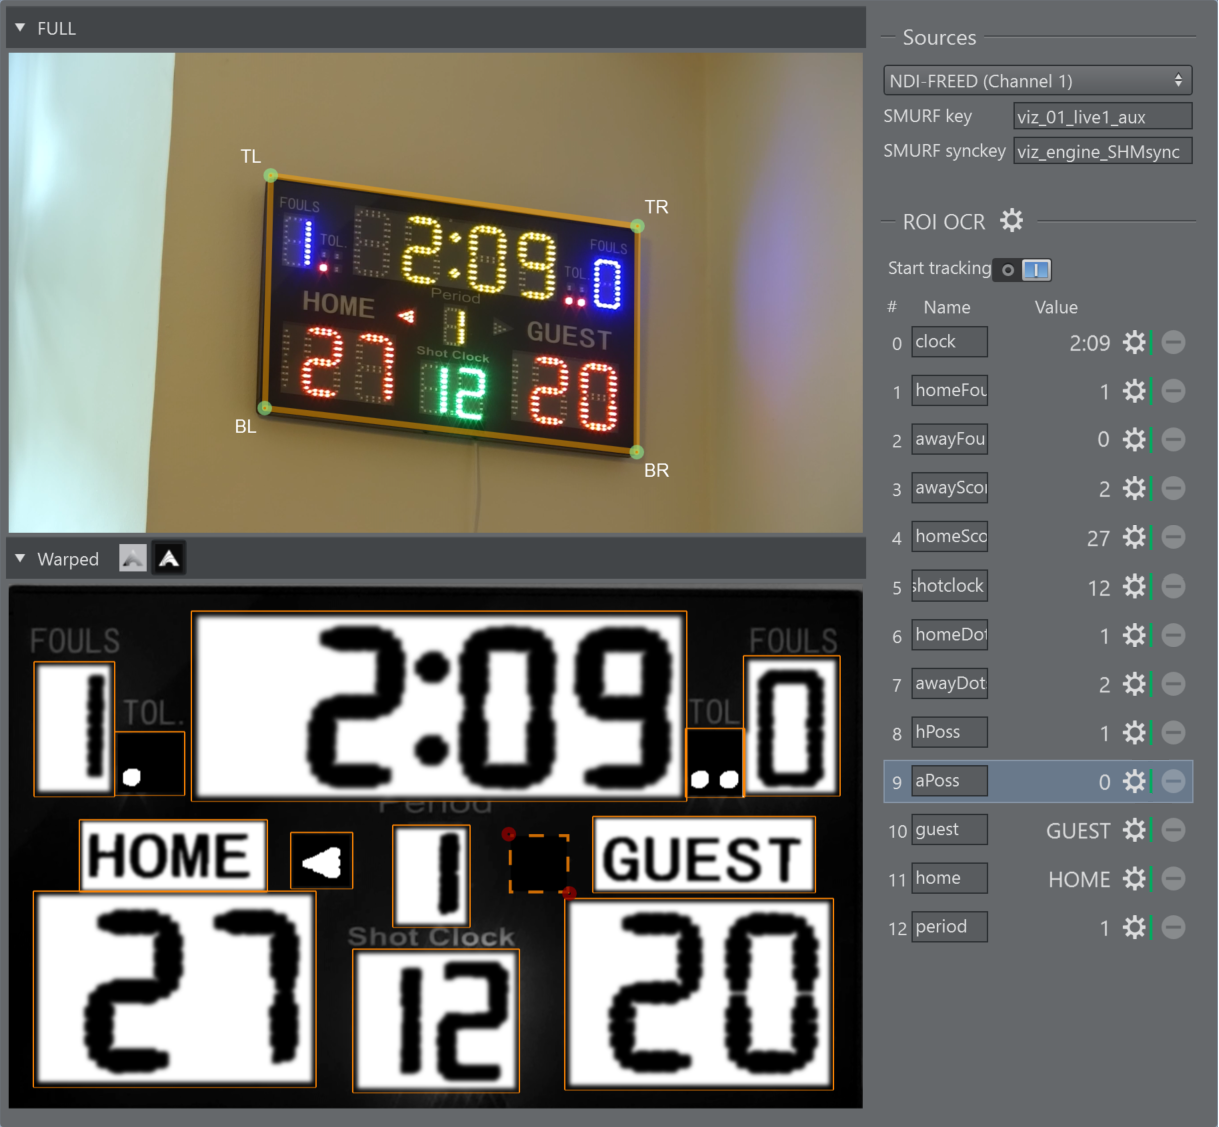
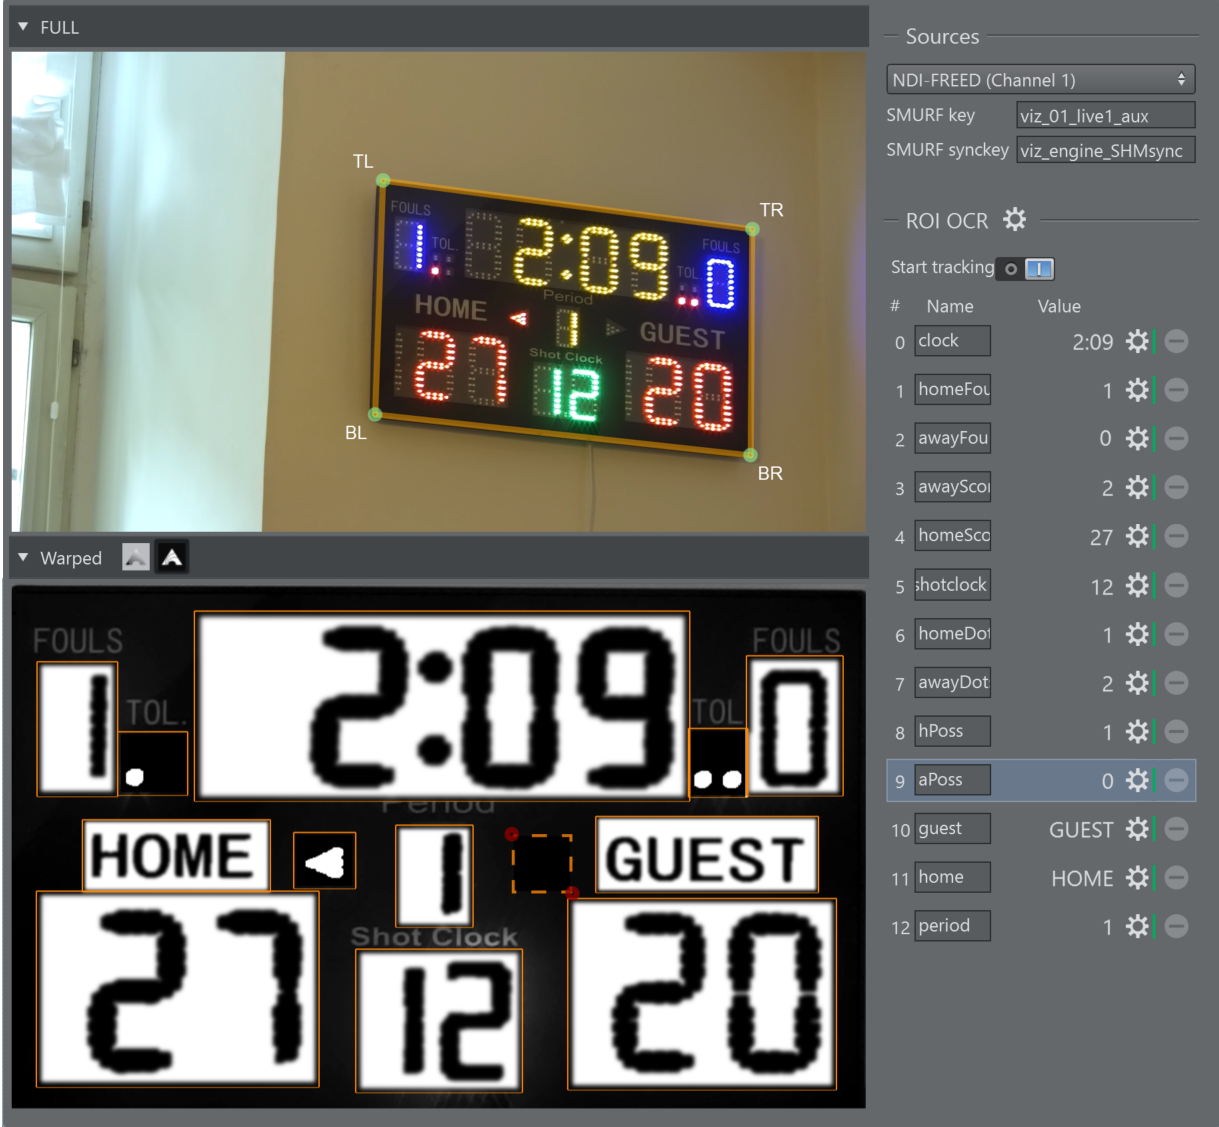
The OCR (Optical Character Recognition) widget enables to recognize any characters or numbers from a video source and store them in the DataMap.
To Add an OCR Widget
Go to the main script (or any template script), right click on the UI editor and select Widgets > OCR.
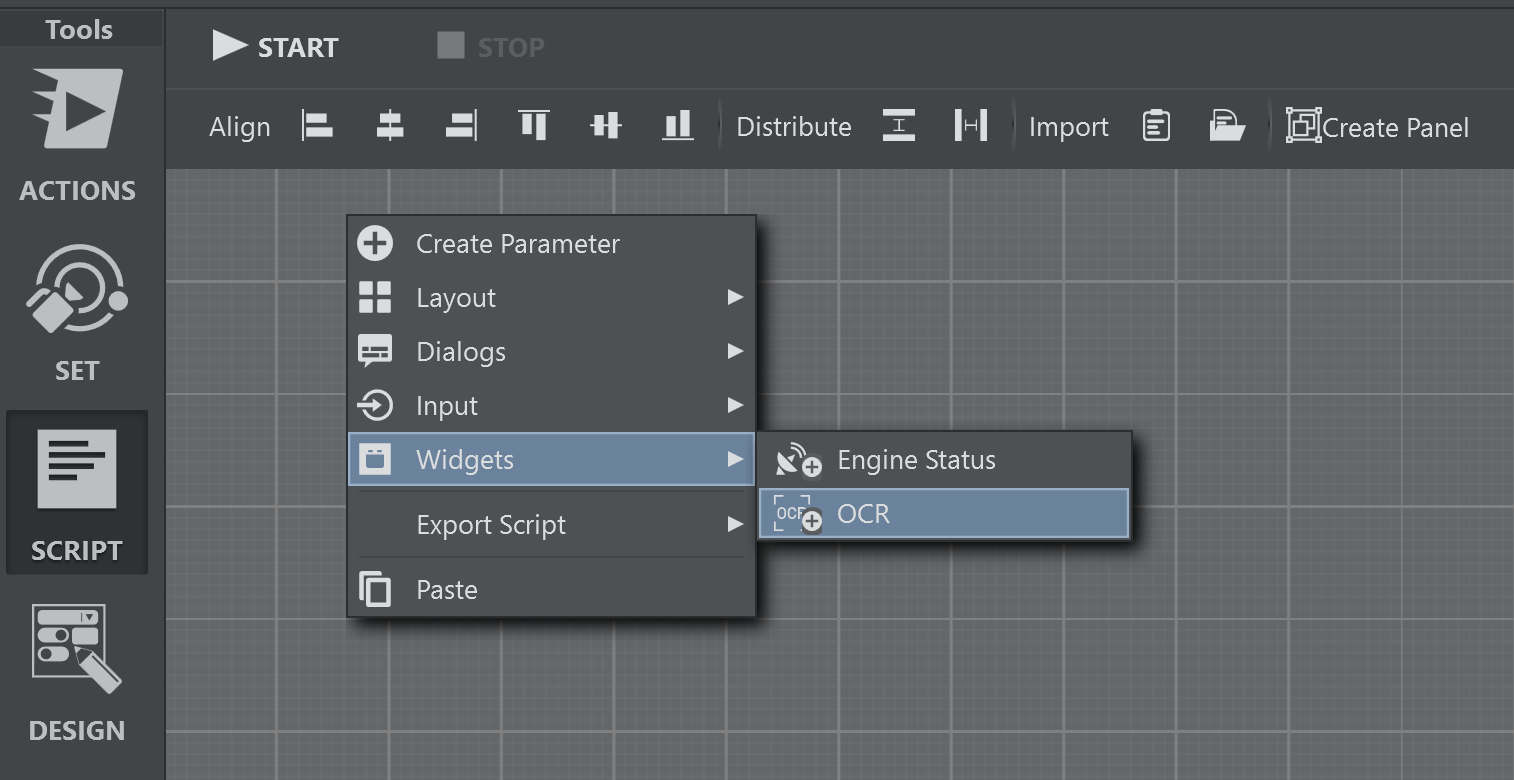
Resize and position the widget. Start the script.
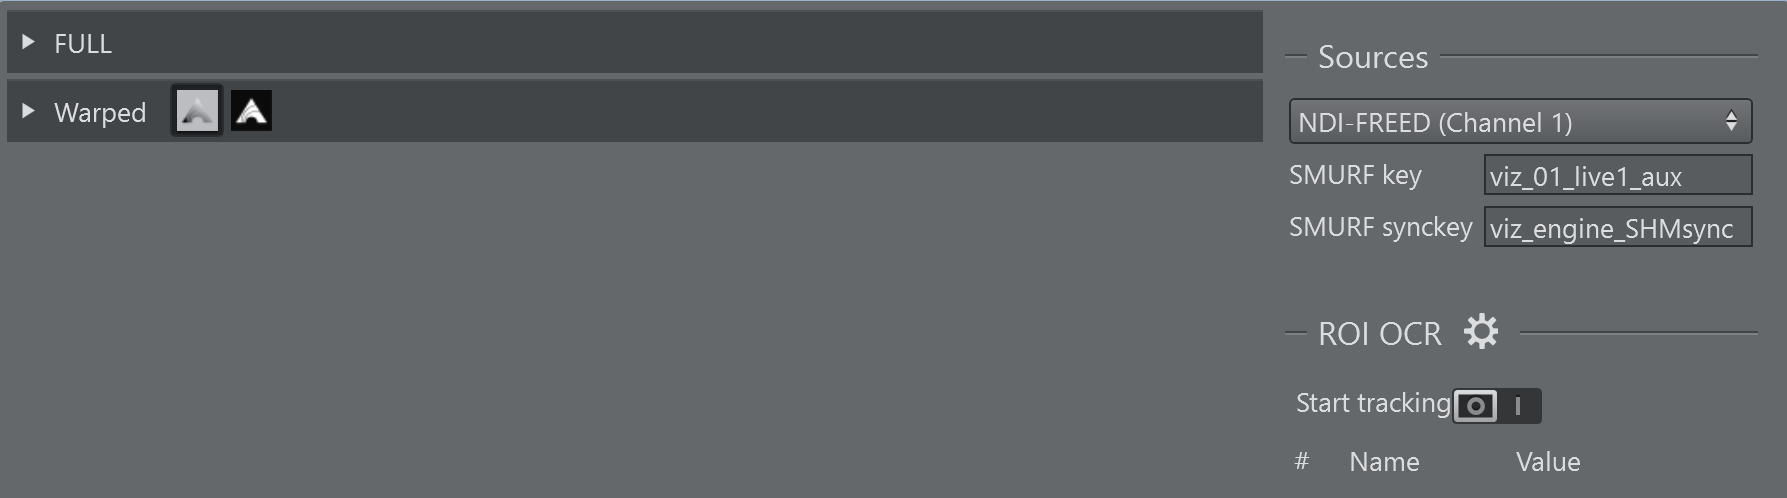
You can add multiple widgets.
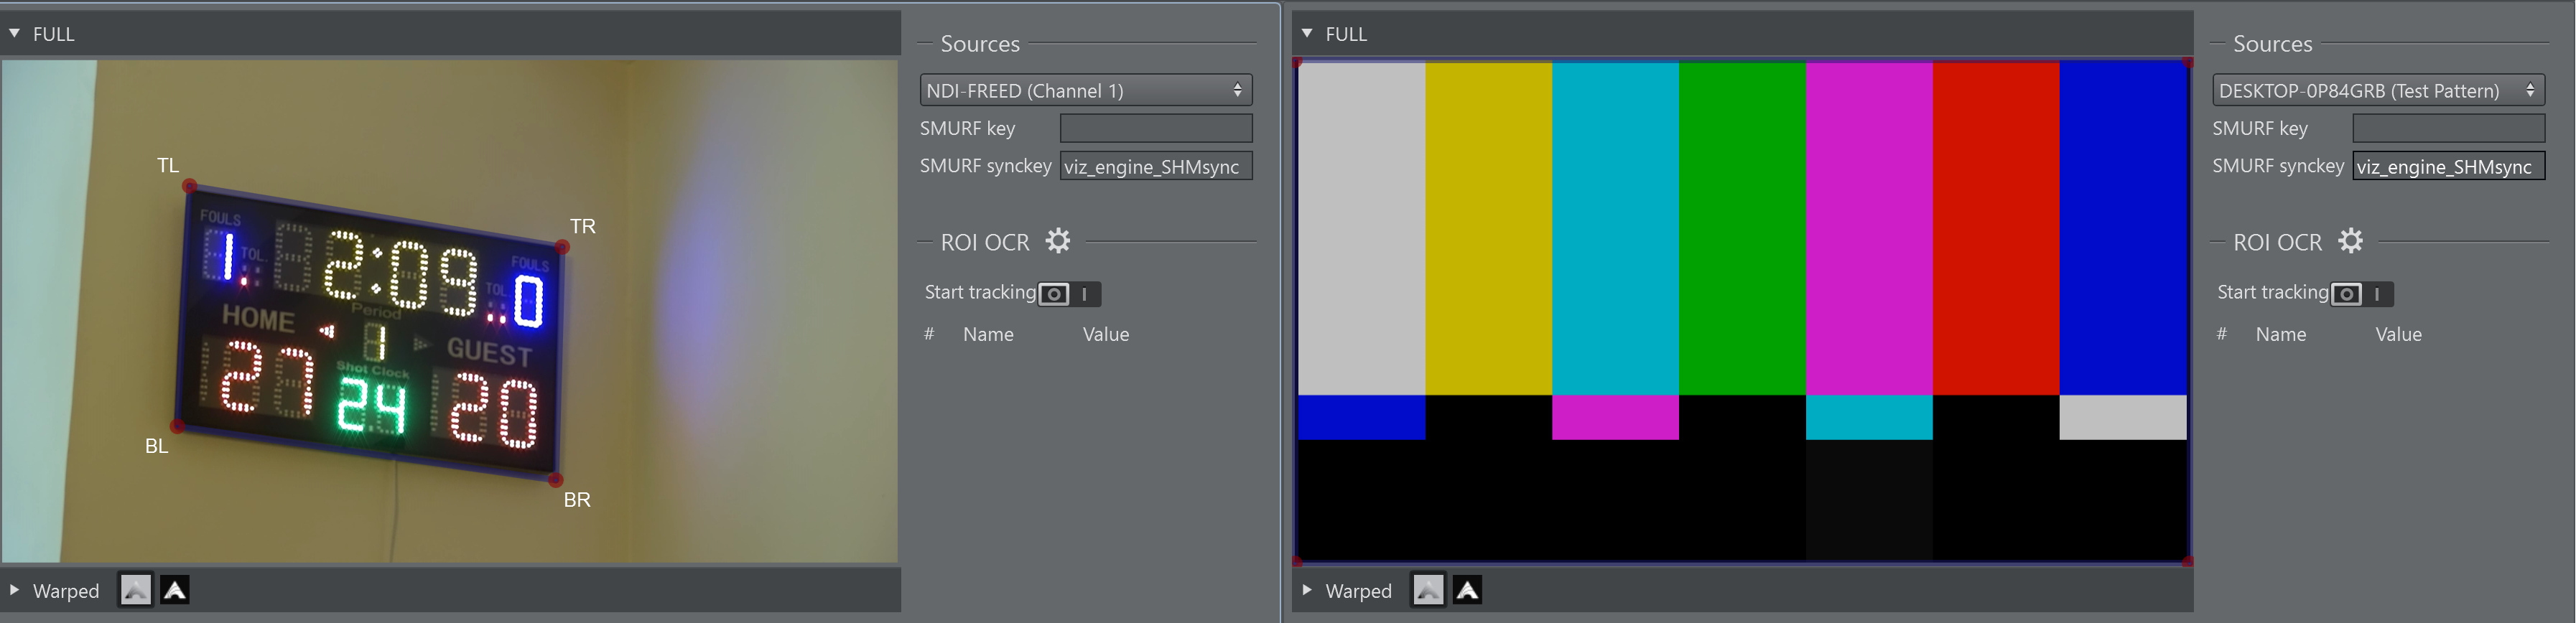
Sources
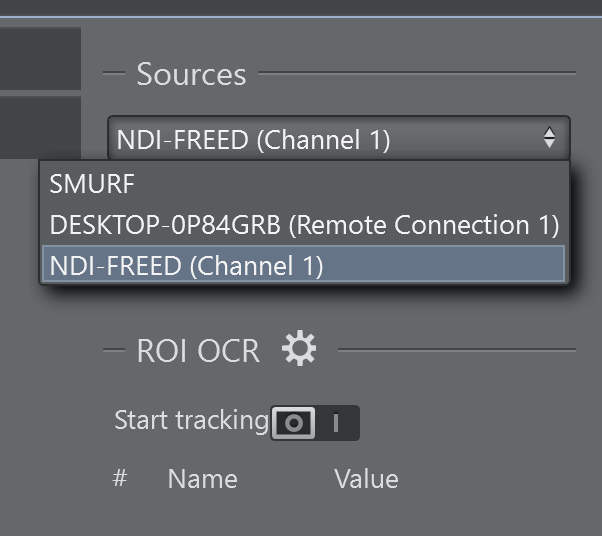
Select a Source in the drop down menu. The widget supports two types of sources:
SMURF: Read from a shared data stream identified by given key. This needs both the key and the sync key to work.
NDI: Each NDI stream found is listed in the drop down.
Warp
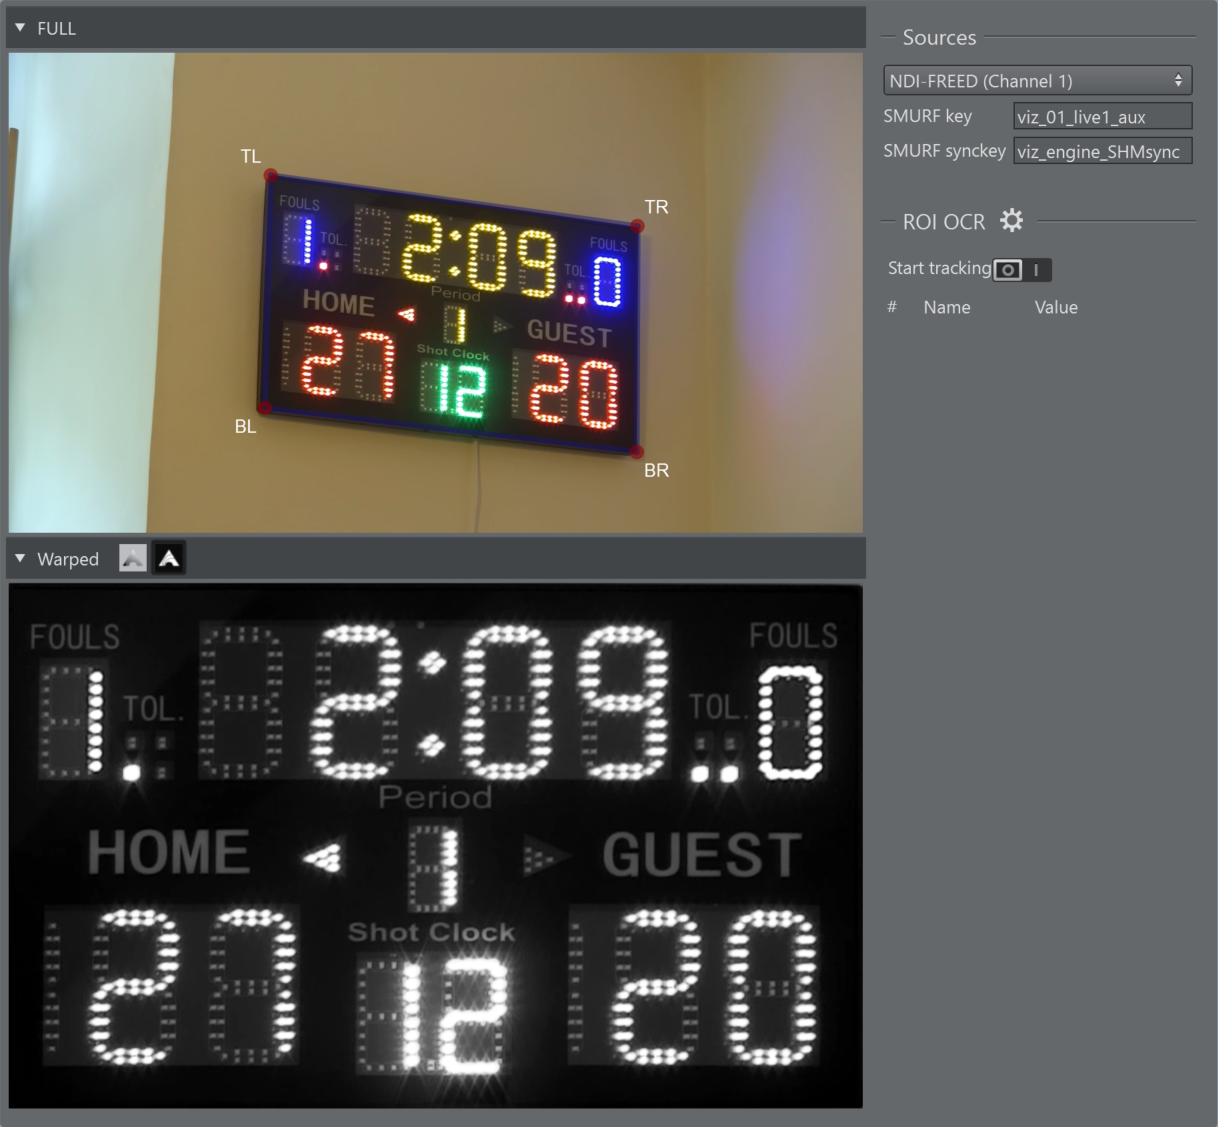
Herdly the camera is not perpendicular to the target (ex. scoreboard), so the image needs to be warped. This step helps the OCR algorithm and improves the results.
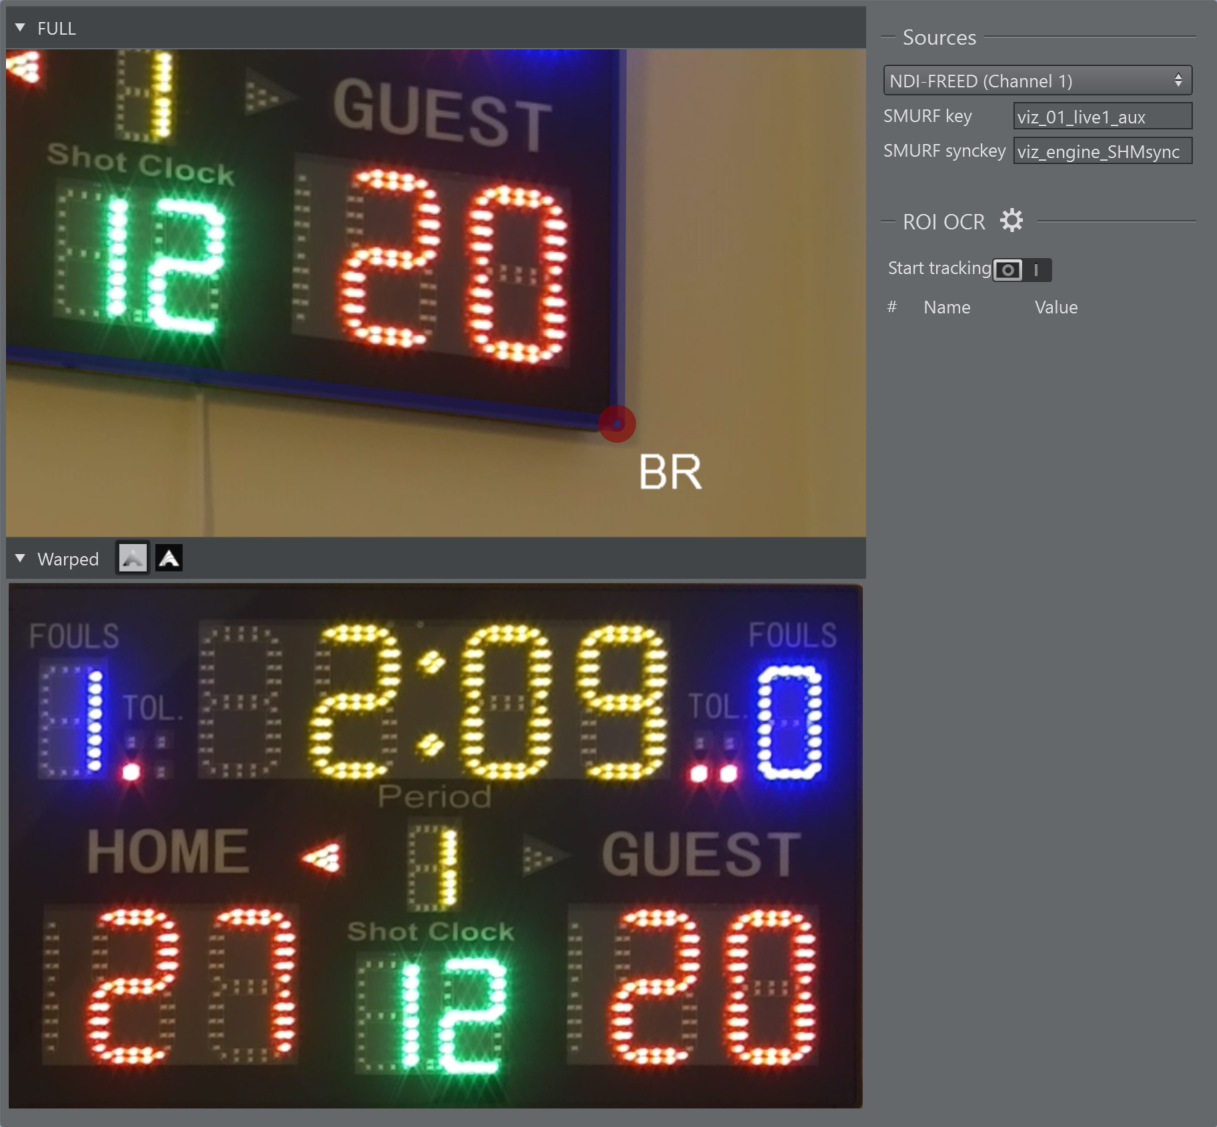
Wrap the quad around the target grabbing the red circles.
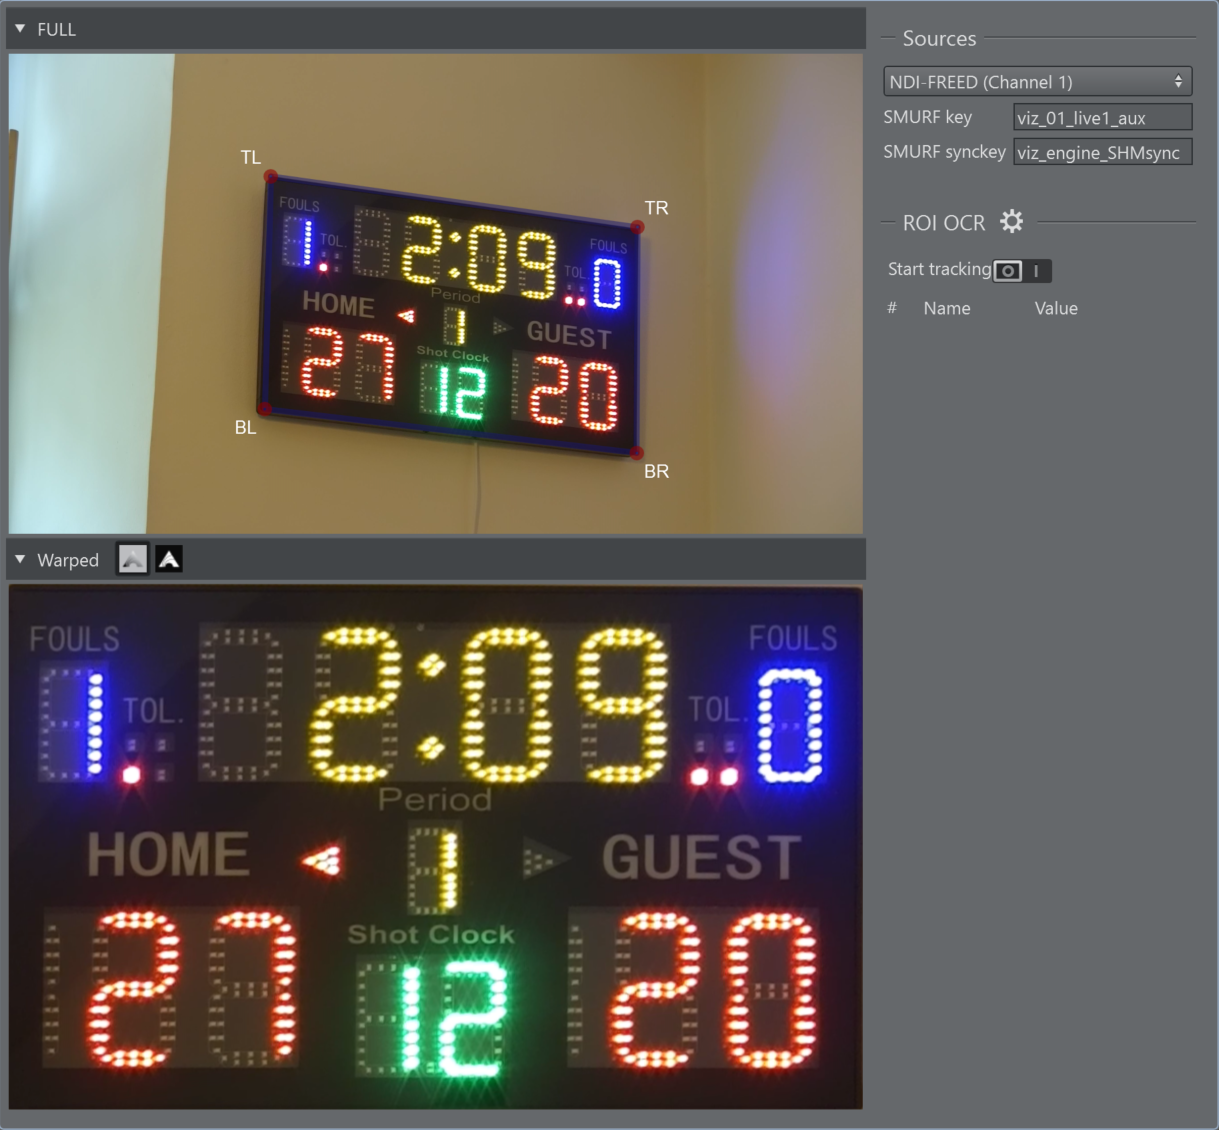
Zoom the image with the mouse wheel, helping to wrap the target more precisely.
Legacy and Dots ROIs are converted internally to a black and white (binarized) image: the ROI is thresholded pixel-by-pixel into pure black/white before recognition, which is what the Binary threshold, Erode and Dilate settings act on. Normal and SevenSegment ROIs instead keep the original color (RGB) image, since the recognition algorithm they use is trained on natural color text and performs worse on a flattened black-and-white image; for these two types, Blur and Suppress are used to clean up the color image instead. Click the Show Key button next to the Warped expander to preview the actual image used for recognition: for Legacy/Dots this is the black-and-white mask itself; for Normal/SevenSegment it shows a grayscale rendition of the ROI, which turns into a highlighted binary mask only where Suppress has picked out a dominant channel.
Global Settings
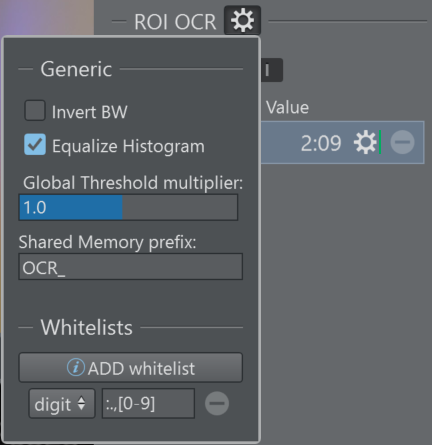
Invert BW: The OCR algorithm works best with black chars on white background, if the result of binarization is inverted you can click on this checkbox to fix it.
Equalize Histogram: Enhances the contrast and helps to be less sensitive to light changes. For Normal and SevenSegment ROIs, this now uses local contrast normalization (CLAHE), which better handles uneven lighting and glare within the frame than the previous global adjustment. Legacy and Dots ROIs are unaffected by this change and still use a global auto brightness/contrast stretch.
Global Threshold multiplier: If there is a light change that leads the algorithm to mixed results, it is possible to use this slider to change all the threshold values of the OCR Rois.
Shared Memory prefix: This string is prepend to the OCR Roi name and the result is used as a key in the share memory datamap.
Whitelists: It is possible to suggest the allowed chars to improve the results, it doesn't support regular expressions but has some keywords:
[a-z] all lowercase letters.
[A-Z] all uppercase letters.
[0-9] all digits.
[a-zA-Z] all letters.
[a-zA-Z0-9] all letters and digits.
ROI (Region Of Interest)
Add a New ROI OCR
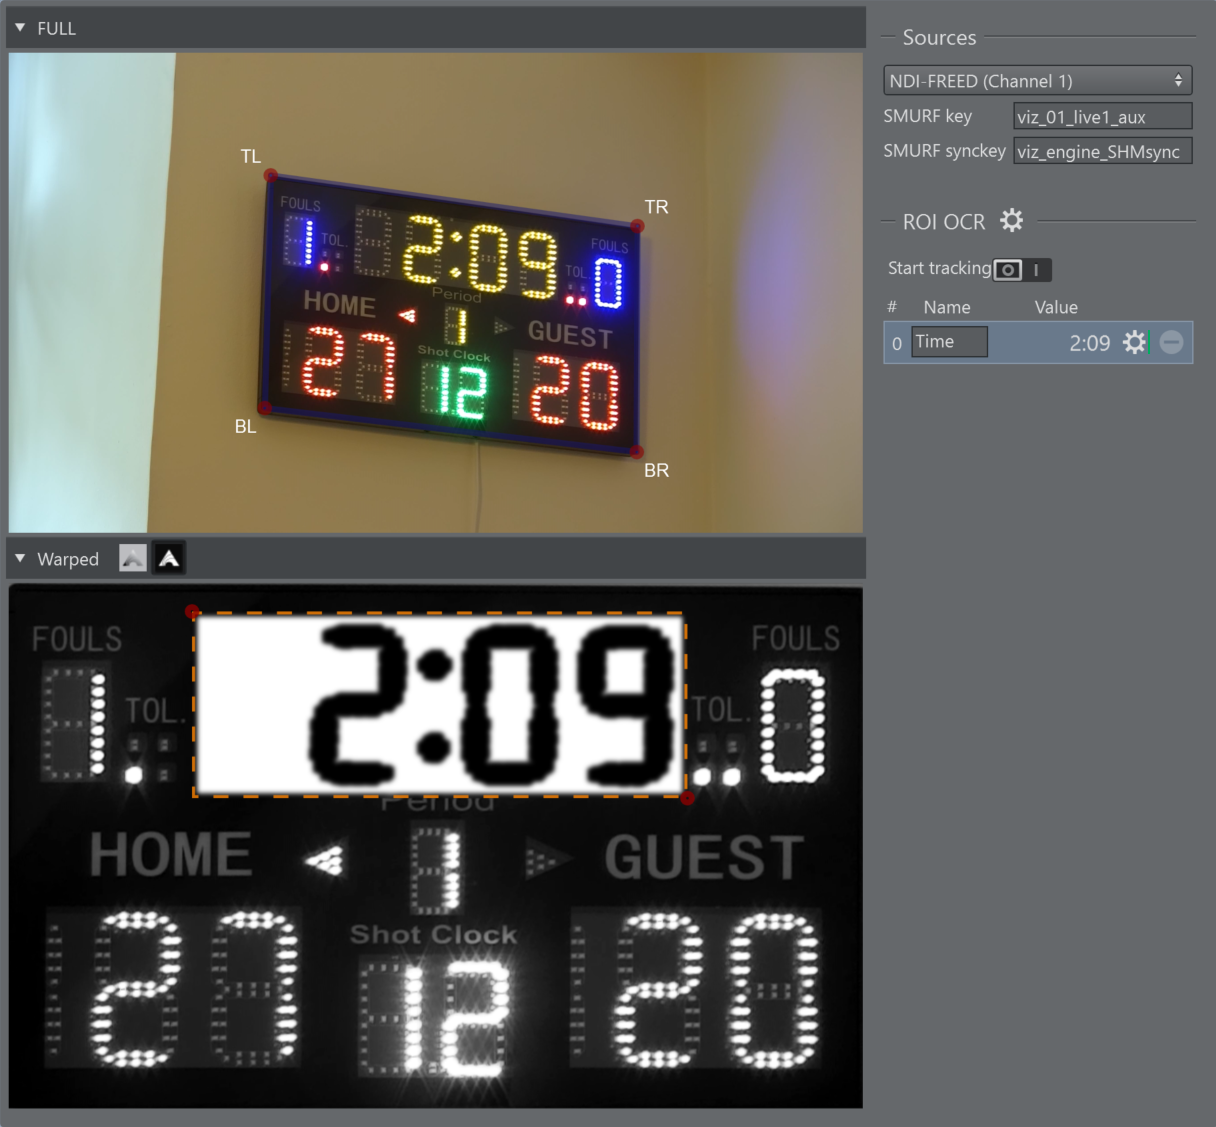
Click and drag the left mouse button in the Warped View to begin drawing the rectangle from its first corner.
While holding the left mouse button, drag to the required size.
Releasing the left mouse button.
It is possible to adjust the size of the ROI by grabbing the top left corner or the bottom right.
Properties
ID: The ID is used as part of the DataMap key if the name field is empty.
Name: Second part of the DataMap key (the first is the prefix see Config paragraph above).
Value: Result of the OCR algorithm that is sent to the DataMap.
Settings Button: See below.
Confidence Indicator: A vertical color bar next to the Settings button shows the confidence level of the ROI's last OCR result: Green between 1.0 and 0.7, orange between 0.7 and 0.4, red between 0.4 and 0.0. No bar is shown if there is no result yet.
Remove Button: To remove the ROI.
ROI Settings
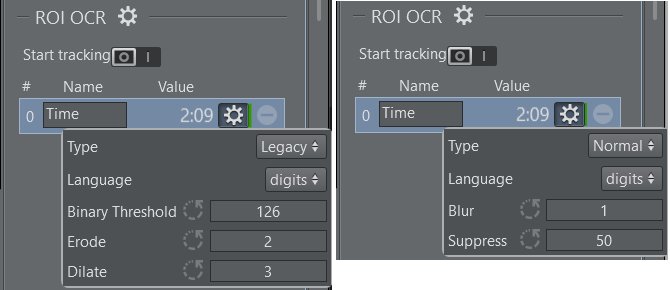
Type:
Normal: General-purpose OCR, for printed or on-screen text and digits.
SevenSegment: Same recognition engine as Normal, with corrections tailored to seven-segment/LED digit displays (scoreboards, clocks, etc). It automatically fixes the digit pairs most often confused on this kind of display (9<->4 and 7<->1) and automatically detects decimal points, with no extra configuration needed. Prefer this type over Normal whenever the ROI is a seven-segment style numeric display.
Legacy: The original OCR engine (previously labelled "Simple"). Kept for compatibility with existing setups; Normal and SevenSegment generally give better results.
Dots: Doesn't run OCR. It counts the distinct lit dots/blobs in the ROI (for example, indicator lights) and returns the count.
Language: Language selection to improve the results (even better if used in conjunction with the whitelist)
For Legacy and Dots types:
Binary threshold: The OCR algorithm works on black and white images, therefore a threshold must be applied. In the Warped option, if you click on the ShowKey button you'll see a grayscale image where the pixel value range is between 0 and 255, so every pixel below the threshold is white or black if above.
Erode: The bright areas of the image get thinner, whereas the dark zones get bigger.
Dilate: The dark areas of the image get thinner, whereas the bright zones get bigger.
For Normal and SevenSegment types:
Blur: Smooths the ROI image before recognition, reducing noise (sensor grain, compression artifacts) that could otherwise be mistaken for character detail.
Suppress: Sets how bright a pixel must be, relative to the ROI's own brightness range, to be kept as "lit" text/digits. Higher values keep only the brightest peaks. Useful for isolating a bright display (for example, LED digits) from a dimmer background.
Example
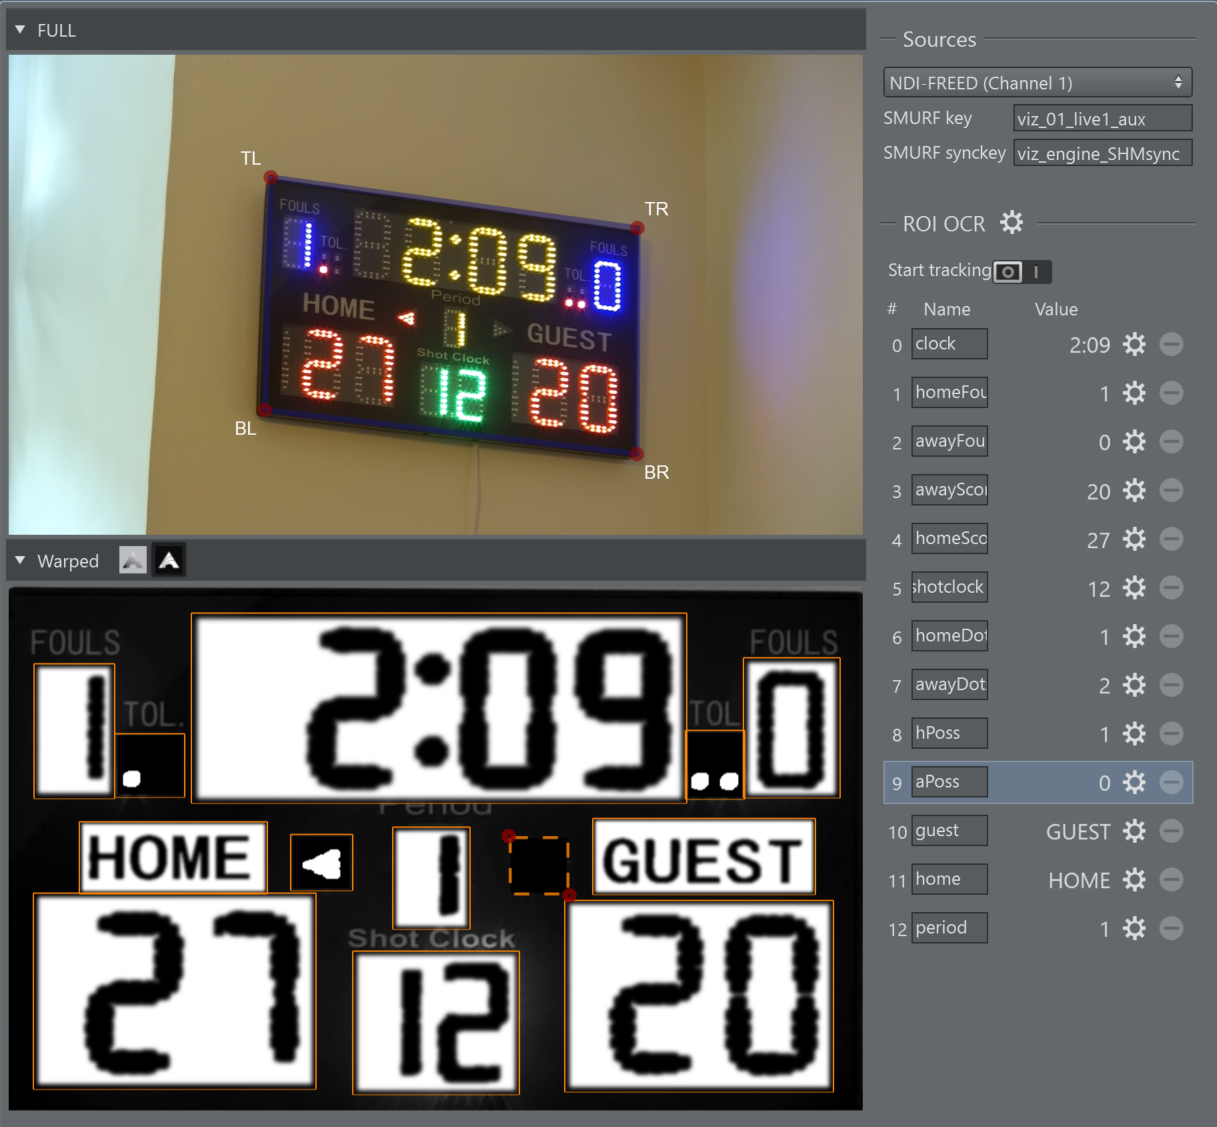
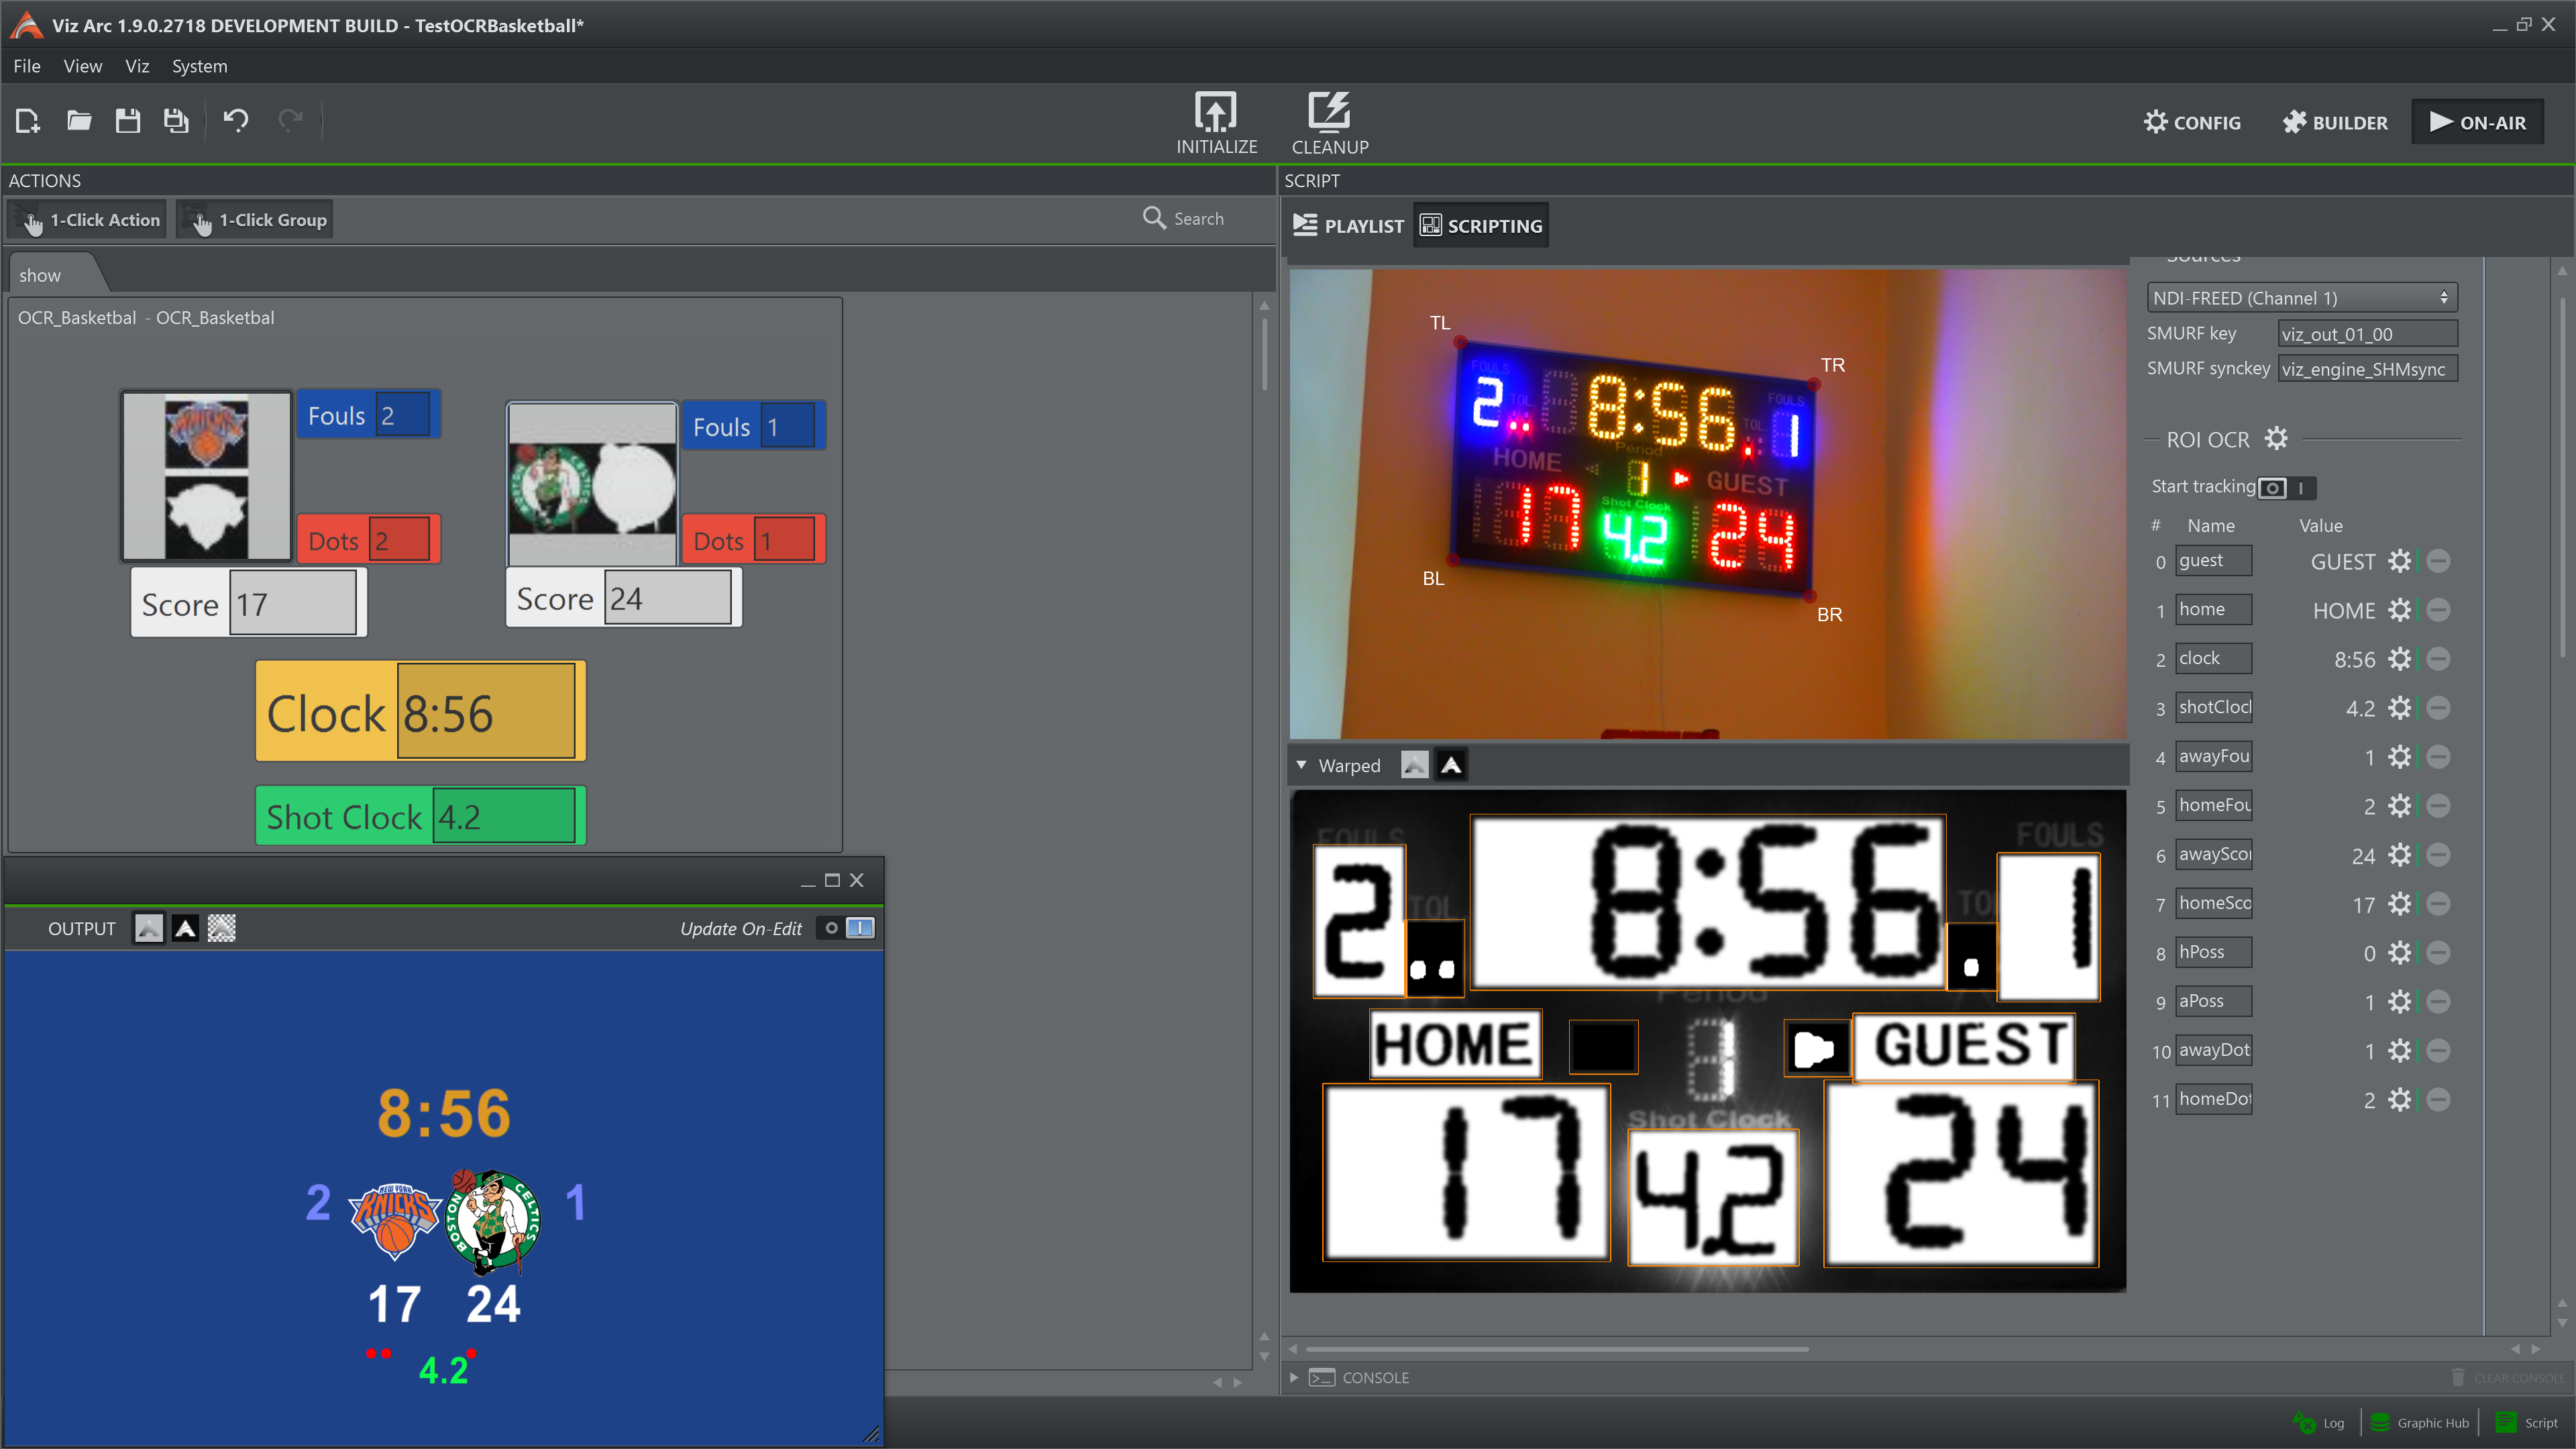
This is how a fully configured widget appears. In the following image all the ROIs are of the type ‘Legacy’.
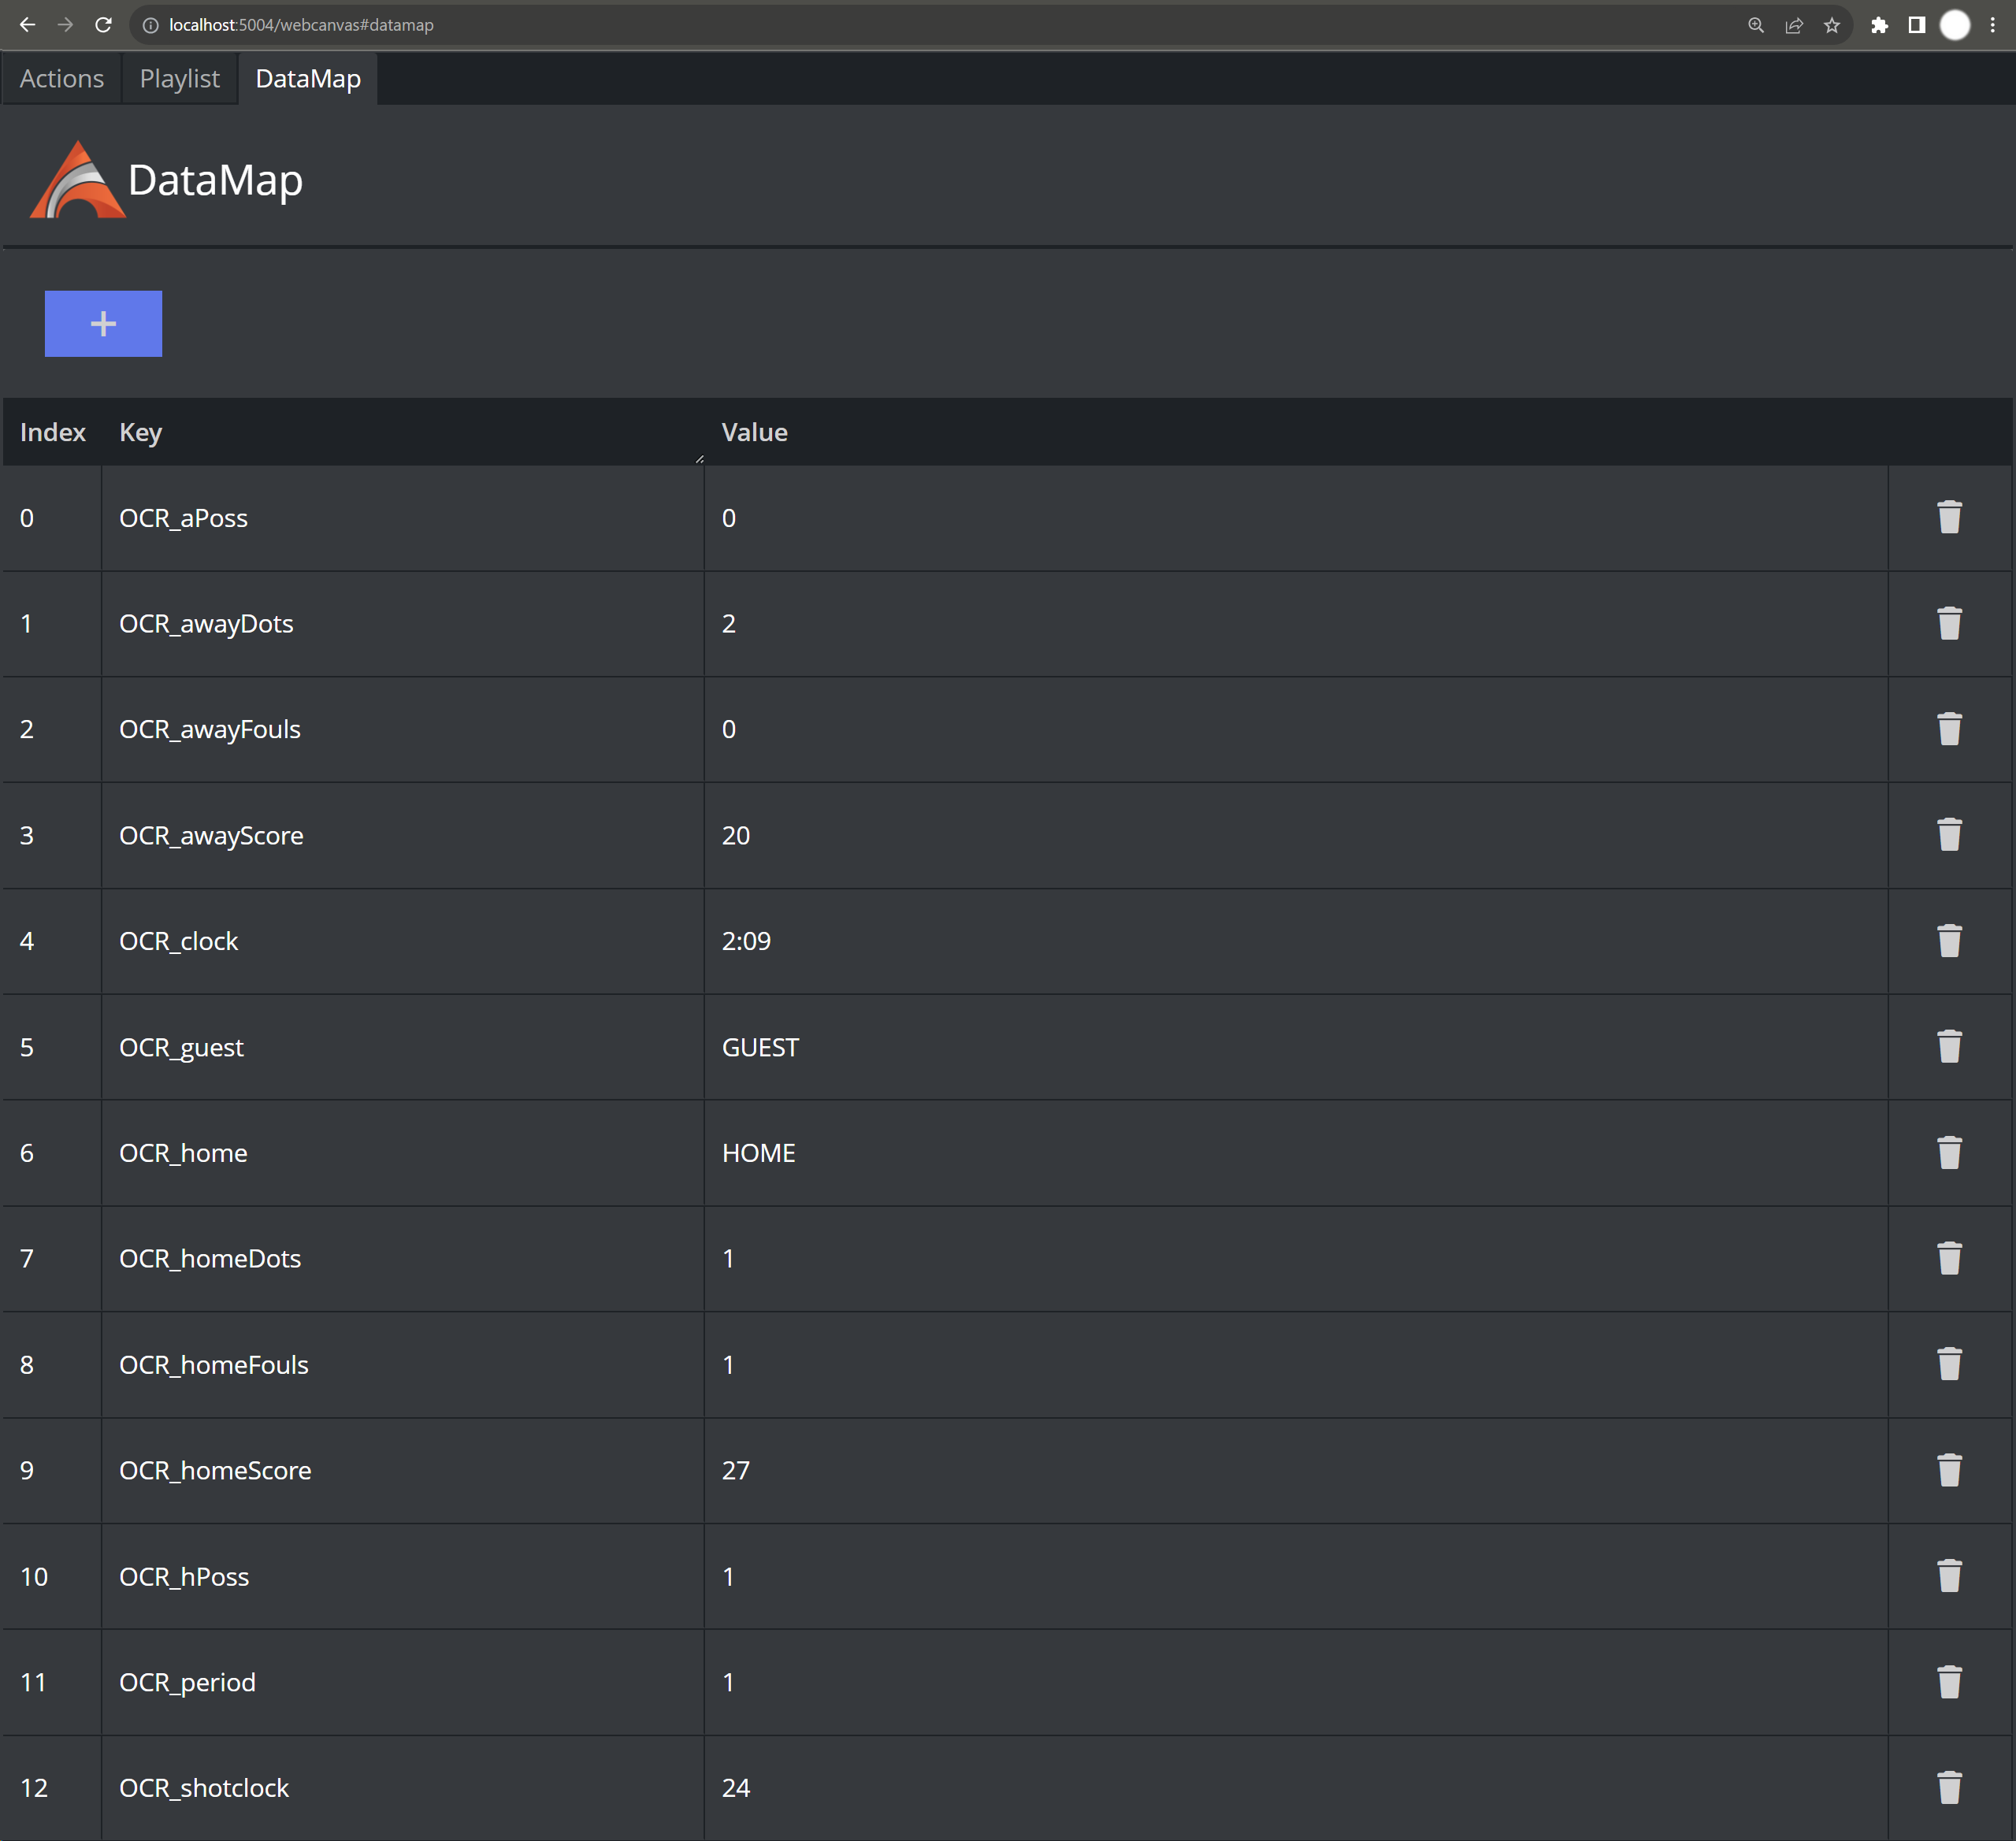
This is the relative DataMap:
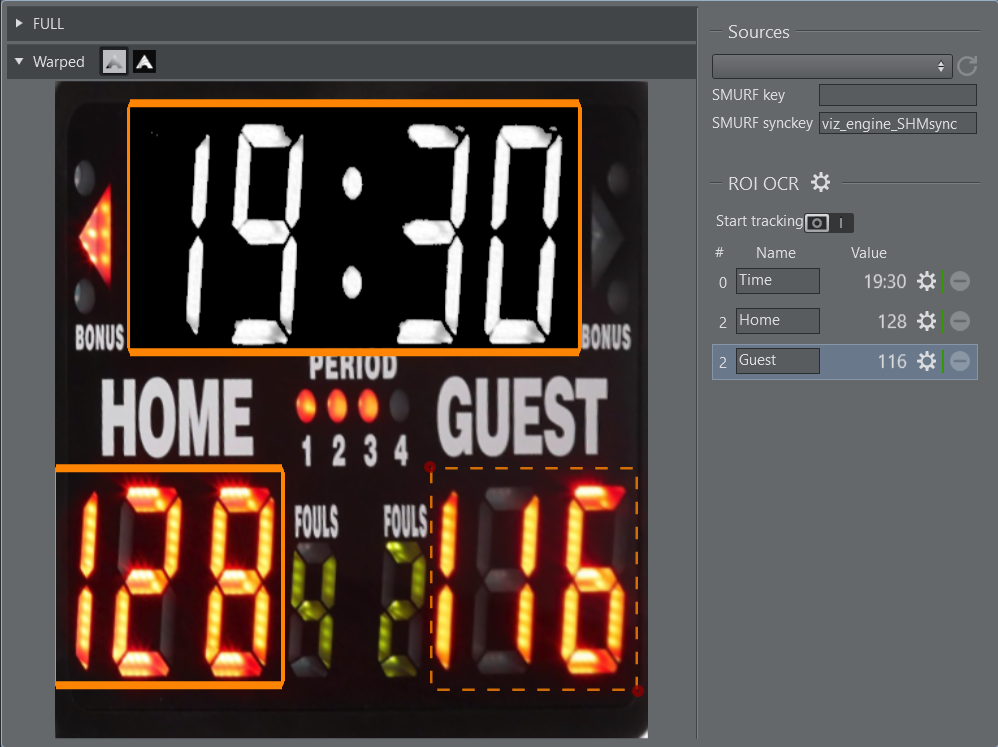
Here is an example with ‘Normal’ ROIs. The Time ROI has a Suppress value greater than 0, so its dominant channel has been chosen and highlighted; the other two ROIs are shown as captured, without the dominant-channel highlighting.
Templates and DataMap
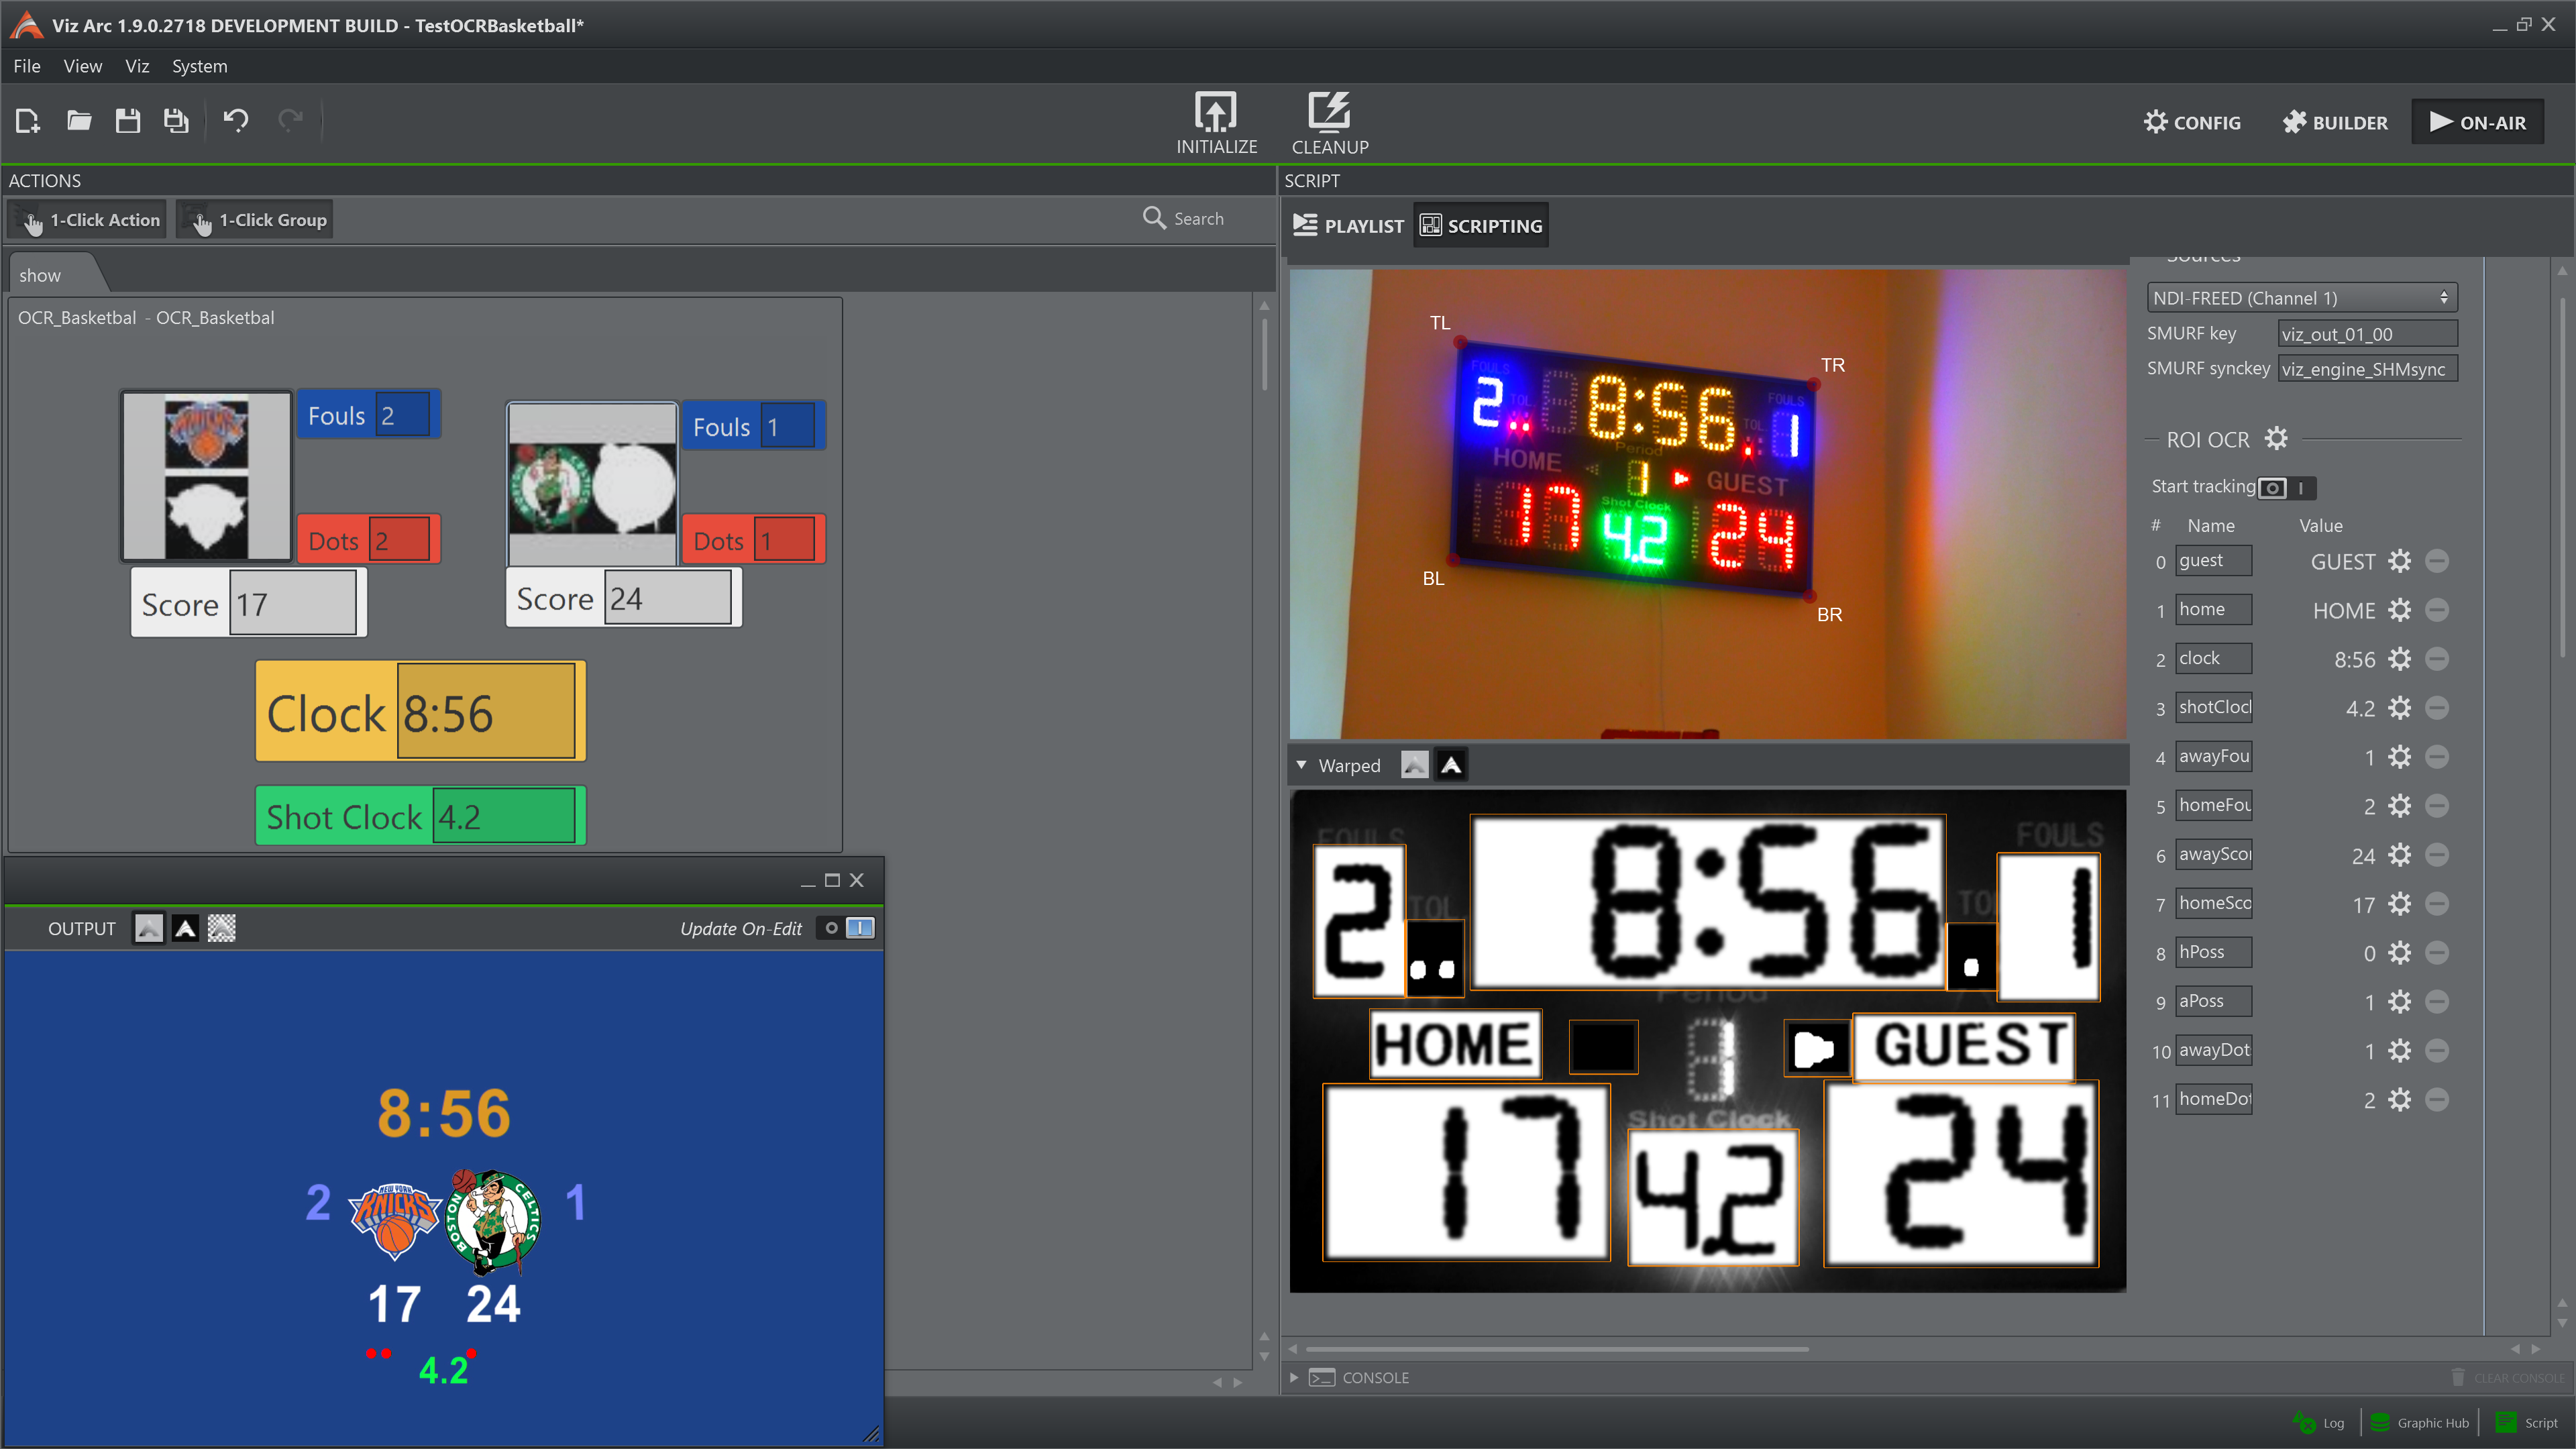
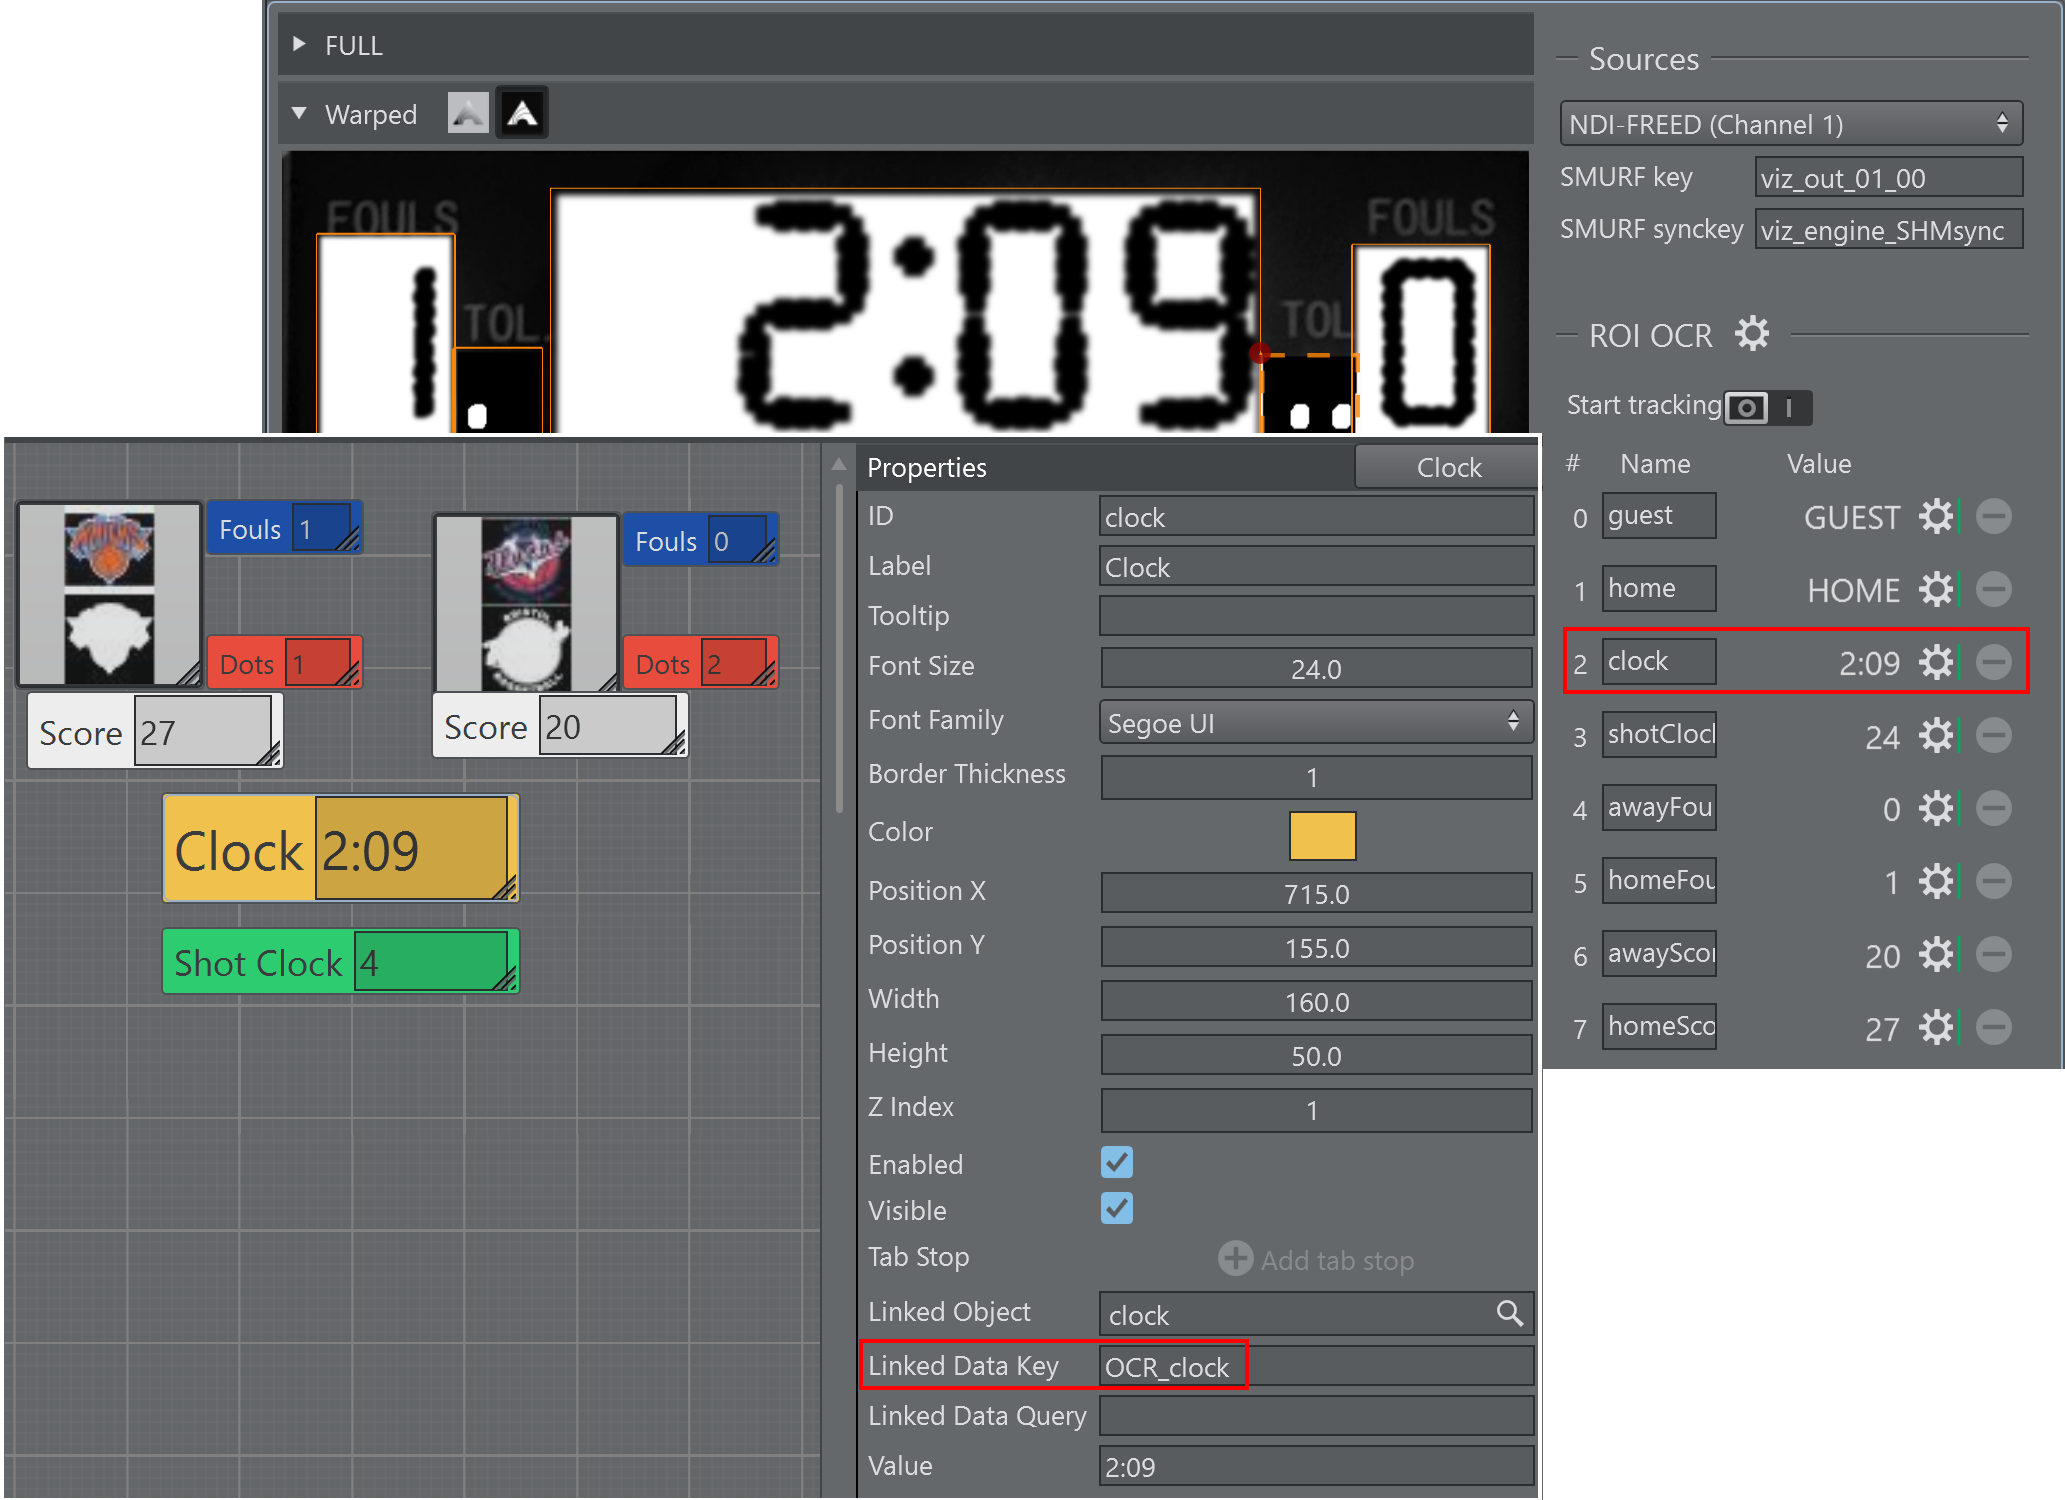
Thanks to the DataMap it is possible to link the results of the OCR to any template object as show below:
This an example on how to link a template object to an ROI result:
Tracking
When the tracking is enabled, the algorithm tries to follow the target. Even if the camera moves, it continues to operate without the intervention of the user.
The quad changes color to confirm the tracking has started. While tracking is not possible to move/grab the control corners.