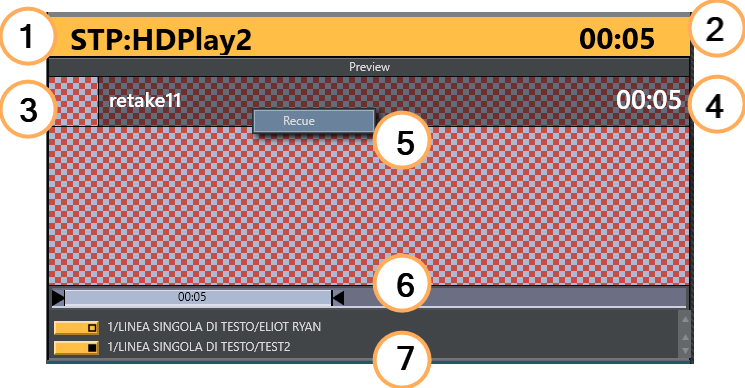
This window displays information about the next story element.
Appearance of the Preview Window
Cued Playout Port/Graphics Engine
(1) The alias of the port which the next clip will play out from is shown in the top left hand corner of the preview window.
This area is also used to display which full-screen graphics engine are used next.
Timing Information
(2) The duration of the item currently in preview is shown in the top right hand corner of the Preview window.
(4) The clip duration of the clip currently in preview is shown to the right of the clip’s title (3).
Clip Recue
To recue a Preview clip
(5) By right clicking inside the Preview window, you can recue a server clip.
This is used, for example, to recue and play from the beginning an adlib/float element from its starting point, rather than the point it had previously reached.
Video Clip in/Out Points
(6) In point and out point of a video clip are shown in the Preview window.
To adjust in point/out point for video clip in the Preview window
When the video server supports it, the operator can select a new in point and out point for video clip in the Preview window.
Drag the left and right markers to the desired points.
Dragging the in point marker causes corresponding scrubbing on the server, for a visual preview of the new in point.
Lower Thirds
(7) Any previewed lower third graphic appears in a list at the bottom of the Preview window until it goes On Air.
Key Select
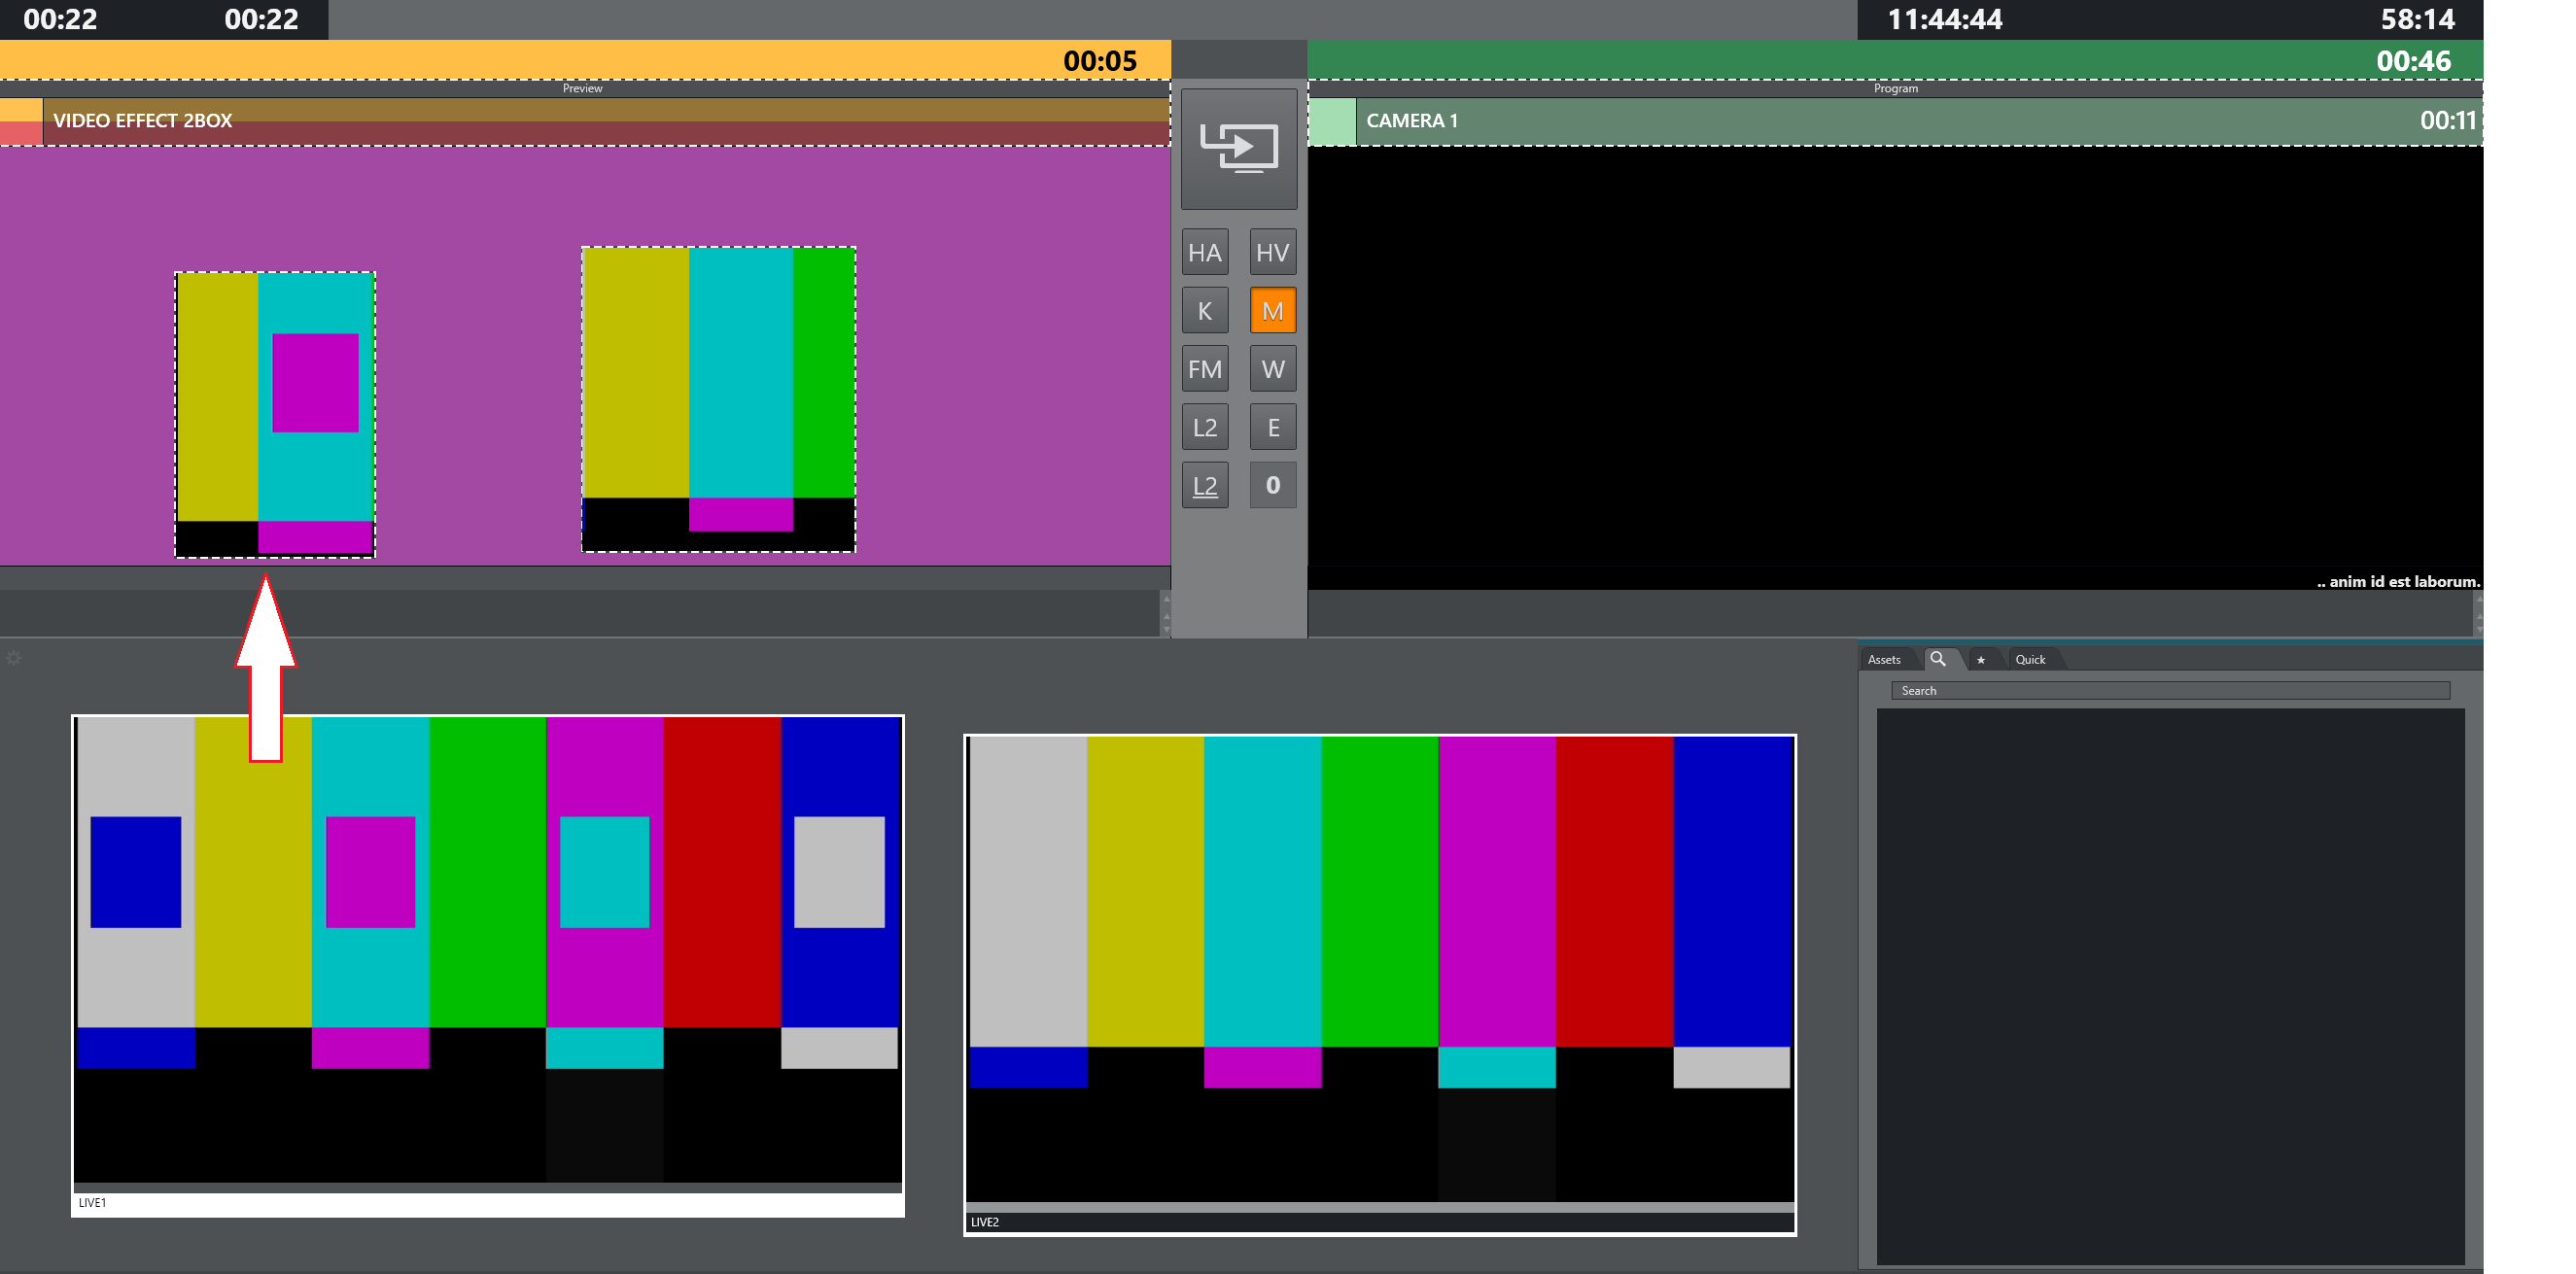
Key Select in Preview works as in Program (see Key Select under section Program Window) but sends content to the Preview channel.
The illustration below shows the side-by side option, used if the width of the Program/Preview control is set wide enough.
Working with Preview Window Settings
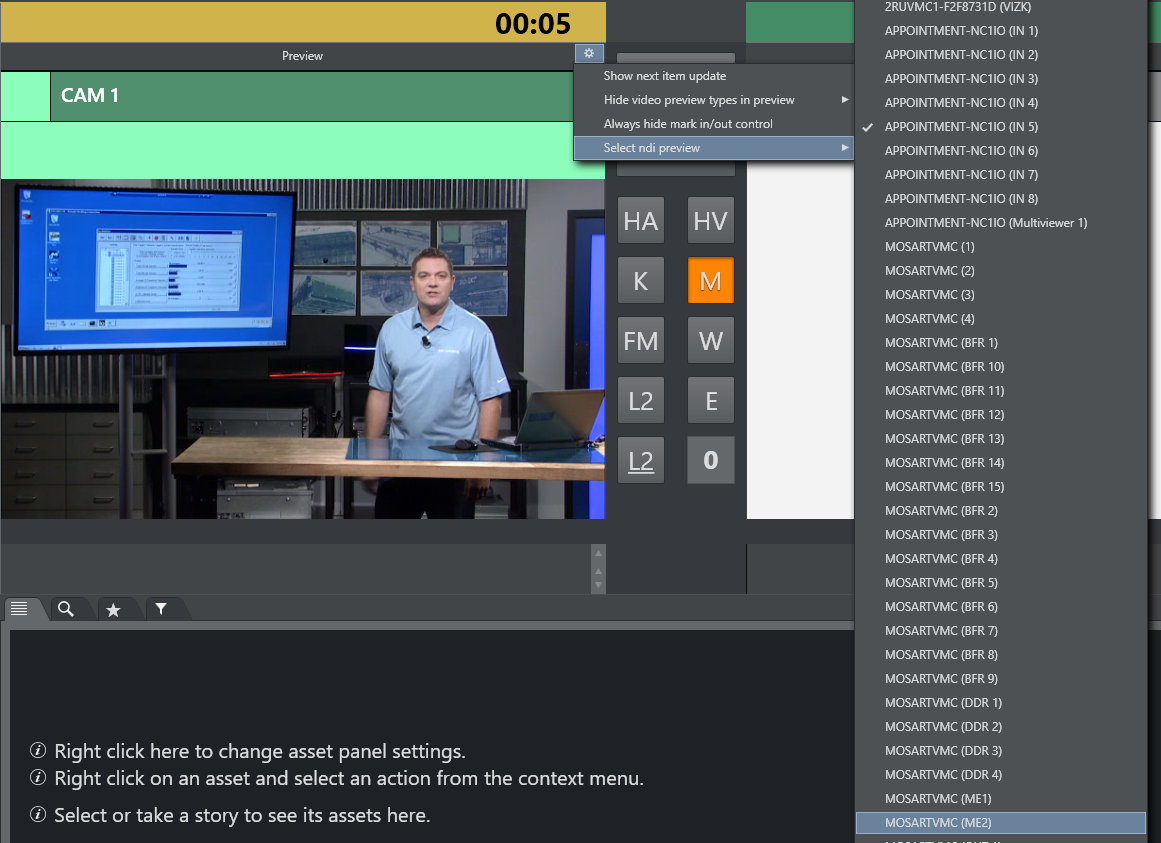
Manage Viz Mosart’s Preview window from the Settings menu, by clicking the Setting icon (cog wheel) at the far right of the Preview pane.
These settings are identical to General settings > User Interface > Preview/Program Window > Preview and changes made in either menu system, mirror each other.
Below is a short description, followed by procedures for specific user actions.
Show next item update: Warn when item in Preview has been updated from the NRCS.
See NRCS Updates below.
Hide video preview types in preview: A selectable list of template types that should not display the preview video.
See Managing Video Preview Types in Preview below.Always hide mark in/out control: When selected, the mark in/mark out selector, normally displayed when a clip is in preview, will NOT appear.
Select ndi preview: If any NDI sources are available on the network it is possible to choose one of the sources from this menu.
The source will be set as the preview video source in General settings.
Note: This NDI selection is not available in General settings
NRCS Updates
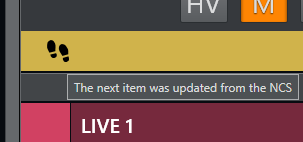
To warn when Preview story has been updated from the NRCS
Select Show next item update.
A a warning (as a pair of footprints) displays in the Preview window whenever the story in preview is updated from the NRCS
Hide video preview types in preview: A selectable list of template types that should not display the preview video.
See Managing Video Preview Types in Preview below.Always hide mark in/out control: When selected, the mark in/mark out selector, normally displayed when a clip is in preview, will NOT appear.
Select ndi preview: If any NDI sources are available on the network it is possible to choose one of the sources from this menu.
The source will be set as the preview video source in General settings.
Managing Video Preview Types in Preview
To hide video preview for a template type
You can prevent a video preview (or NDI stream) from appearing in Preview, based on template type.
In the Preview pane, select the Settings icon (cog wheel).
Choose Hide video preview types in preview.
Check-mark the template types where you do not want NDI preview.
NDI® Preview
You can populate the Preview window with any connected NDI source that is intended for program output.
To define an NDI Stream in Preview
In the Preview pane, select the Settings icon (cog wheel).
Choose Select ndi preview and the required NDI stream (the program output) from list of devices.
Note: If an NDI workflow is not in use, you can add a hardware converter device (for example, SDI => NDI) that will add the preview output as an NDI signal on the network.
The stream then becomes available in the NDI preview drop-down list, as shown above.


