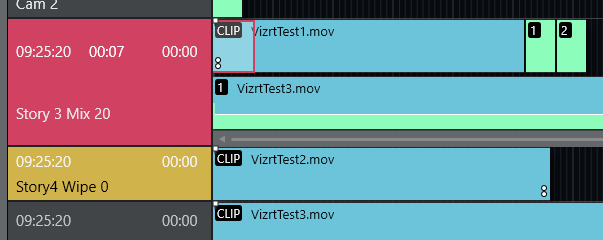
You can loop a part of the rundown, by setting a loop start and a loop end point in the rundown. The loop start and end are marked with 2 vertical white dots (see image below).
Working with Rundown Loops
Defining the Scope of the Loop
To set a loop start point
You can either:
Set the loop in by right-clicking on any item in the story from where you want to start loop and select Loop > Start.
Use a STORY_ACTION LOOP_START control command to set the Loop Start item as the first item in the selected story.
To set the loop end point
You can either
Set the loop out by right-clicking on any story item that you want to end the looping and selecting Loop > End.
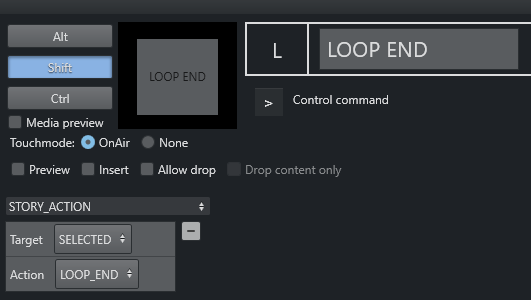
Use a STORY_ACTION LOOP_END control command to set the Loop End item as the last looped item in the selected story.
Auto-take Mode
When entering the first item in a loop, Viz Mosart goes into auto-take next mode.
To exit auto-take mode
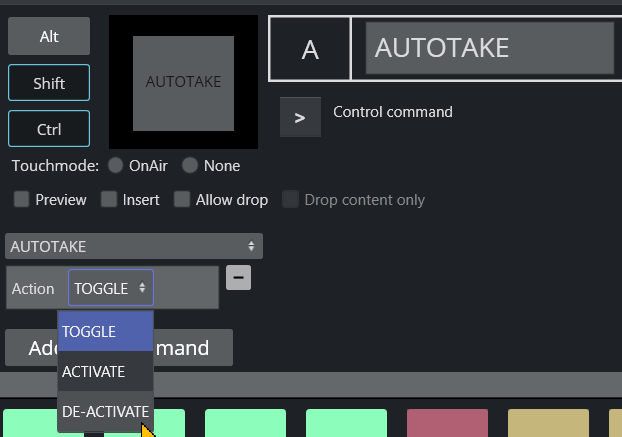
Use the control command AUTOTAKE.
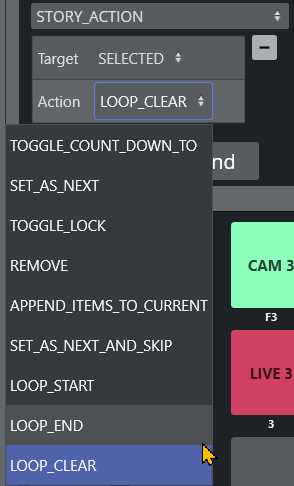
The screenshot below shows that either TOGGLE or DE-ACTIVATE will exit auto-take mode.The command sequence STORY_ACTION > LOOP_CLEAR will also end the autotake.
Moving a Loop
To remove an end loop point
Left-click the loop point and select Loop > End to remove it.
Autotake continues while you are moving the point.Left-click the new position and choose Loop > End (or use a shortcut as described above).
The same procedure can be done for Loop > Start.
If the Loop > End point has been reached without a valid Loop Start point above it in the rundown, the next item is set to the first story in the rundown.
Stopping the Loop
To clear the loop
Left-click and select Loop > Clear.
This stops the auto-take. Removing both Loop Start and Loop End continues the auto-take.


