Viz Arc User Guide
Version 1.9 | Published October 31, 2023 ©
Loupedeck
Getting Started
Start Viz Arc and then either select an existing Viz Arc project or create some chroma or transformation actions. It is sufficient to select any of those actions to modify its content. You can also edit the action and see the values changing when changed through the LoupeDeck device.
Precision Keyer
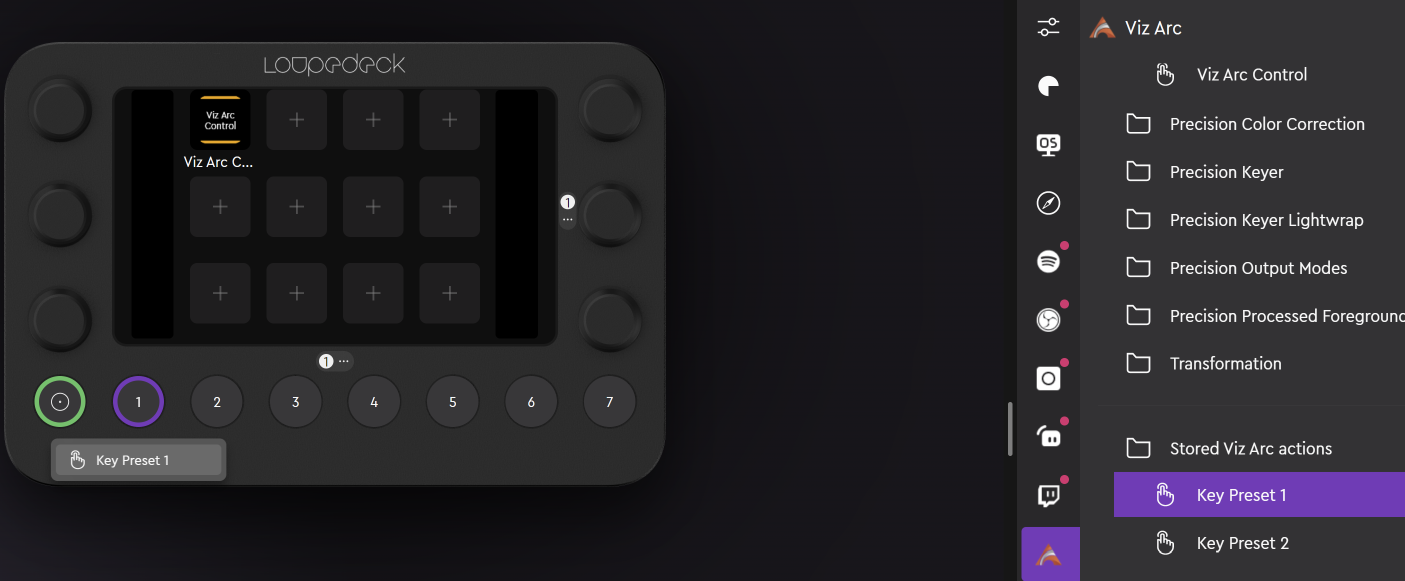
On the LoupeDeck device touch the Viz Arc Control button and in case a chroma action has been selected, the device shows with the first page of the chroma settings.
From here the Hue, Saturation, Opacity and Transparency can be changed using the dial buttons. The buttons on the top row change Viz Engine's preview output mode.
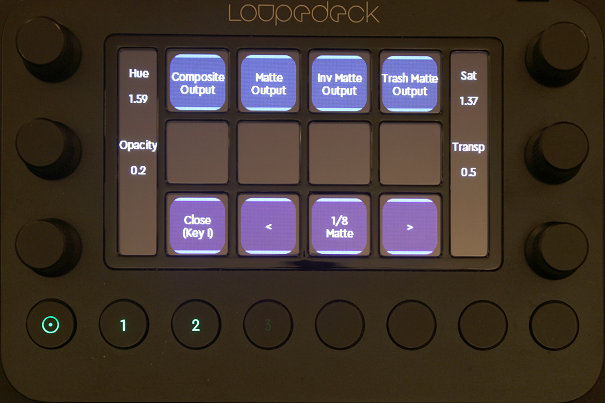
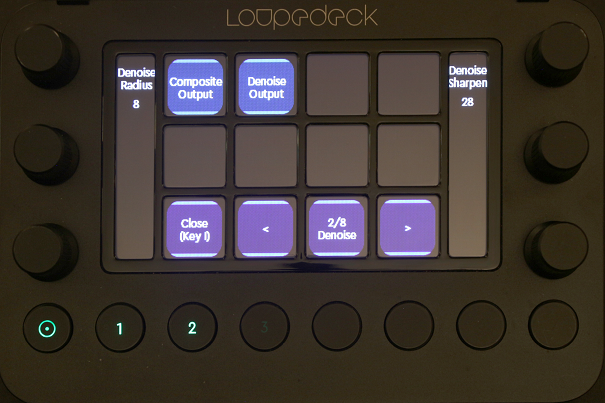
Touch the right arrow to get to page two where settings related to the denoise can be set.
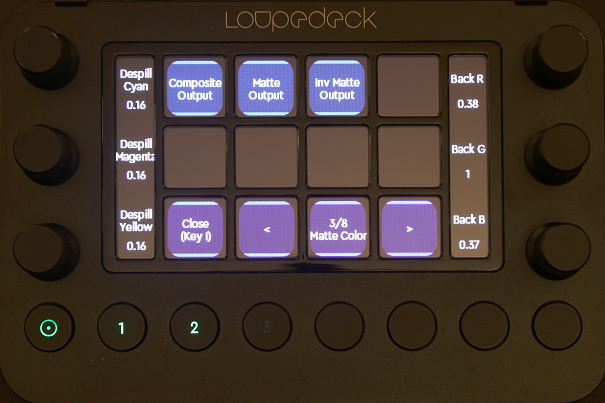
Page three allows you change the despill CMY color and the backing plate RGB color.
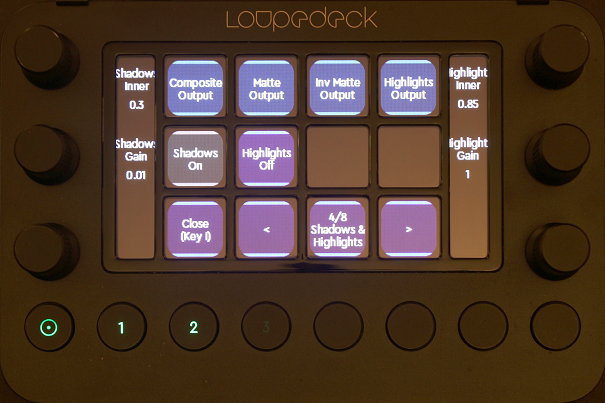
Page four allows you enable/disable shadows and highlights and change their respective parameters.
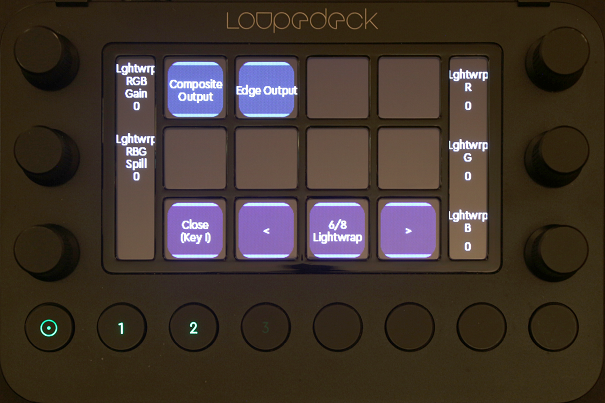
Page five allows you to change the lightwrapping edge parameters.

Page six allows to change more lightwrap parameters.
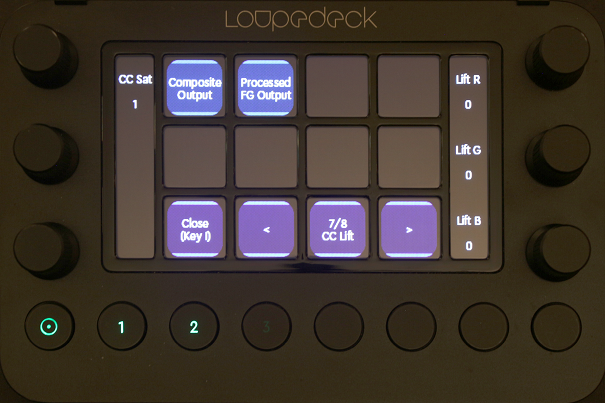
Page seven allows you to manipulate the saturation and RGB lift.
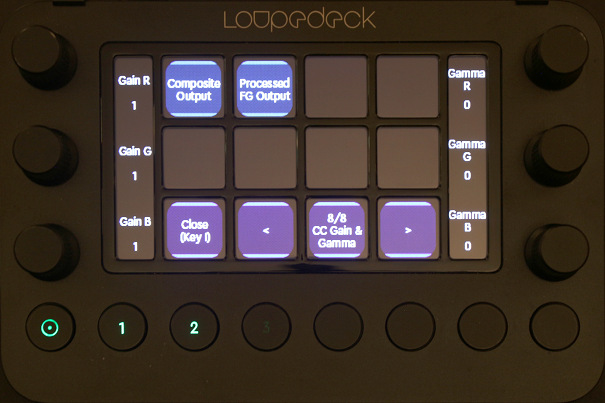
Page eight allows you to change gain RGB and gamma RGB.
Transformations
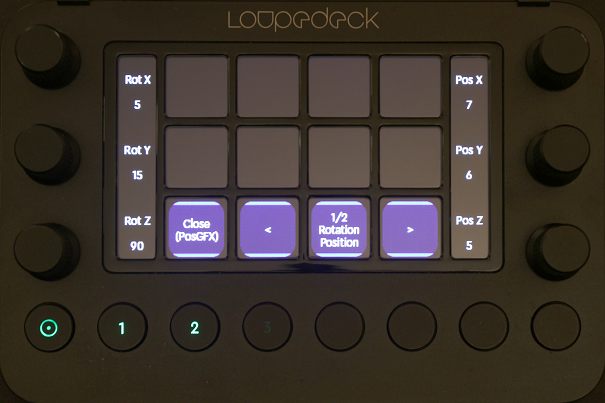
Select a transformation action from the action canvas or from the map view.
The first page allows you to change position and rotation of the graphics element.
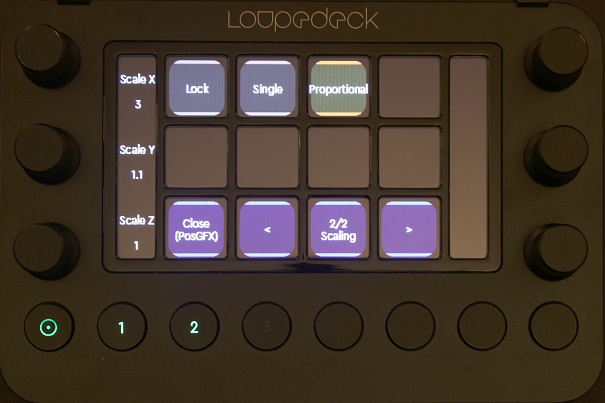
The second page allows you to scale the graphics object. Select Lock, Single or Proportional for the scaling mode.
Other Functions
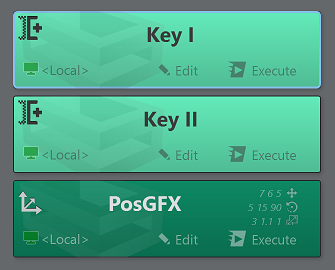
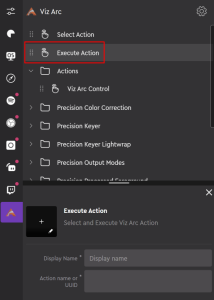
The Execute Action allows the selection and execution of a specific Viz Arc action from the LoupeDeck device and is not limited to chroma or transformation actions.
Click on the Execute Action item to create a new command.
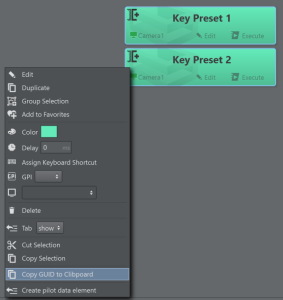
In Viz Arc, look for the actions you want to map on the LoupeDeck device, select them, right click and select Copy GUID to Clipboard.
Copy the GUID's and names to notepad or similar and use either the name or the GUID and copy it over to the LoupeDeck Execute Action Editor. Enter a name for the button and save the command.

Under Stored Viz Arc actions you can find the previously defined actions. Drag them to any of the free buttons on the LoupeDeck panel.
By touching the buttons, the action is automatically selected, highlighted and executed in Viz Arc. The action to be executed must be present on the currently opened project or the button has no effect.
Limitations
Contemporary changes of values through the LoupeDeck device and the Viz Arc action UI might result in unexpected behavior. The changes made through the Viz Arc UI are not instantly reflected on the LoupeDeck device. You need to deselect and reselect the action in Viz Arc to push changes back to the external device.