Packages are the unit of installation in VAM. Everything you can add, configure, upgrade, or remove is a package.
The Packages View
The default landing page after sign-in lists every package known to the installation, grouped by category (Applications first). Each package is shown as a card.
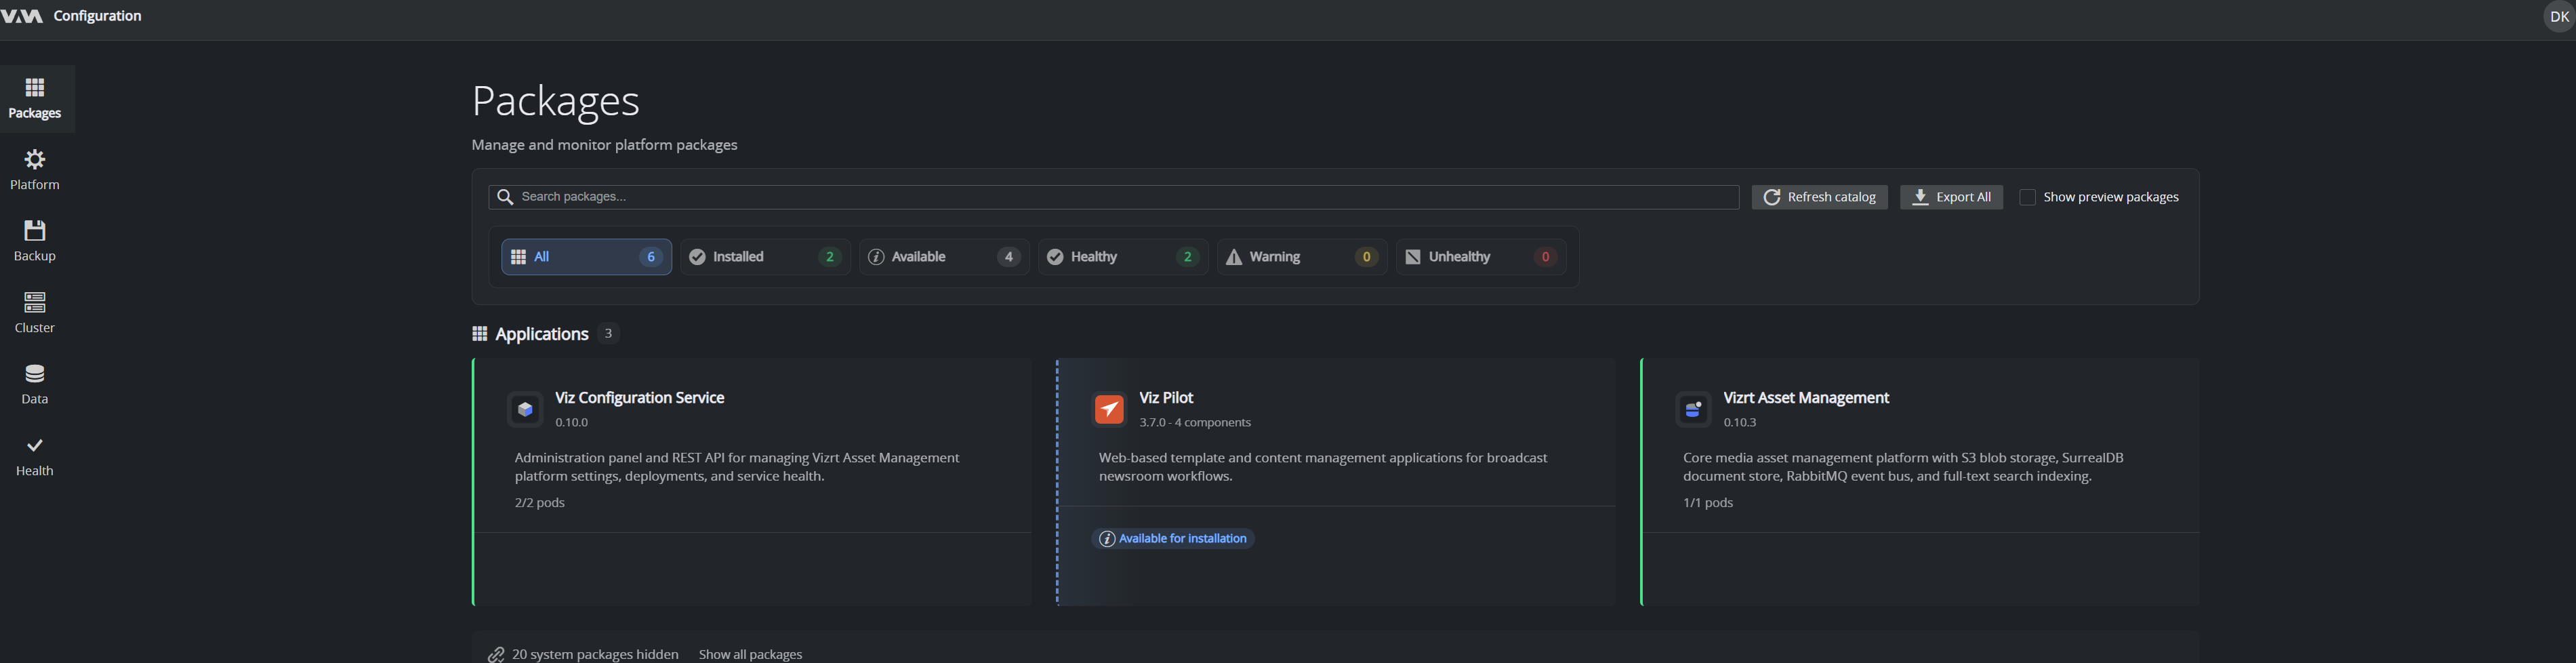
Across the top you have:
- Search: filter the list by name.
- Filter chips:
All,Installed,Available,Healthy,Warning,Unhealthy(each with a count) to narrow what's shown. - Refresh catalog: re-pull the catalog from the registry so newly published packages / versions appear (no redeploy needed).
- Export All and Show preview packages for advanced use.
Each card shows the package's name, installed version, a short description, its pod count (for example, 2/2 pods) and badges such as Update available. Infrastructure/system packages are hidden by default — use Show all packages to reveal them.
Click a card to open the package detail view.
Package Detail View
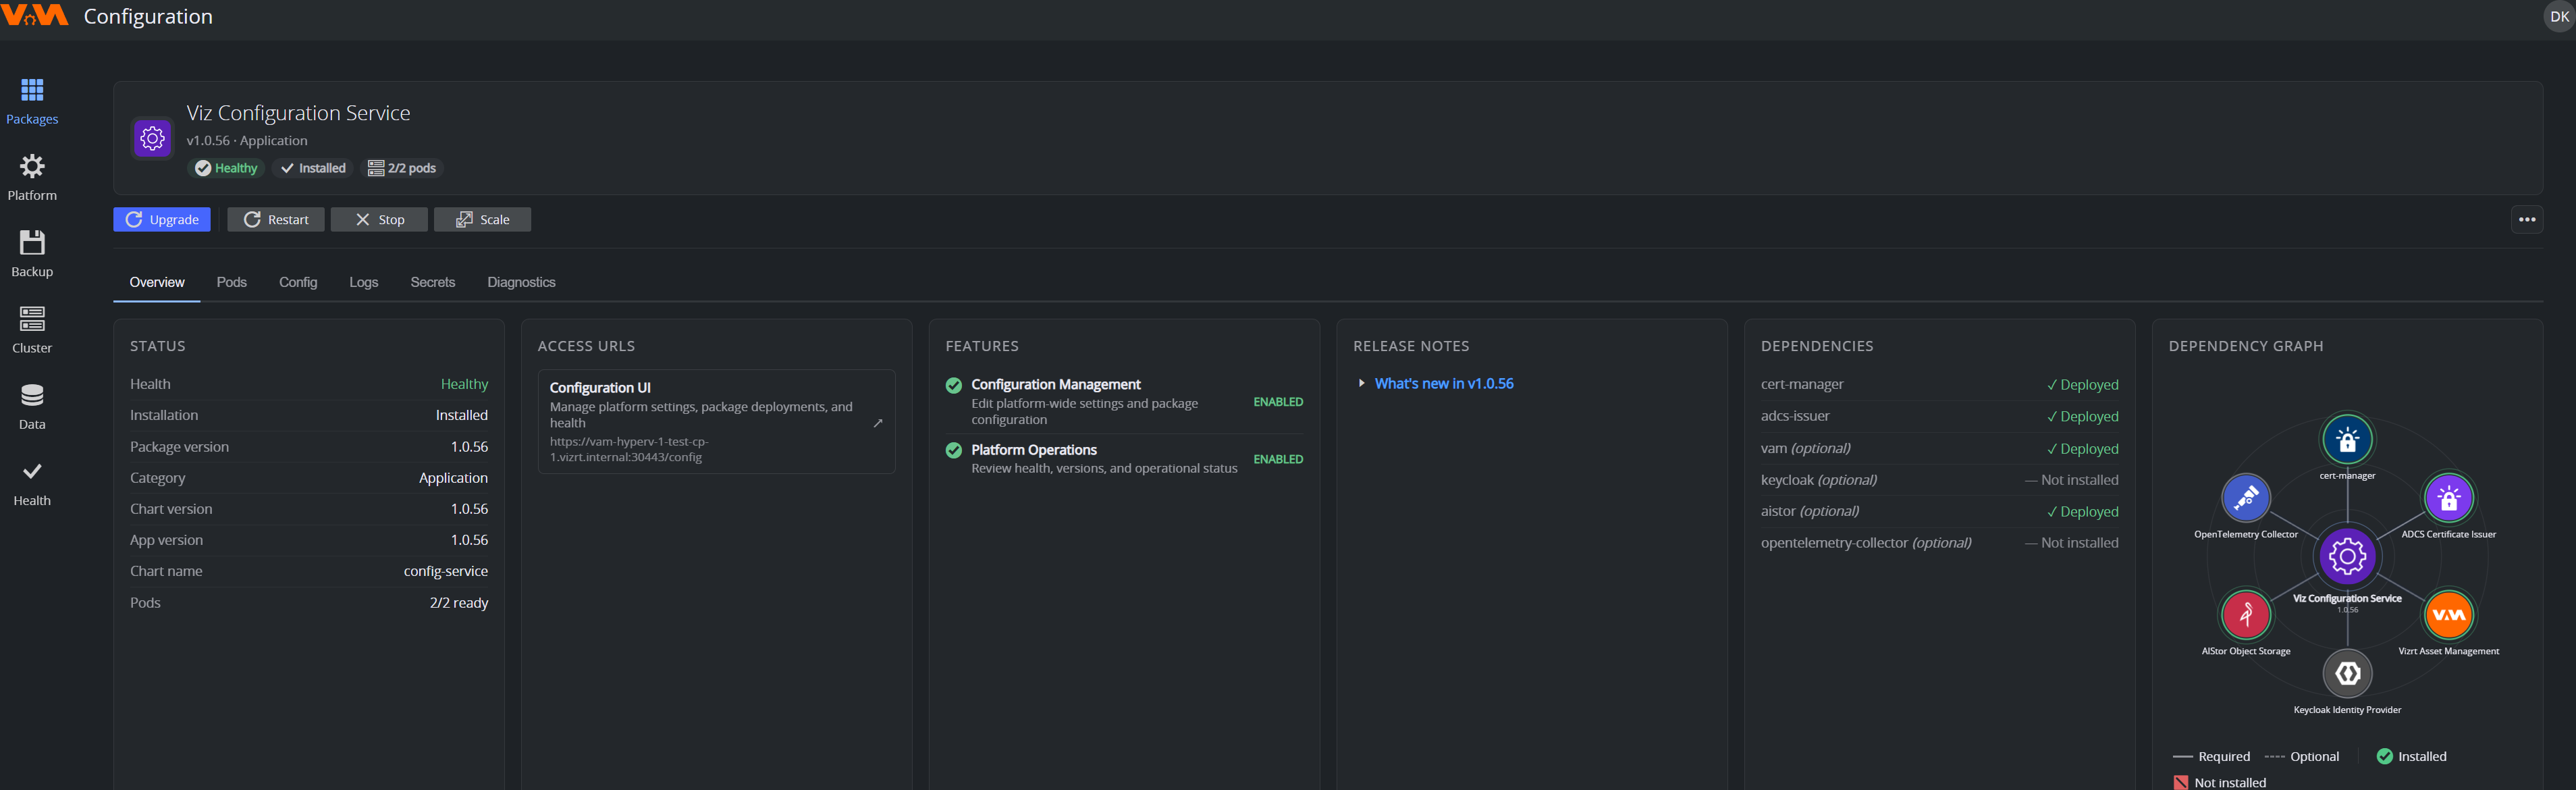
The package detail view is where you do everything for a single package. Lifecycle actions live in the button row at the top — Upgrade, Restart, Stop, Scale and an … overflow menu (Uninstall lives here when the package allows it). Below that is a set of tabs:
- Overview: status (health, installed version, chart/app version, pod readiness), access URLs, the package's enabled features, release notes (the "What's new" changelog), its dependencies and a visual dependency graph.
- Pods: the package's running pods and their status.
- Config: the package's settings, as a form generated from the package's published config schema (schema-validated).
- Logs: recent log output from the package's pods.
- Secrets: the secrets the package consumes (values are never shown).
- Diagnostics: additional detail for support/debugging.
Installing a New Package
- On the Packages view, filter by Available (or use Refresh catalog first if you just published something).
- Click the package card to open its detail view.
- Read the description and check the Dependencies section / dependency graph. Any missing required dependencies are listed; the UI installs them in the right order if you accept.
- Click Install.
- Fill in the configuration form. Required fields are marked; the form does not let you submit until they are filled and valid. Some packages add gates here (for example a GPU check).
- Click Install to start.
- Live progress is shown step-by-step. On success, the package appears as Installed with status Healthy.
If the install fails, expand the failed step to read the diagnosis. Most failures are configuration problems — fix the values, then retry from the package detail page.
Configuring an Installed Package
- Open the package's detail view.
- Click the Config tab.
- Edit values. As you change a field, the UI validates against the package's schema and shows inline errors if a value is out of range, the wrong type, etc.
- Save:
- Save Configuration persists the values without redeploying.
- Save & Apply persists and rolls the change out to the running package.
- Reset to Saved discards your unsaved edits.
- Disruptive changes are applied in place — typically with no downtime.
Some configuration values (database passwords, OIDC client secrets) are sealed secrets; the UI shows •••••••• for the current value and lets you replace it, never read it back.
Upgrading a Package
- The package card / detail page shows an Update available badge when the catalog has a newer version. (Use Refresh catalog to pick up newly published versions.)
- Click Update.
- A dialog shows what's changing — vX → vY: the release notes / changelog for the new version and the configuration to review.
- Click Update to start; live step-by-step progress is shown.
If an upgrade fails, it is automatically rolled back to the last known-good version and the dialog explains what happened — so a bad upgrade does not leave the package broken.
Self-upgrade: the Configuration Service can upgrade itself through this same flow. When it does, it briefly restarts and reconnects automatically and a dedicated progress dialog tracks the steps. Upgrading the core VAM platform (and adding/removing cluster nodes) is still done through the
vamctlinstaller.
Uninstalling a Package
- Open the package's detail view.
- Click Uninstall.
- Read the warning — uninstalling deletes the package's data.
- Type the package name to confirm.
- Click Uninstall.
If other installed packages depend on this one, the UI refuses and lists the dependents. Uninstall them first (or, if intentional, override with Force uninstall — but only after reading the warning).
Reading Package Logs
Open the Logs tab on the package detail view. The UI streams recent log lines from the package's pods. Filter by:
- Severity: show only errors / warnings / info / debug.
- Pod: if the package has multiple pods, pick one.
- Time range: last 5 minutes / 1 hour / 24 hours / custom.
For long-term log analysis (beyond what the UI buffer holds), contact your administrator about the cluster's observability stack.