Custom Execution Logic is a way to specify Media Sequencer behavior for different actions (take, read, out, continue, cue, out and update). The "script" logic is expressed in the Media Sequencer's own internal VDOM logic through a simplified XML format.
Note: Custom Execution Logic is a powerful, but also potentially complex mechanism that requires expert level understanding of Media Sequencer's internal working.
Execution Logic commands are saved as part of a template. This allows data elements based on the template to use the same execution logic commands. For example, adding an execution logic script to Media Sequencer’s command Take, replaces the Take command for all data elements based on that template. A benefit of using Execution Logic is that the script can be run without the need for external services or clients to be open. It is possible to use a limited set of commands, or any Viz Engine command, straight on Media Sequencer to issue instructions.
This section contains the following topics:
Execution Logic Editor
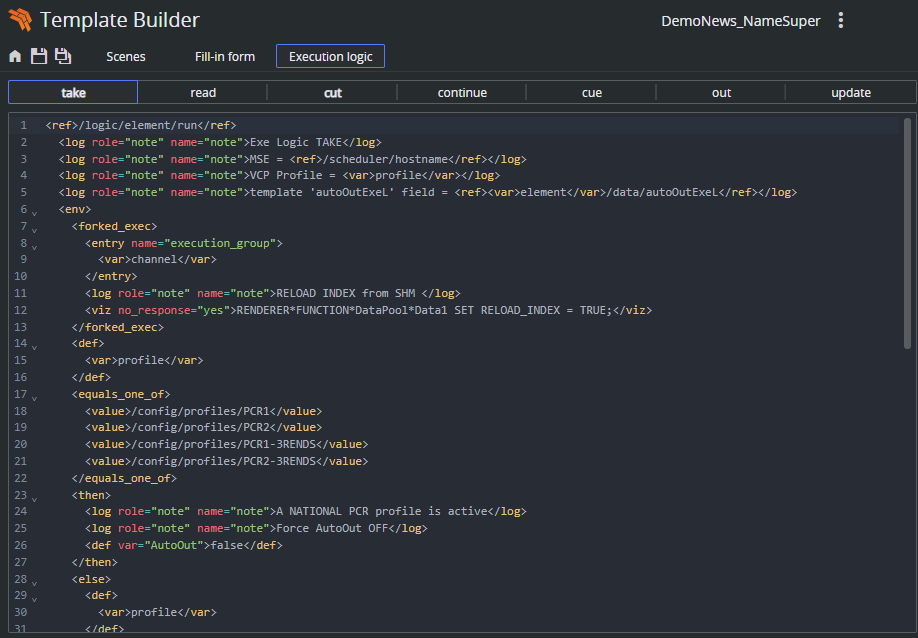
The Execution Logic editor consists of two parts, a list of commands and an XML editor for the MSE commands. In addition there is a status bar displaying syntax errors.
Command list: The top toolbar displays the available commands. If a command is written in bold, it has custom logic inside. It is possible to implement some commands but not all. The commands left empty behave as normal. It can also be useful to prevent some commands, then inserting a log line only logs and does not execute the default action. For instance
<log>CUE not supported.</log>Command editor: Displays the currently selected command and its execution logic. Available context menu option is Insert Default Action.
Insert default action: Inserts the default command
<ref>/logic/element/run</ref>.
Working with Execution Logic
This section contains the following topics:
Send basic commands
Example - Play, Continue, Take Out
Example - Forked Execution
Example - Commands generated by a template
Send Basic Commands
The <viz> handler is used to send commands to Viz Engine.
The following example sends the RENDERER SET_OBJECT SCENE*... command to channel “A” in the current profile:
<env viz="A"> <viz>RENDERER SET_OBJECT SCENE*...</viz> </env>Multiple commands can be sent by separating each command with <br/>, for example:
<viz>RENDERER SET_OBJECT ...<br/>RENDERER*STAGE START</viz>Instead of setting the command directly, a more powerful approach is to use the contents of a field in the template. The field (a hidden textbox for instance) can then be filled with the Viz commands that need to be sent.
This example shows how the contents of a data field in a data element can be retrieved by using the <ref> construct ("field_01" is the ControlObjectName of the data field):
<env viz="A"> <ref><var>element</var>/data/field_01</ref> </env>To send commands to several channels, duplicate the command:
<env viz="A"> <ref><var>element</var>/data/field_01</ref> </env> <env viz="B"> <ref><var>element</var>/data/field_02</ref> </env>Note: Forked execution is required when a channel contains multiple engines, otherwise the commands only applies to the first engine in a channel.
Note: Execution logic does not work with non-control object based templates.
Example - Play, Continue, Take Out
This example shows how execution logic can be used to play an element, do a Continue after five (5) seconds, and then a Take Out after ten (10) seconds.
In the Execution Logic Editor, select the “take” command, add the logic into the editor (right pane). This means that when a “take” is issued on a data element based on this template, Media Sequencer executes the logic.
The commands are modified to do a "take","continue" and then an "out". The timecode for each operation must be set.
<relative> <env command="take" timecode="00:00:00:00"> <ref>/logic/element/run</ref> </env> <env command="continue" timecode="00:00:05:00"> <ref>/logic/element/run</ref> </env> <env command="out" timecode="00:00:10:00"> <ref>/logic/element/run</ref> </env> </relative>Note: The running/outer context takes precedence over attributes on the “ref”. Instead of adding attributes on the “ref” node, you use an “env” node as in the example above.
Example - Forked Execution
These examples show how the "take" command can be modified to make the template override the standard logic and instead send RENDERER*STAGE START.
Here, the command is sent to the channel assigned to the data element:
<forked_exec> <entry name="execution_group"><var>channel</var></entry> <viz>RENDERER*STAGE START</viz> </forked_exec>To send commands to a specific channel in the current profile, replace <var>channel</var> with the name of the channel you want to send to, as follows:
<forked_exec> <entry name="execution_group">MY_CHANNEL</entry> <viz>RENDERER*STAGE START</viz> </forked_exec>Example - Commands Generated by a Template
By using the information from the preceding examples, we can create logic that sends custom Viz commands that are generated by the template.
One way would be to add a Value Control Component (see Viz Pilot > Template Wizard Components > Viz Control Components) to the template, and set the ControlObjectName to "vizcmds". Then create a regular script that sets the ControlValue of the TWValueControl to whatever command needs to be sent.
Alternatively, use a standard memo box, and set the ControlObjectName to "vizcmds". Then enter the Viz commands (or script what the contents should be). The memo box’s visibility can be set to false so the user can’t see it. In the Execution Logic you can then add the following:
<forked_exec> <entry name="execution_group"><var>channel</var></entry> <viz> <ref><var>element</var>/data/vizcmds</ref> </viz> </forked_exec>