Object Tracker User Guide
Version 1.0 | Published June 09, 2022 ©
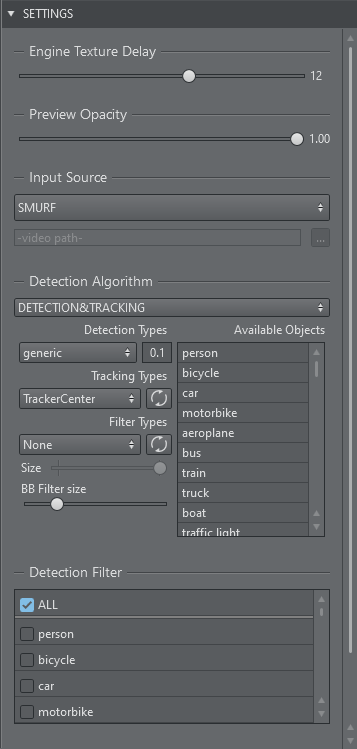
Settings Panel
In the settings panel, you can select which tracking algorithm to use and which neural network to work with for the AI tracker. Each tracker and algorithm has specific settings which are exposed in the panel.
Apply Settings: Please note that most settings that can be changed in the settings panel do not get applied as you change them in the Object Tracker. You need to press the Init button to apply your changes on the server.
![]()
Detection Algorithm
Manual
This mode allows you to track manually using the mouse pointer, touch screen or pen input.
Detection and Tracking
This option selects the AI tracker based on a neural network.
Detection Types
The network to be used can be selected under Detection Types.
![]()
The generic network is always available and offers a couple of standard objects that it recognizes (for example, people, cars, etc.).
The number besides the dropdown represents a threshold in the range of 0.0 to 1.0. It represents a factor of confidence of how well an object has been detected. The higher the value the higher the probability the detection is correct. Object with a low confidence score can be ignored by using this threshold value. Depending on the quality of the images and the neural network this value can be adjusted to improve the overall tracking.
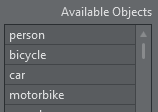
The list of available objects is shown under Available Objects. This is the list of objects that are recognized by the neural network.
Tracking Types
![]()
The Tracking Types dropdown lets you choose what kind refined tracking to use inside of the detected bounding box. The button next to the drop down sends the new settings to the Object Tracker without having to use the global initialize button.
-
TrackerCenter: Extracts features around the center of the bounding box. A gravity force re-centers the tracking point toward the center of the bounding box over time to avoid drifting.
-
TrackerTop: Extracts features towards the top area of the bounding box. This is typically used when tracking persons as the arms and legs might move too much for a stable tracking, while the area of the chest and head are more stable and yield better tracking results. As for the tracker above, a gravity force re-centers the tracking point toward the center of the bounding box over time to avoid drifting.
-
FeaturesCenter: Same as TrackerCenter without the gravity. The tracked point might drift away over time.
-
Simple: Uses the center of the detected bounding box as tracked reference.
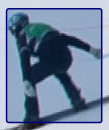
Detected object's bounding box
An example of a bounding box of a detected person object.
Filter Types
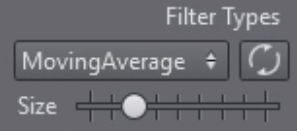
The filter types allow you to filter the tracked point over time. Several of them are available. The button next to the drop down sends the new settings to the Object Tracker without having to use the global initialize button.
-
MovingAverage: Calculates the average of the last points.
-
ExponentialMovingAverage: Gives more weight to the most recent points. Similar to MovingAverage.
-
KalmanSimple: Simple Kalman filter.
-
KalmanLinear: Linear Kalman filter.
-
KalmanUnscented: Unscented Kalman filter.
-
KalmanAugmentedUnscented: Augmented Unscented Kalman filter.
Warning: Be very careful when using filters. In most cases, they lead to undesired lags especially for rapid and sudden changes in direction of the tracked object. The larger the size of the filter, the larger is the lag. However, the filters might be very beneficial on smooth and slow movements of objects.
Detection Filter
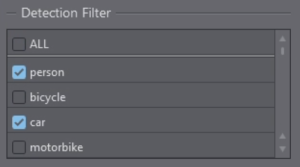
Select which objects of you want to detect. In most cases, you would like to select one or two kind of objects in a video stream.
Bounding Box Filter
The bounding boxes undergo a different filtering than the actual tracking point as it is more noisy and is subject to more extreme and sudden changes over time (for example, a person walking). You can configure a filter size for smoothing the bounding boxes for the tracking output. It is particularly useful when graphics need to be placed aligned to the bounding box.
Profiles
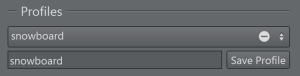
Here you can save all the above settings into a profile which you can recall later on. Profiles are stored locally.
Global Settings
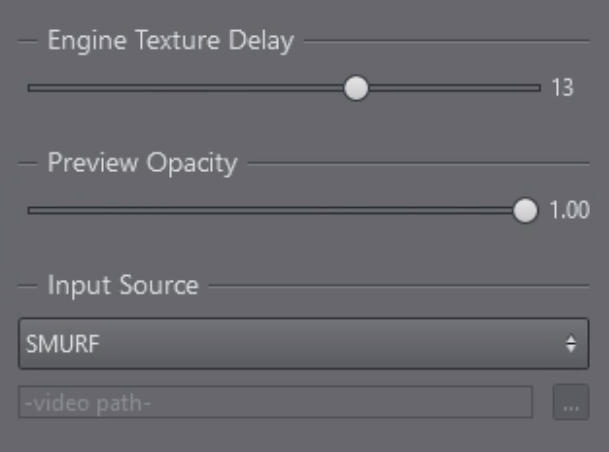
Engine Texture Delay
The Engine texture delay (in fields) determines the delay between the acquisition of the input texture for the Object Tracker and the actual rendering of the resulting tracking. This value depends heavily on the selected algorithm and underlying hardware. Typically the delay is around 11-13 fields.
Information: The delay is applied on the program channel that has been configured in Viz Arc. The delay value is set on the Engine when a object has been selected for tracking. Changing this value might lead to a freeze frame on Viz Engine's output, make sure not to change this value during live operations.
Preview Opacity
The preview output that has been configured in Viz Arc can be rendered on top of the NDI stream coming from the Object Tracker. This allows the operator to preview the graphics on screen. The opacity of this preview can be adjusted here.
The preview is intended to verify the editorial graphics content and not the accuracy of the tracking.
Information: For performance reasons the composed on-screen preview might not look the same as on the actual program output. Make sure the fill channel of the preview is black where it is supposed to be transparent. The timing between the underlying NDI stream and preview is not guaranteed to be correct. The tracking and the preview graphics might not match.
Input Source
Select SMURF to select the Engine's input running where the Object Tracker has been installed. When installing Viz Arc locally, you are able to select a file as well. This workflow is intended for testing only as it is not guaranteed to run in real-time.