This section guides you through management of AWS IAM roles needed for operating Viz Now with your AWS account.
Secure, reliable operations are ensured by first clarifying permissions and adopting these best practices.
Overview
Viz Now requires two IAM roles:
IAM Role Name | Purpose | Used By |
|---|---|---|
| Provisions infrastructure via Terraform | Deployment Agent |
| Manages deployed instances | Control Plane |
These roles are assumed using AWS STS (Security Token Service), and their ARNs are stored securely in Viz Now.
Prerequisites
An active AWS account.
IAM Administrator access to AWS.
Administrator access to the Viz Now platform.
Update Existing IAM Roles
If your AWS account already has Viz Now IAM roles defined, follow these guidelines to update them.
Note: If your AWS account has no Viz Now IAM roles defined, first see section Create New IAM Roles.
IAM Roles
You will update both the Deploy and Management IAM roles and their associated inline policies.
To update an IAM role in Viz Now
This procedure assumes that your Viz Now user details are already setup in AWS. See the Note above.
Log in to your AWS Management Console with IAM Administrator permissions.
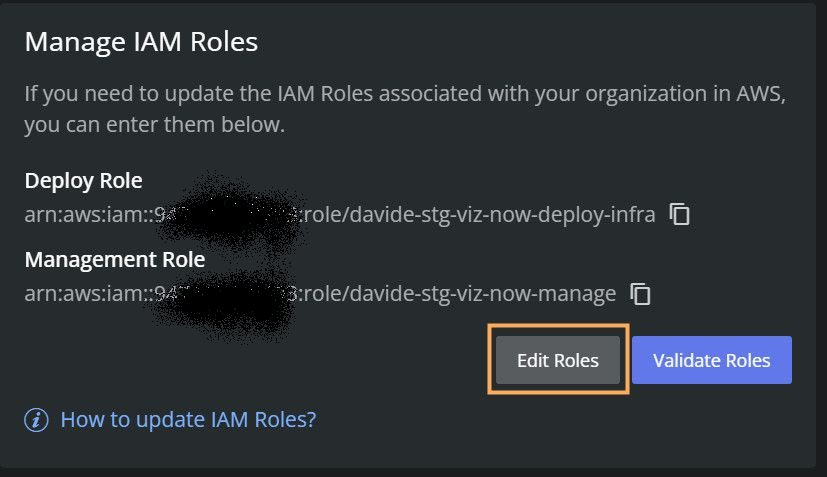
Keep this tab active in your browser.Log in to the Viz Now and navigate to the panel Organization > Infrastructure tab > Manage IAM Roles.
You’ll see a screen like the one below, where you can define the IAM Role ARNs for the Deploy and Control Plane functionality.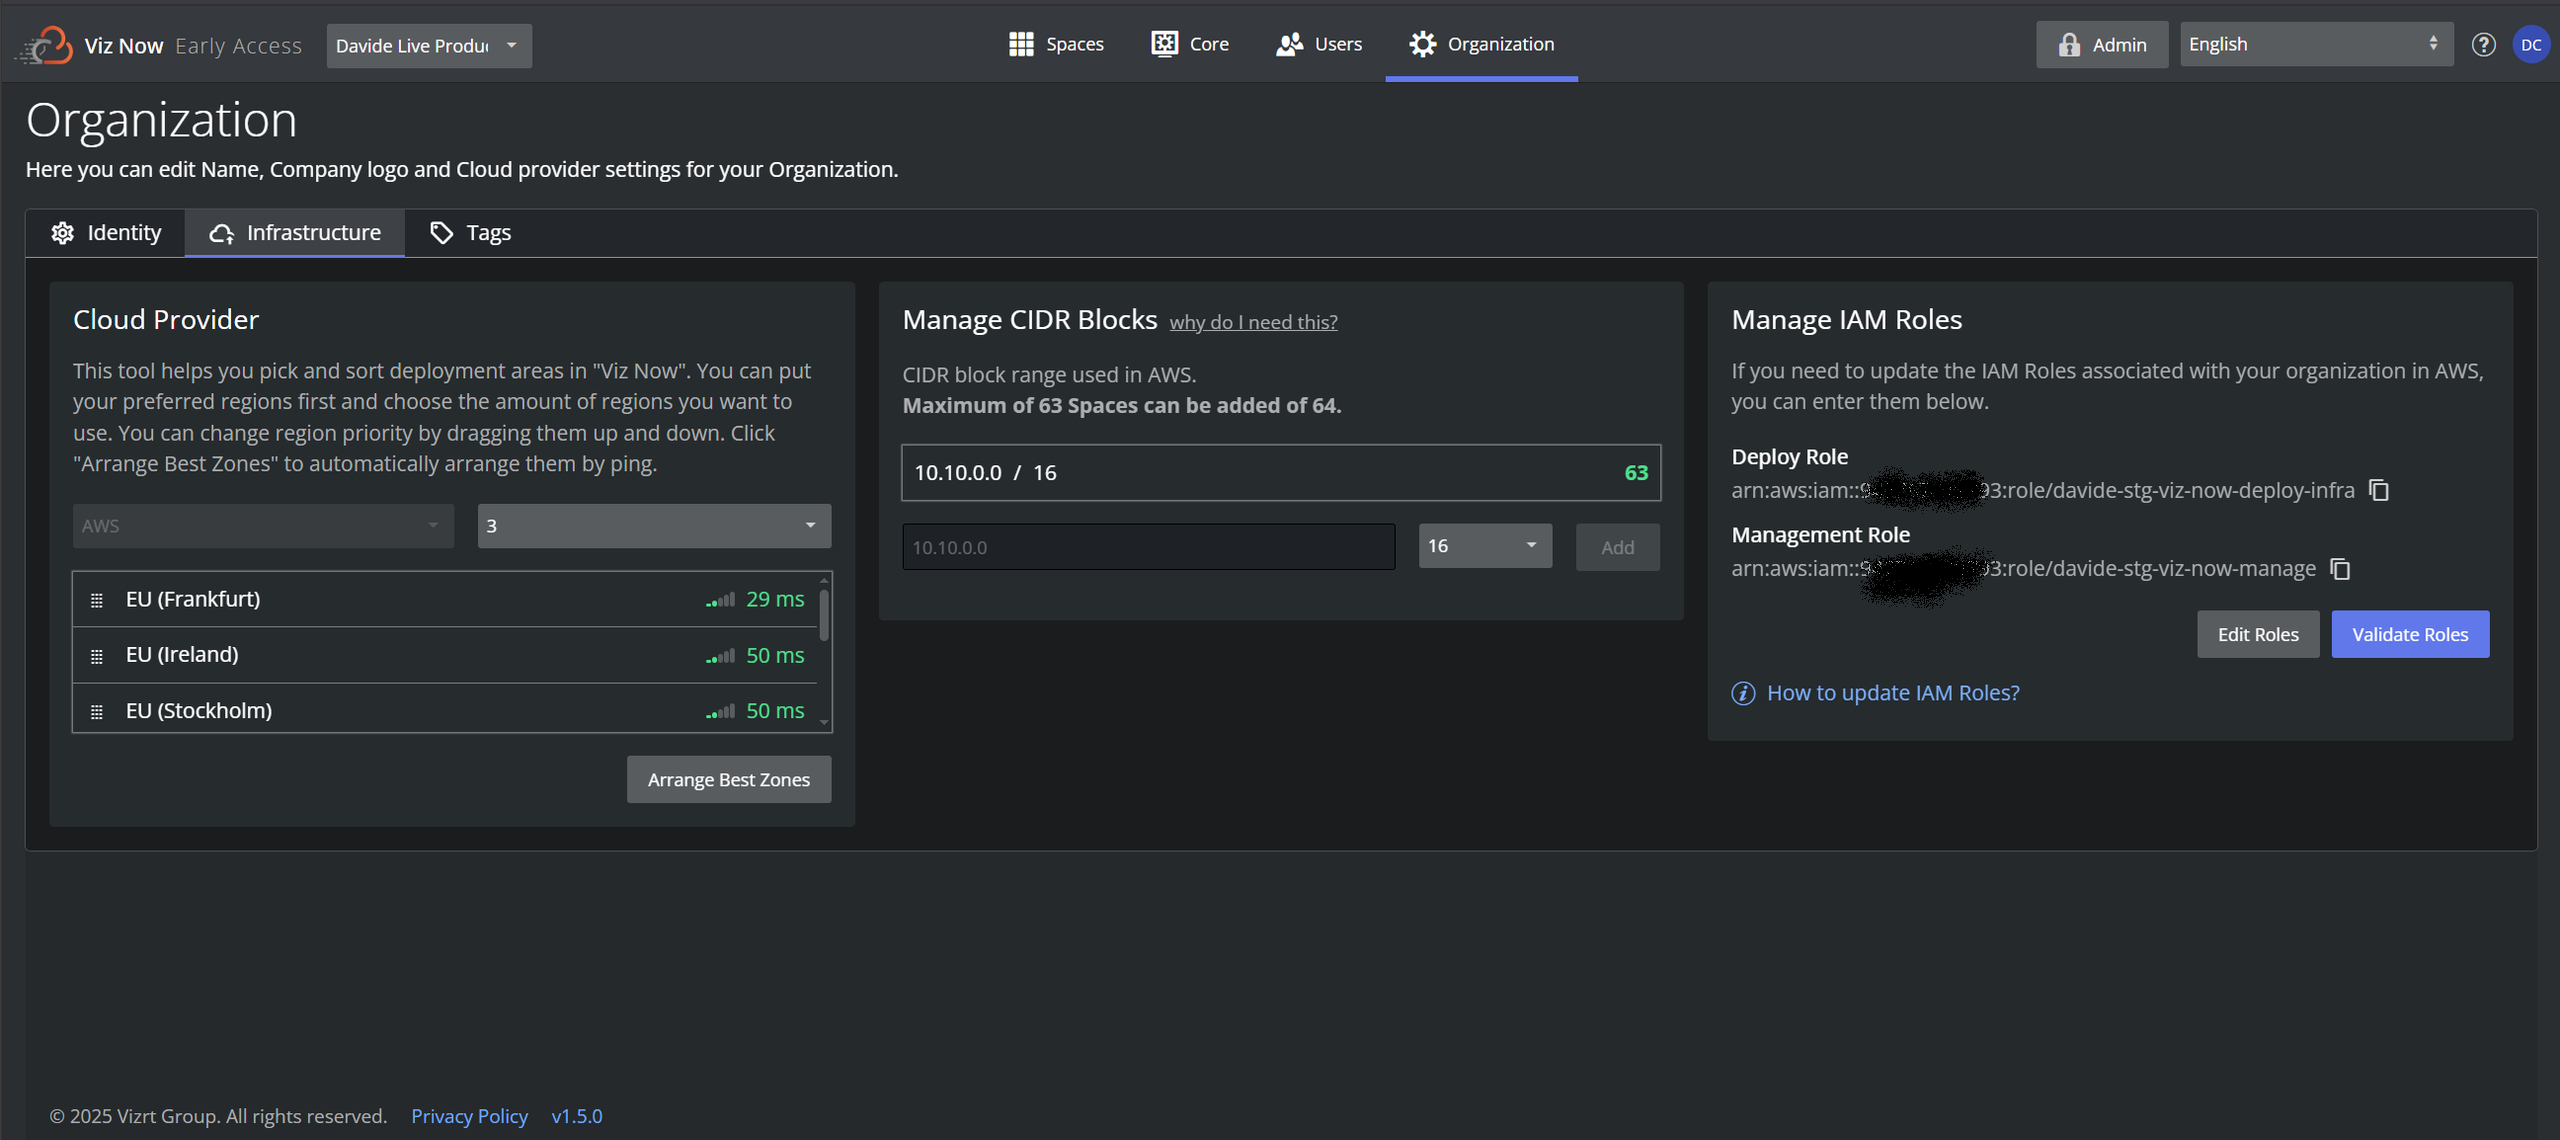
Keep this tab active in your browser.
Deploy roleUpdate the inline policy:
Switch to the AWS console IAM > Roles and from the Permissions tab, you can search for required inline policy.
This is the same as in the Viz Now UI: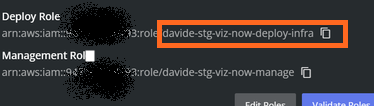

Click it to open.
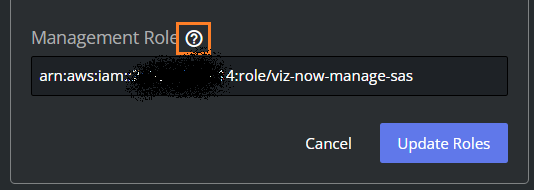
Go back to Viz Now and in the Manage IAM Roles panel, next to Deploy Role, click the Question mark icon
 .
.
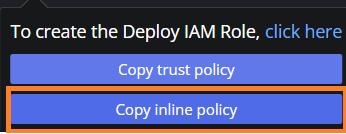
and then Copy inline policy.
(This saves the policy details to the clipboard).
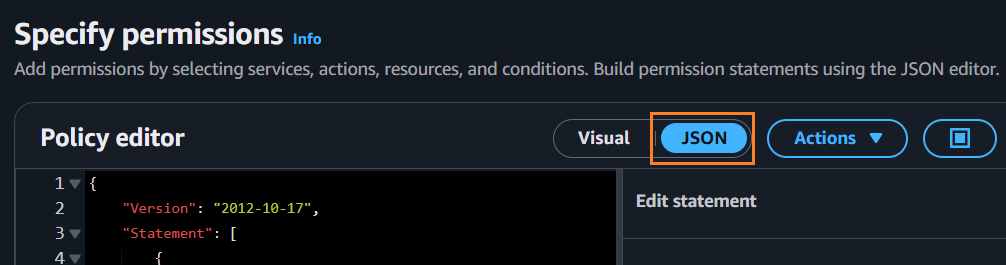
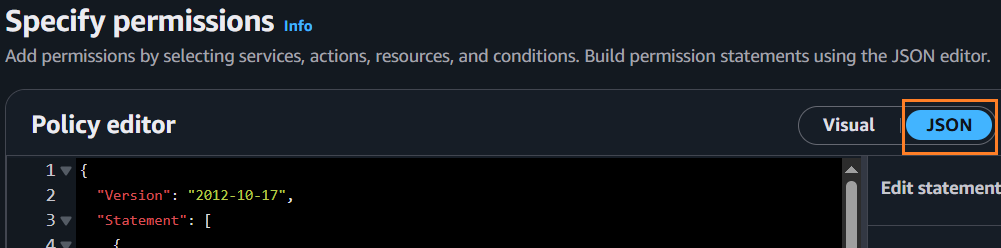
Switch back to the AWS Console Policy editor and click the JSON button.

In the Policy editor, paste-in the inline policy from the clipboard.

Click Next and then click Save changes.
A confirmation message is displayed.

Management Role
You now repeat the same steps for the Management role.
In Viz Now, next to the input field Management Role, click the Question mark icon
.
From the pop-up, click Copy inline policy.

In the AWS Console, search for the required manage role, in this example, viz-now-manage, and click on it to display a Summary page.
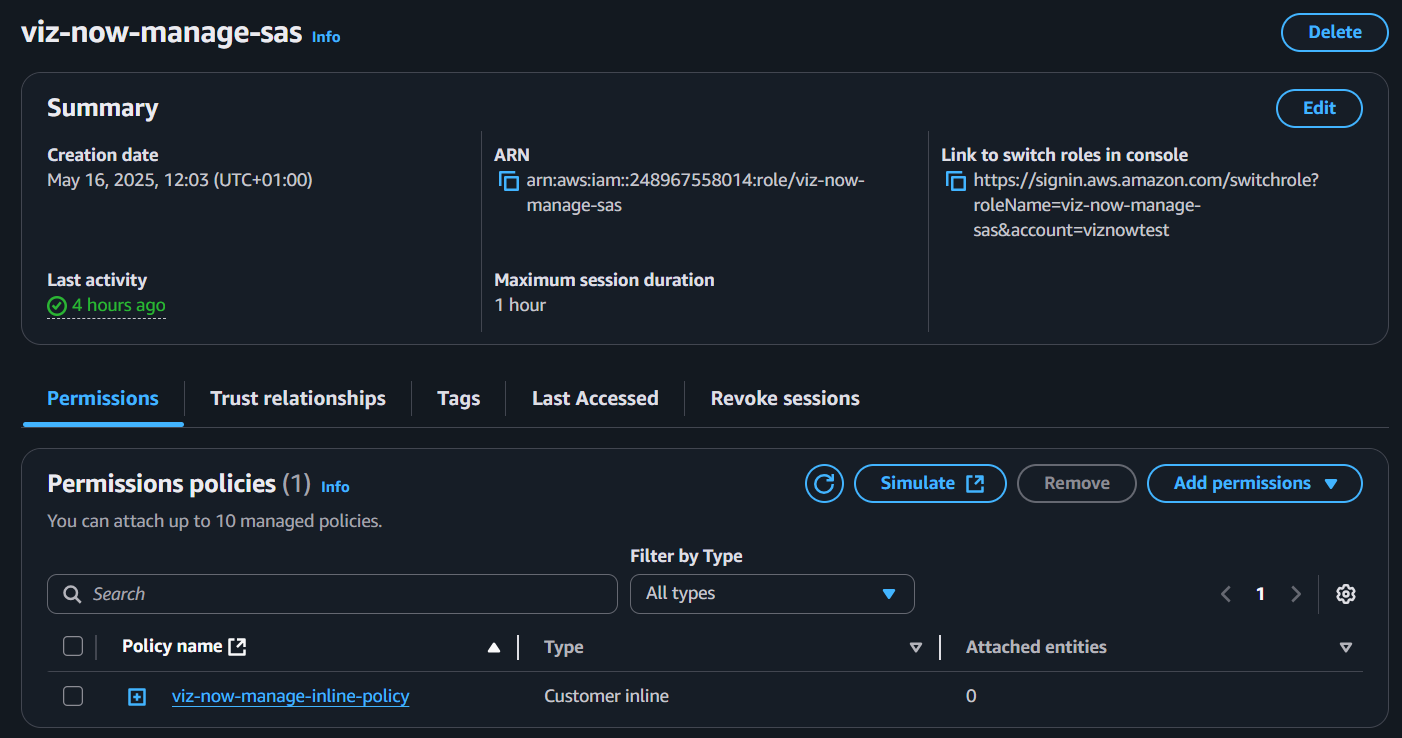
Select the Permissions tab and then its contained policy.
The Policy editor page opens: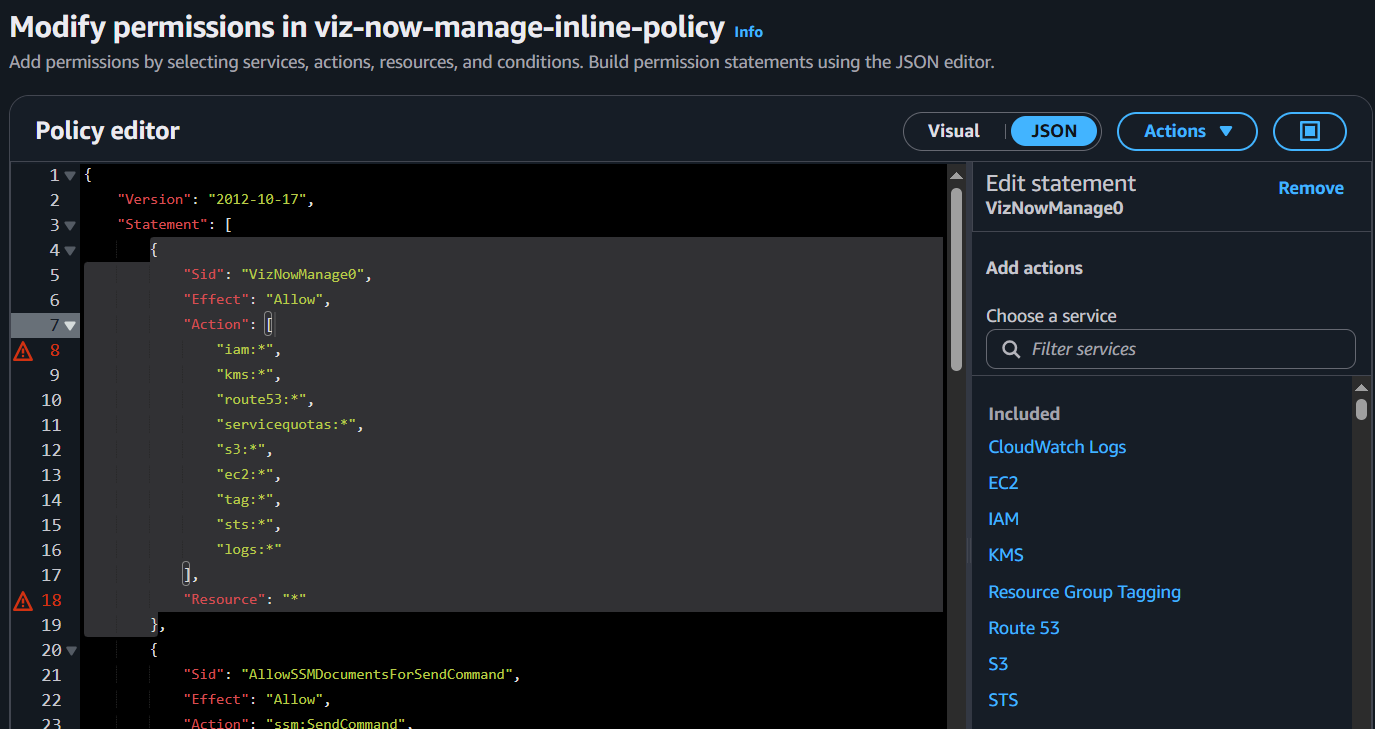
Paste-in the inline policy that you copied to your clipboard, to update the JSON code.
For an example, see the code below.Click Save changes.
Validate IAM Role in Viz Now:
Click Cancel.
In Viz Now Manage IAM Roles panel, click Validate Roles.

A confirmation message is displayed.

Create New IAM Roles
If you have not defined any IAM roles for Viz Now, follow these guidelines.
Note: If you have already have Viz Now IAM roles defined for your AWS account, see to Update Existing IAM Roles below.
Defining a new IAM Role
You will create both a Deploy role and a Management role, and associate customized Viz Now trust relationships and policies.
To define an IAM role in Viz Now
Log in to Viz Now and navigate to Organization > Infrastructure tab > Manage IAM Roles.
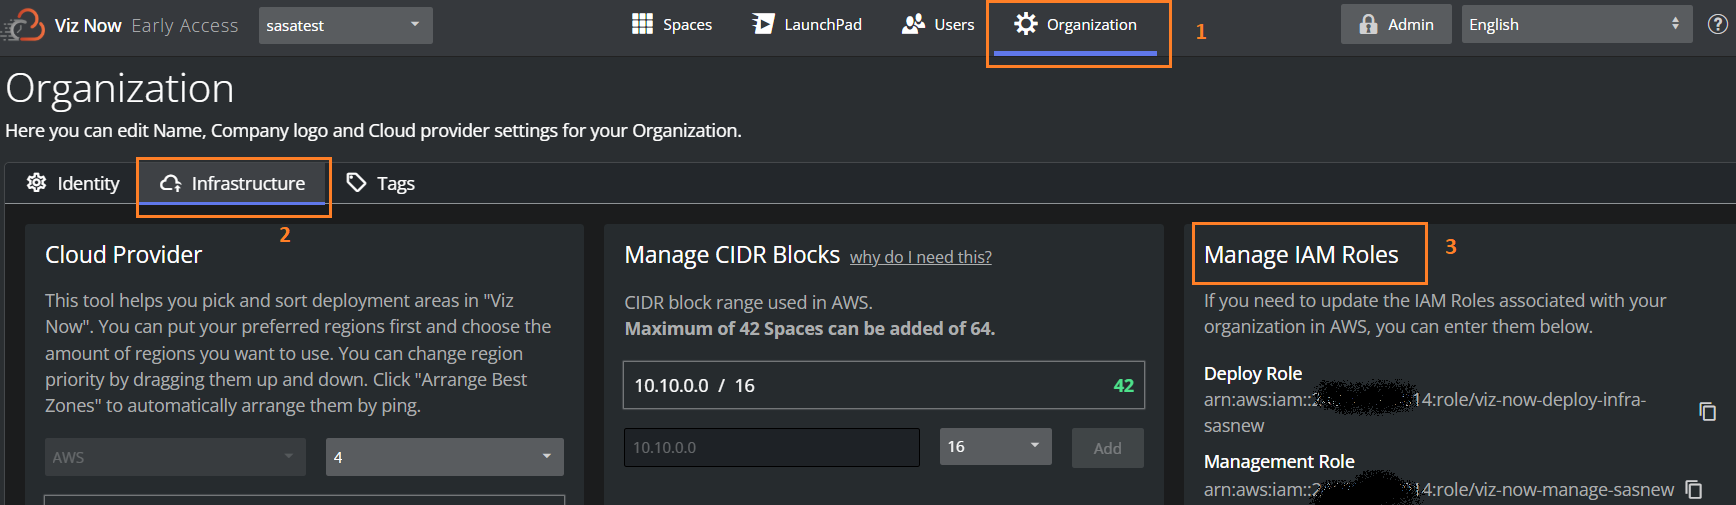
You’ll see a screen like the one below, where you define the IAM Roles ARNs needed for a Deploy role.
Deploy Role
The role viz-now-deploy-infra allows deploying infrastructure in your AWS Account.Log in to the AWS Management Console with IAM Administrator rights.
Back in Viz Now, click Edit Roles.

Next to the Deploy Role input field, click the
icon.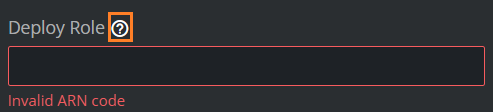
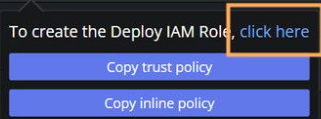
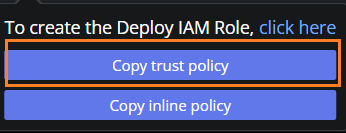
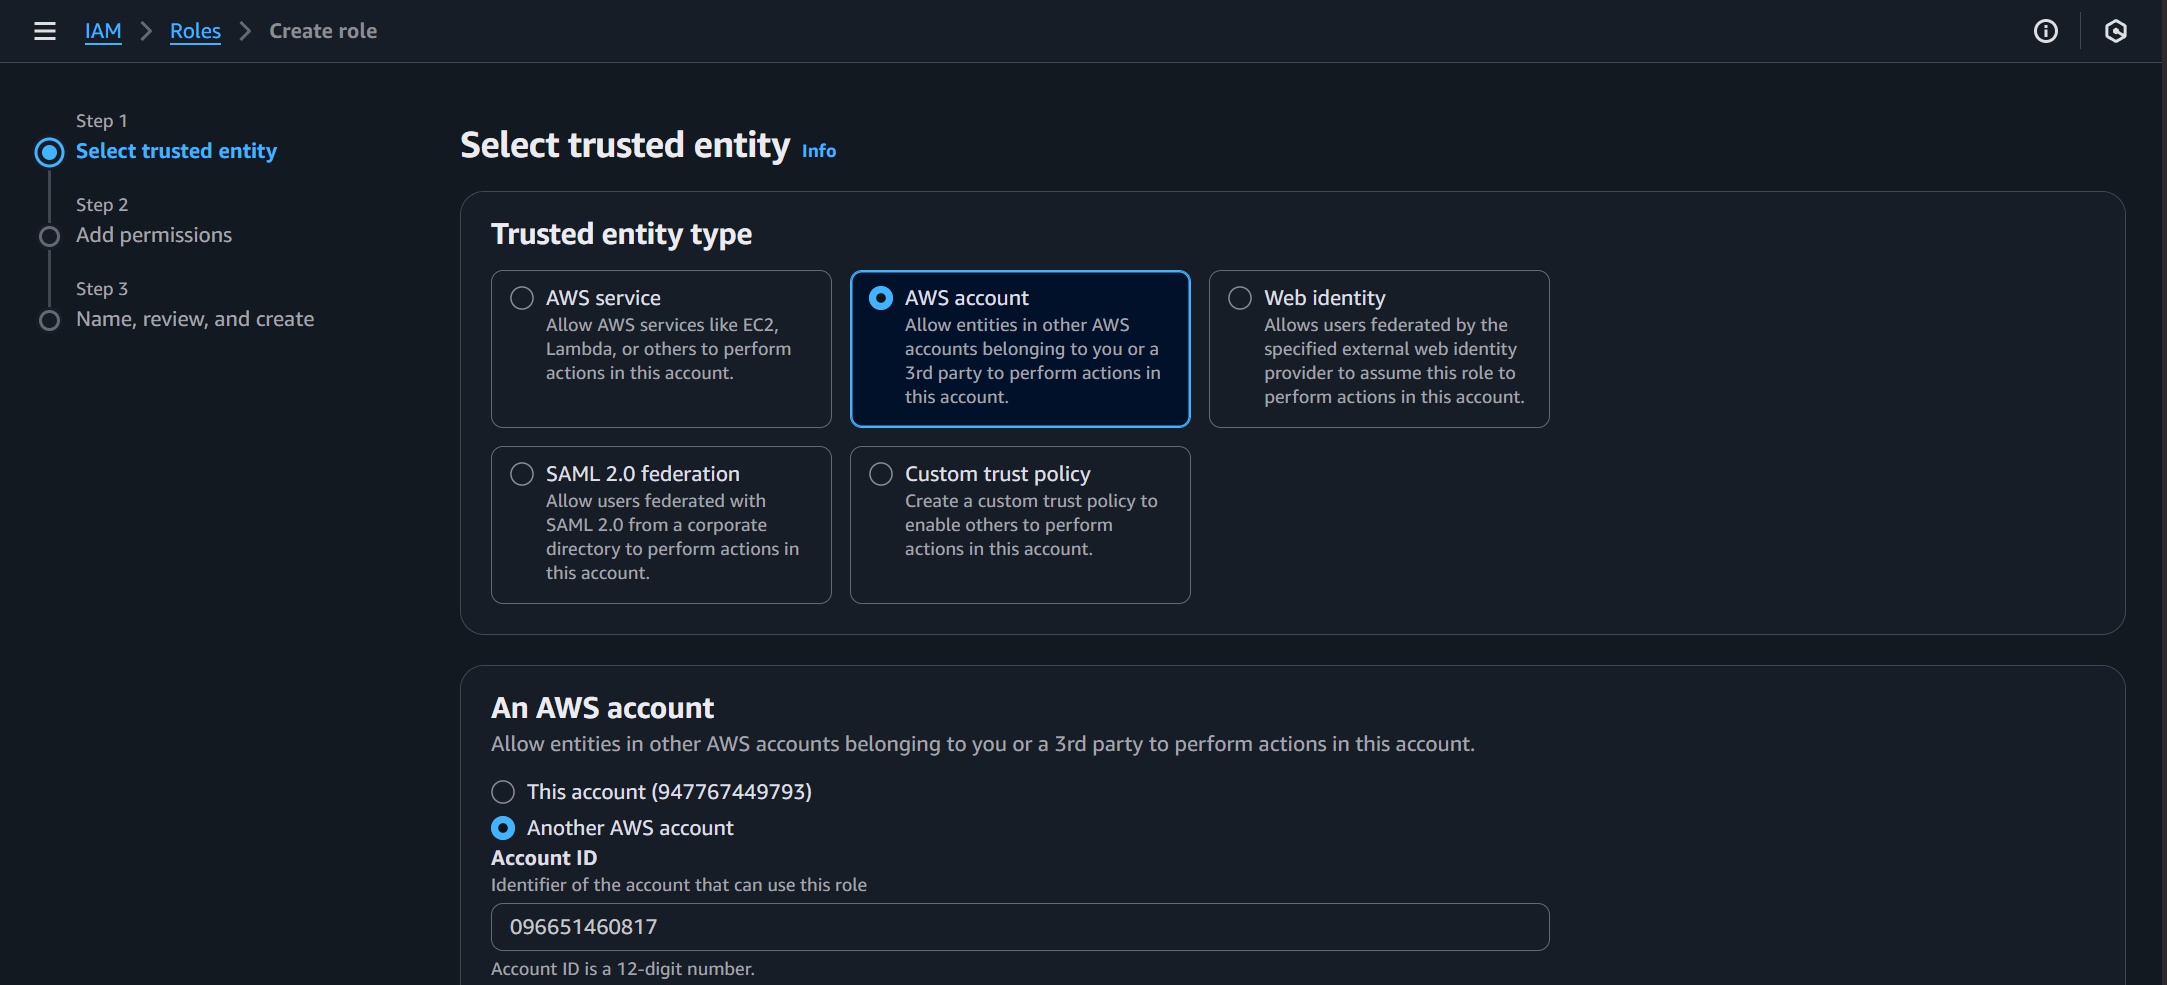
From the pop-up, follow the link click here to open the AWS console.
The AWS console opens in a new tab (if not logged-in, you will need to authenticate).
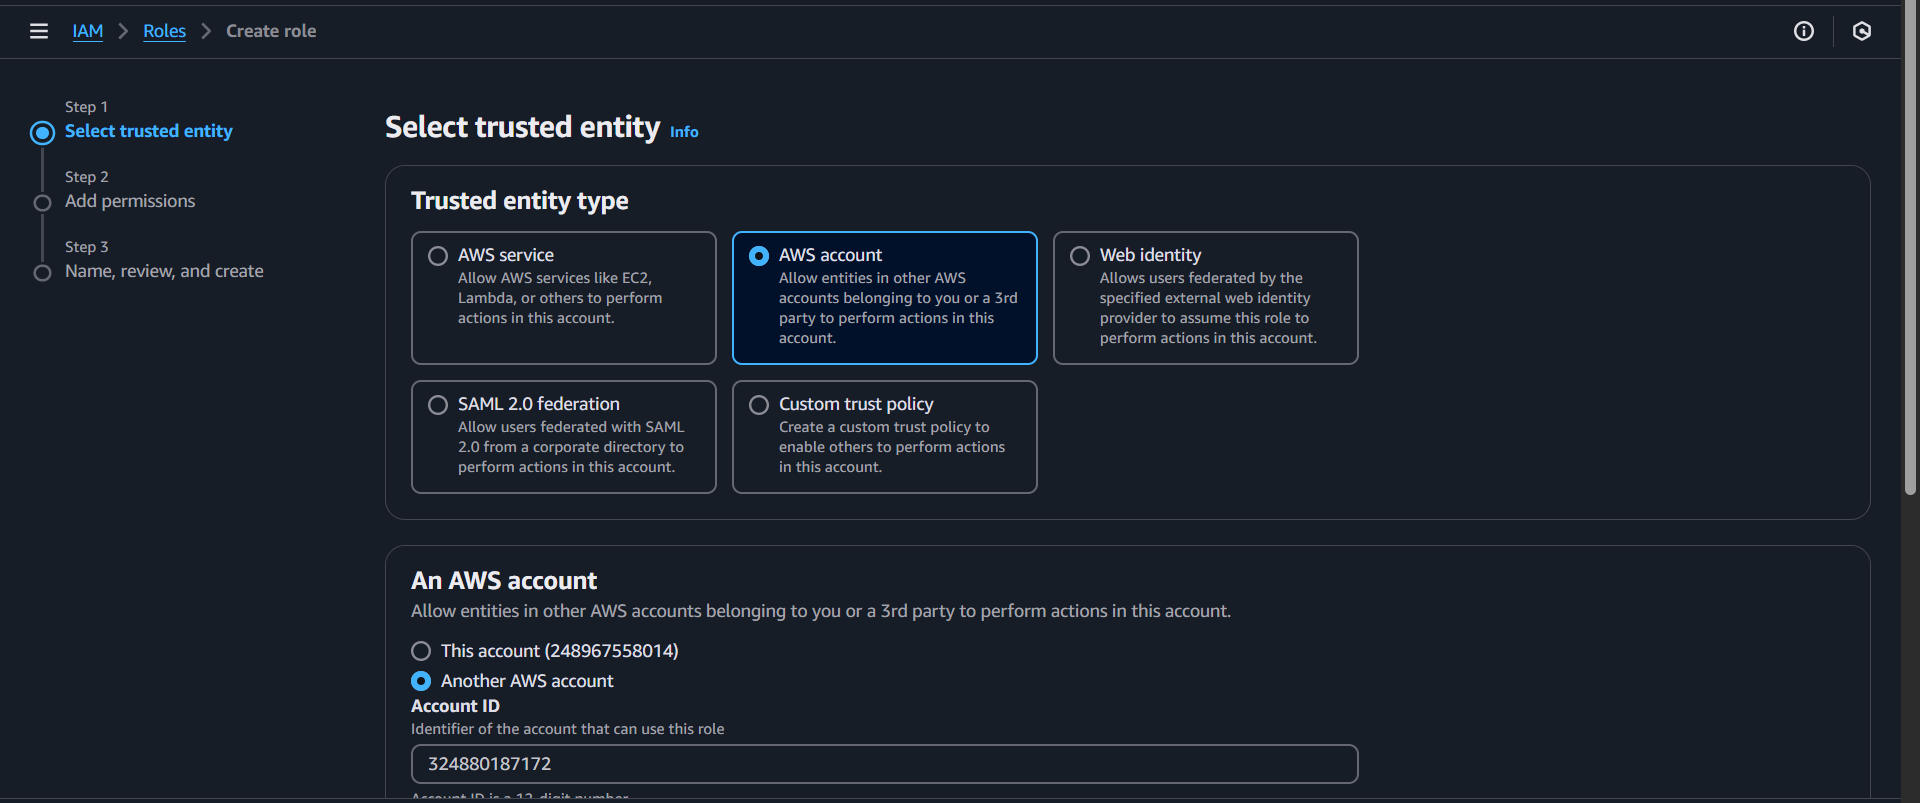
Click Next twice to skip the Add permissions step and arrive at Name, review, and create.
Role Name is pre-populated as: viz-now-deploy-infra.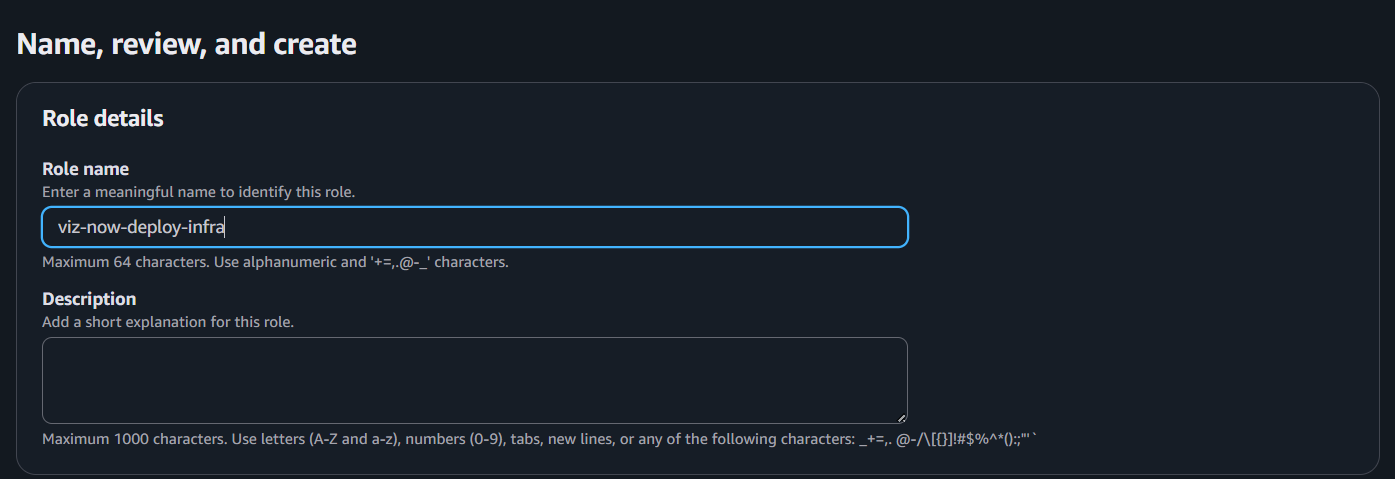
Click Create Role.
A confirmation message is displayed.
Note: If a warning indicates that the name already exists, update it by adding a suffix, for example: viz-now-deploy-infra-something else.
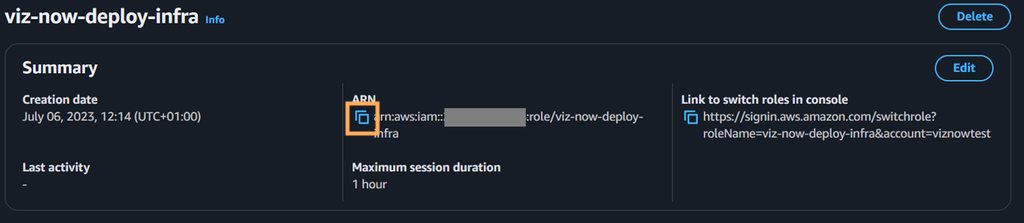
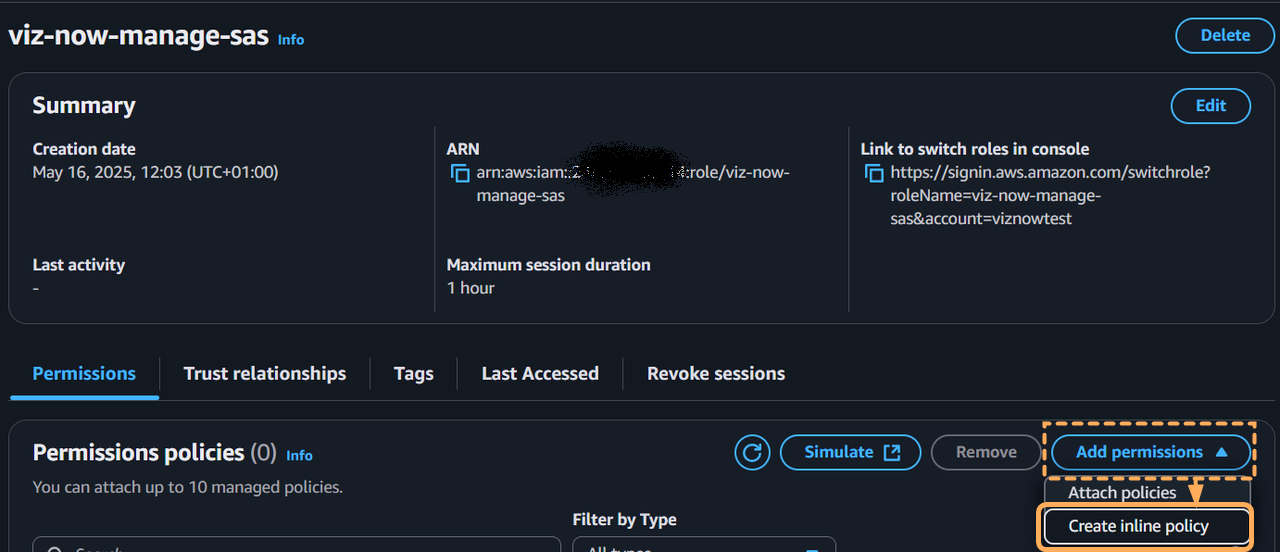
Click View role, AWS opens with the Summary page of the new role:
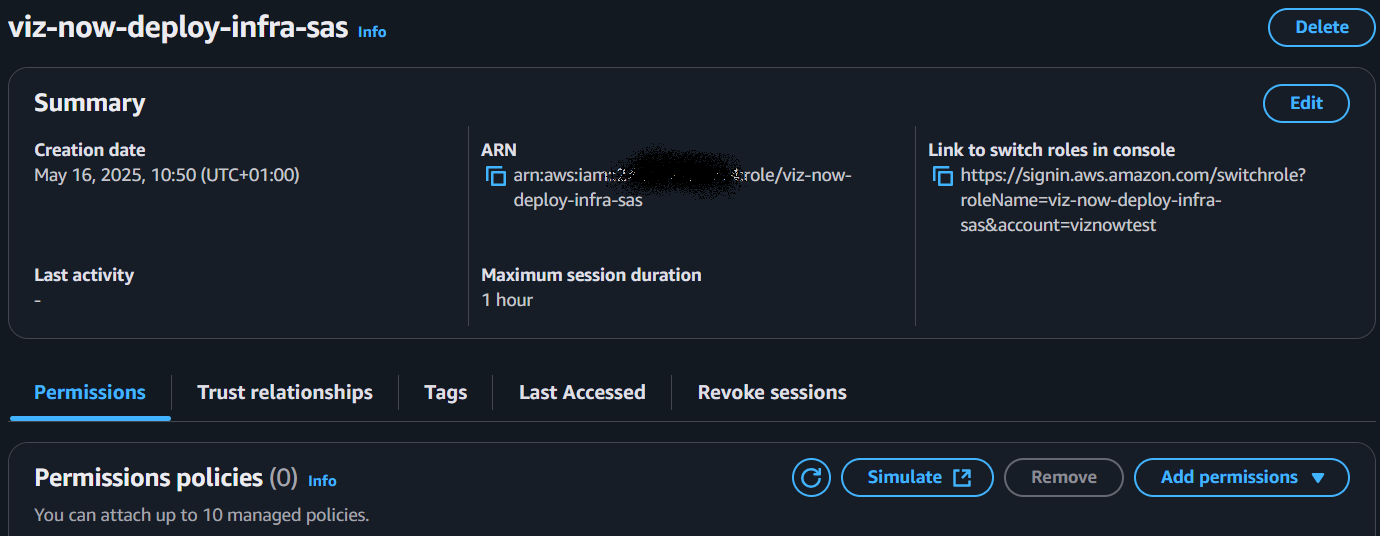
Update the Trust PolicyBack in Viz Now, click Copy trust policy.
Switching back to the AWS console, on the tab Trust relationships, click Edit trust policy.

Paste the trust policy and click Update Policy.
The JSON code, shown below and which you can copy, is verified.
{"Version":"2012-10-17","Statement": [{"Effect":"Allow","Principal": {"AWS":"arn:aws:iam::324880187172:root"},"Action":"sts:AssumeRole","Condition": {"StringLike": {"sts:ExternalId":"SpaceliftIntegration@*"}}}]}
Code | Explanation |
|---|---|
Principal | Allows the Deployment Agent’s AWS account (here |
Condition | Ensures the external ID starts with |
Continue in the AWS console by clicking the role’s name in the breadcrumbs to reach the role’s Summary page:

From the Permissions tab, click Add permissions > Create inline policy.

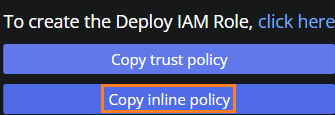
Go back to Viz Now, and from the input field Deploy Role, click Copy inline policy.
Back to the AWS console, in the Policy editor, click the JSON button and then paste the inline policy into the Policy editor.
The pasted JSON looks like:
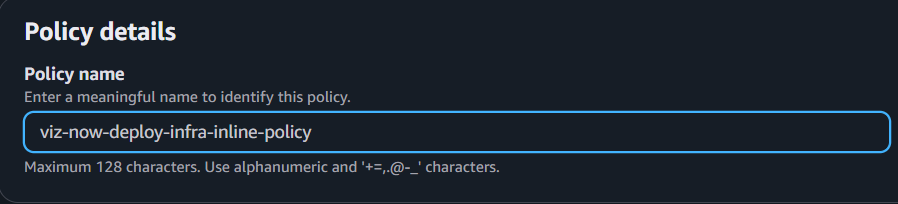
{"Version":"2012-10-17","Statement": [{"Sid":"VizNowDeployInfra0","Effect":"Allow","Action": ["iam:*","s3:*","kms:*","route53:*","sts:*","ec2:*","tag:*","logs:*"],"Resource":"*"}]}Click Next, and in the input field Policy name, name the policy (for example use, viz-now-deploy-infra-inline-policy) and click Create policy.
Associate the IAM Role in Viz Now:
Copy the role’s ARN from the AWS Console.
Over in Viz Now, in Manage IAM Roles, paste the ARN from the clipboard into the field Deploy Role.
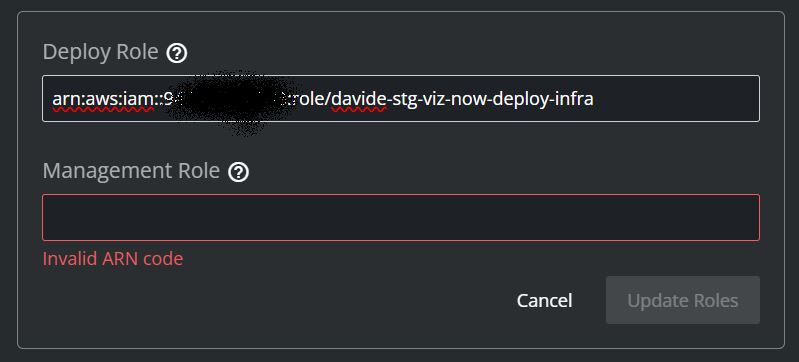
(The Update Roles button will be enabled only after filling the Management Role ARN in the next steps).
Management Role
The viz-now-manage role enables Viz Now to manage deployed instances and perform operational tasks.
Still in the Manage IAM Roles menu, click the
icon next to the input field Management Role.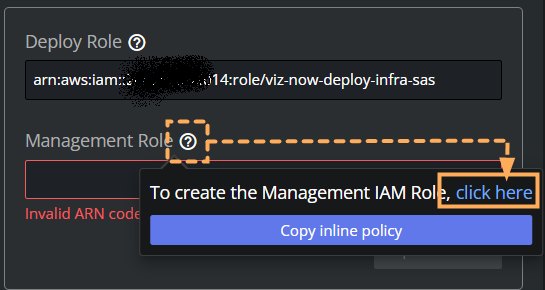
Follow the link Click here, the AWS Console opens.
Click Next twice to skip the Add permissions step and arrive at the Name, review, and create menu.
Role Name is pre-populated as viz-now-manage.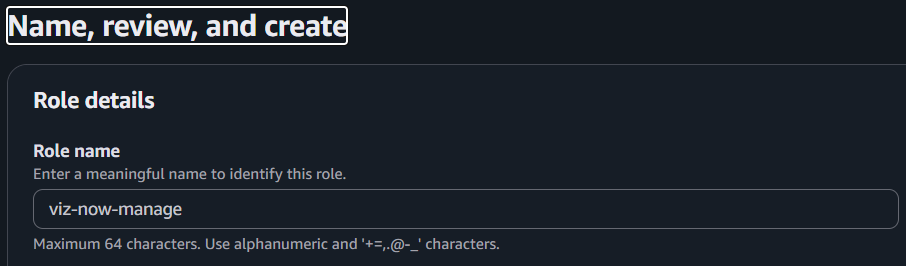
Click Create Role.
Note: If a warning indicates that the name already exists, update it by adding a suffix, for example: viz-now-manage-something else.Click View role.
A confirmation message is displayed:
Add Inline permissions:
Switch to the AWS console, and from the role’s Summary page, click Permissions tab > Add permissions > Create inline policy.
Go back to Viz Now, and next to the input field Management Role, click the
icon, then, Copy inline policy.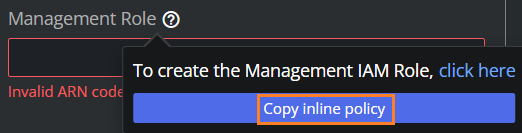
Switch to the AWS console and click the JSON button.
Paste the inline policy into the Policy editor.
In the Editor, the pasted-in the JSON code will look like:
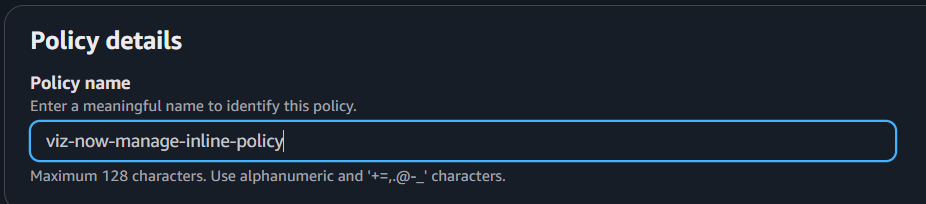
{"Version":"2012-10-17","Statement": [{"Sid":"VizNowManage0","Effect":"Allow","Action": ["iam:*","kms:*","route53:*","servicequotas:*","s3:*","ec2:*","tag:*","sts:*","logs:*"],"Resource":"*"},{"Sid":"AllowSSMDocumentsForSendCommand","Effect":"Allow","Action":"ssm:SendCommand","Resource":"arn:aws:ssm:*:*:document/*"},{"Sid":"AllowSendCommandToVizNowInstances","Effect":"Allow","Action": ["ssm:SendCommand"],"Resource":"arn:aws:ec2:*:*:instance/*","Condition": {"StringEquals": {"ssm:ResourceTag/VizNow":"true"}}},{"Sid":"AllowCommandInvocationChecks","Effect":"Allow","Action": ["ssm:ListCommandInvocations","ssm:GetCommandInvocation"],"Resource":"*"},{"Sid":"AllowSSMInventoryReadOnly","Effect":"Allow","Action": ["ssm:ListInventoryEntries","ssm:DescribeInstanceInformation"],"Resource":"*","Condition": {"StringEquals": {"ssm:ResourceTag/VizNow":"true"}}},{"Sid":"AllowCreateMediaConnectFlows","Effect":"Allow","Action": ["mediaconnect:CreateFlow"],"Resource":"*"},{"Sid":"AllowManageVizNowFlowsByName","Effect":"Allow","Action": ["mediaconnect:DeleteFlow","mediaconnect:UpdateFlow","mediaconnect:StartFlow","mediaconnect:StopFlow","mediaconnect:AddFlowOutputs","mediaconnect:RemoveFlowOutput","mediaconnect:UpdateFlowOutput","mediaconnect:AddFlowSources","mediaconnect:RemoveFlowSource","mediaconnect:UpdateFlowSource","mediaconnect:AddFlowVpcInterfaces","mediaconnect:RemoveFlowVpcInterface","mediaconnect:GrantFlowEntitlements","mediaconnect:UpdateFlowEntitlement","mediaconnect:DescribeFlow","mediaconnect:ListEntitlements"],"Resource":"arn:aws:mediaconnect:*:*:*VizNow-*"},{"Sid":"AllowListMediaConnectFlows","Effect":"Allow","Action": ["mediaconnect:ListFlows","mediaconnect:DescribeFlow","mediaconnect:ListTagsForResource"],"Resource":"*"}]}Click Next, and in Policy name, provide an identity for the policy (for example, use: viz-now-manage-inline-policy), and then click Create policy.
Associate and update the IAM Role in Viz Now:
Copy the role’s ARN from the AWS Console on the Summary page.
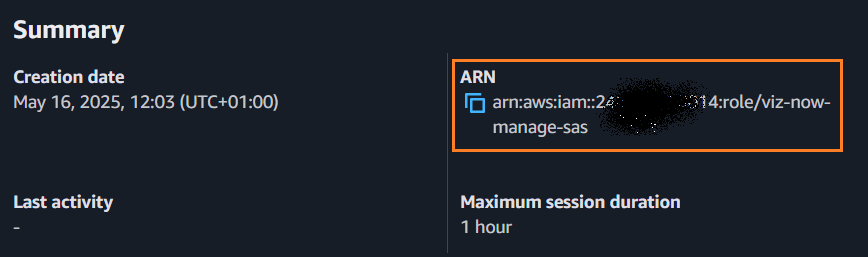
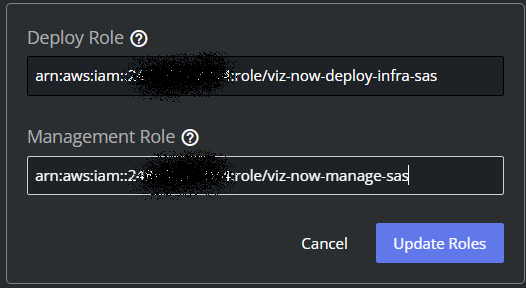
In Viz Now Manage IAM Roles panel, paste the ARN in Management Role field.

To save, click Update Roles.
Viz Now validates the updated roles:

Permissions Explained
Deploy Role (viz-now-deploy-infra)
The Deploy role grants broad permissions to allow Spacelift to deploy infrastructure using Terraform. All permissions apply to all resources ("Resource": "*").
Permission | Purpose | Resource Scope |
|---|---|---|
| Manages IAM roles/users | Scope to specific roles |
| Manages S3 buckets | Scope to specific buckets |
| Manages encryption keys | Scope to specific keys |
| Configures DNS | Scope to specific zones |
| Assumes roles | Necessary for Spacelift |
| Provisions EC2 resources | Scope to specific VPCs |
| Applies tags | All ( |
| Manages CloudWatch logs | Scope to specific log groups |
Manage Role (viz-now-manage)
The Manage role enables Viz Now to perform operational tasks on deployed instances. Permissions are scoped to specific resources whenever possible.
Key Tasks Enabled by Manage Role
Increase service quotas for AWS resources.
Reserve specific EC2 instance types.
Create S3 buckets for file storage.
Manage security groups for IP-based access.
Handle VPC peering.
Start, stop, or destroy instances.
Manage MediaConnect flows for streaming.
Permission | Purpose | Resource Scope |
|---|---|---|
| Manages IAM configurations | All ( |
| Manages encryption keys | All ( |
| Updates DNS | All ( |
| Increases quotas | All ( |
| Manages S3 buckets | All ( |
| Manages instances | All ( |
| Manages tags | All ( |
| Assumes roles | All ( |
| Manages CloudWatch logs | All ( |
| Executes commands | SSM documents & tagged EC2 instances ( |
| Checks command status | All ( |
| Retrieves instance details | Tagged resources ( |
| Creates MediaConnect flows | All ( |
| Manages MediaConnect flows | Flows named |
| Lists flows | All ( |