
Viz Pilot Edge User Guide
Version 2.2 | Published December 21, 2021 ©
Viz World Client Integration
This section shows how to integrate a Viz World Client with Viz Pilot Edge.
Note: Viz World maps can be used in graphic templates if they contain the Map field, which can be set in Template Builder version 1.0.2 and later.
Requirements
-
A connection to a Viz World Server is required to select maps.
-
A local Viz World Client installation is required to edit maps.
Note: For more information about the Viz World Client and Server, and scene design, see the Viz World User Guide and the Viz World Plugins Guide, respectively.
Viz Pilot Server Settings
-
Install Viz Engine.
-
Install the Viz World Client. It's recommended to install the bundled installer that includes both the 32-bit and 64-bit versions. The Viz Pilot Edge workflow often includes Viz Pilot, which requires a 32-bit installation.
-
Make sure the Microsoft Visual C++ 2010 Redistributable Package (x64) is installed, otherwise the Viz World Client installer will not run.
-
Download the Viz World Client and run the installer.
Info: It's recommended to use Viz World Client 17.0.0. Newer versions (17.0.1, 17.0.2) have issues displaying the Maps preview due to the ControlMap.vip plugin in these versions. If you must use a newer version of the Viz World Client, the ControlMap plugin should be manually copied from the products/VizWorld/PreviousVersions/Viz Plugins/17.0.0-controlPlugins folder on the FTP into C:\Program Files\vizrt\Viz3\plugin.
-
-
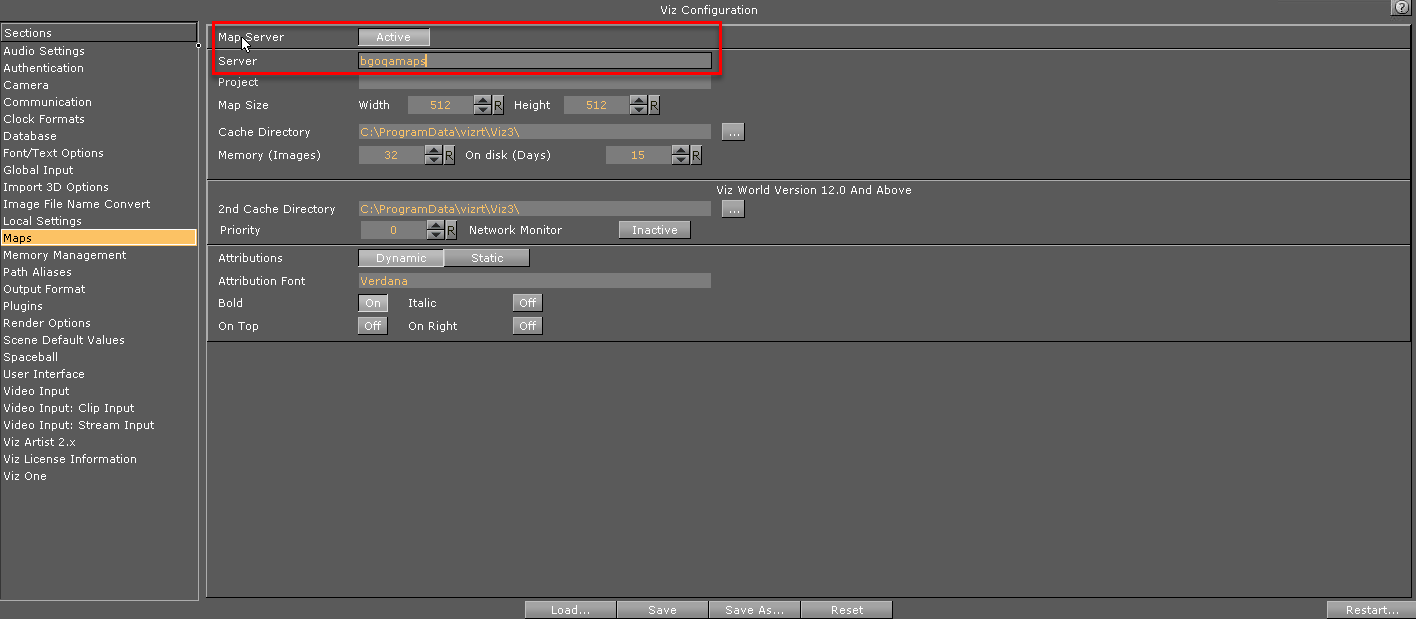
Modify Viz Config.
-
Run Viz Config.
-
Select Maps.
-
Set the Map Server to Active.
-
Type in the maps server name in Server.
-
Click Save and close the Viz Config window.
-
Run the Viz Config again.
-
Select Maps. A list of .tpl files is shown in the Available section.
-
Select the desired files to add them to the Project.
-
Click Save and close the Viz Config window.
-
Restart Viz Engine.
Important: Remember to restart Viz Engine.
-
-
Pilot Data Server Configuration.
-
Run the Pilot Data Server in a browser: http://dataserver.example:8177.
-
Click Settings.
-
In the Parameters tab add the maps server name in shared_curious_server.

-
Workstation Settings
-
Install the Viz World Client. It's recommended to install the bundled installer that includes both the 32-bit and 64-bit versions. The Viz Pilot Edge workflow often includes Viz Pilot, which requires a 32-bit installation.
-
Make sure the Microsoft Visual C++ 2010 Redistributable Package (x64) is installed, otherwise the Viz World Client installer will not run.
-
Download the Viz World Client and run the installer.
Info: It's recommended to use Viz World Client 17.0.0. Newer versions (17.0.1, 17.0.2) have issues displaying the Maps preview due to the ControlMap.vip plugin in these versions. If you must use a newer version of the Viz World Client, the ControlMap plugin should be manually copied from the products/VizWorld/PreviousVersions/Viz Plugins/17.0.0-controlPlugins folder on the FTP into C:\Program Files\vizrt\Viz3\plugin.
-
-
Viz World Client Configuration
-
Run C:\Program Files\vizrt\Common\Maps\MapsClient.Service.exe.
Note: This step is important, but you will not get any explicit feedback once it's completed. You must complete this step in order to launch the Maps Editor from Vizrt's web applications.
Note: You must re-run MapsClient.Service.exe every time you either: 1) Restart your PC or 2) Update the Viz World Client.
-
If you want to open the Maps Editor from outside Vizrt's web applications, you must launch C:\Program Files\Vizrt\Common\Maps\MapsClient.exe and specify the maps server name as the server in the Login dialog.
-