Viz Engine
Version 3.10 | Published April 03, 2018 ©
Viz Engine Video Wall Configuration Settings
To configure Viz Engine for Video Wall
-
Open Viz Configuration, and create a backup of the existing configuration settings by saving them to a new file.
-
Import a configuration profile for the desired input format from the selection of Installed Configuration Profiles. These ship with the Engine installation, and are located in the <viz install folder>\Configuration Profiles folder. The input format files are named video-resolution-*.cfg, where the asterisk represents the frame rate the configuration is suitable for, if it includes audio settings, and which video hardware it is designed for. For example, the audio enabled configuration file for the Matrox X.mio3 video board running in 1080i50 resolution, is called video-resolution-1080i50-audio-xmio3.cfg.
-
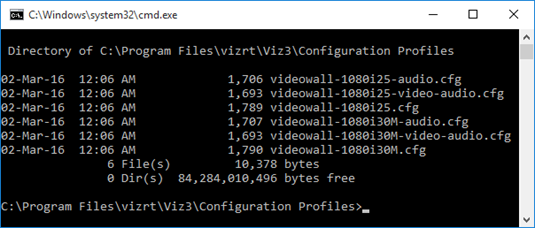
Next, import a Video wall configuration profile, where the frame rate matches the one loaded for the video hardware in the previous step. As with the input format profiles, these are located in the <viz install folder>\Configuration Profiles folder. These configuration files are named videowall-*.cfg, where the asterisk represent the frame rate the selected configuration file is suitable for:
-
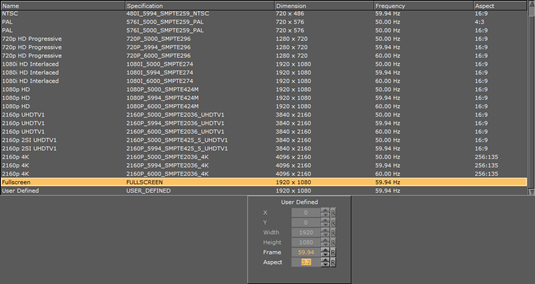
Adjust the Output Format in Viz Config:
-
Verify that Fullscreen is the selected format in the output format specification list.
-
The frame rate should have been set when loading the videowall-*.cfg configuration profile in step two. Ensure that the correct values are set for the required output. For PAL systems, set the Frame value to 50.For NTSC systems, set the Frame value to 59.94.
-
Set the Aspect value to the aspect ratio of the video wall. The aspect ratio decimal value is found by dividing the number of pixels, width by height. This value depends on the actual video wall display layout and needs to be adjusted if changes to the display layout are made.
-
-
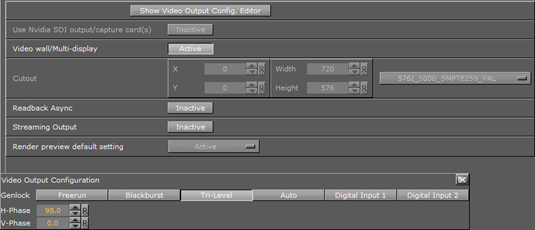
Verify the following Video Output settings:
-
Video wall/Multi-display should be set to Active.
-
Click the Show Video Output Config. Editor button and verify that the required Genlock is set. For configurations with the Matrox X.Mio3 video board, Genlock must be set to Auto. Other configurations can be set to Auto, Blackburst or Tri-Level, as required:
-
-
Under Render Options, disable On Air Mouse Cursor.
-
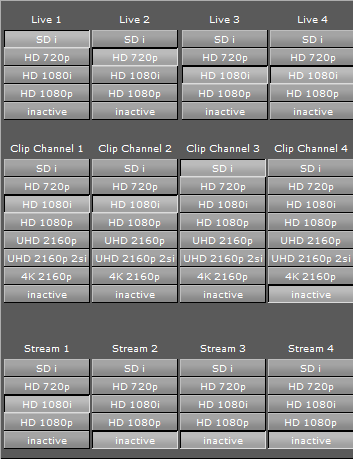
In the Video Input section, enable the required number of Live and Clip Channel sources. Unused live inputs should be deactivated, as activating them could have an impact on performance.
-
Disable GPU-Direct in the Video Board section of Viz Configuration.
-
Manually edit the configuration file, and set the flag use_threaded_io to 1.
-
In the Database section, specify which Viz Graphic Hub to use and provide the login credentials.
-
Start Viz Engine without a User Interface, by executing the following from the command line:
<viz install folder>\viz.exe -n -w
-
Load a scene containing a single live-video or clip source as a texture and scale it up to full screen. If running Viz Artist, switch to On Air Mode. Watch for drops in the video wall output within the first 60 seconds.
-
Verify the configuration of the NVIDIA driver by checking the Topology Inspector, and check the Viz Engine configuration. This is especially important when setting up a 59.94 Hz video-wall, as a wrong refresh-rate of 60 Hz could get applied to the displays by mistake.
-
In general, a proper Mosaic setup is automatically synchronized with Viz Engine. However, it can be necessary to force Viz Engine to synchronize. This is necessary for all setups with multiple graphics cards.
To force synchronization, issue the following command in the Engine Console:IMPORTANT! Do not execute this command unless needed, as this may have an impact on performance.
send RENDERER JOIN_SWAPGROUP 1
If the computer is rebooted or Viz Engine restarted, the command needs to be sent again. To avoid doing this manually every time the Engine starts, set the swapgroup value in the RENDER_OPTIONS section of the configuration file to 1. The default value is 0.This synchronization can also remedy certain tearing effects. Create a simple scene with a bar running left to right. If any of the connected monitors display tearing effects, try sending the above command.
Audio Output
For performance reasons, in a Video Wall setup the video out channels will usually be set to Unused. To configure a Video Wall with embedded or AES audio output, the video out channel must be mapped to the selected Matrox channel. Set Map to Viz Channel in the Matrox VideoOut Properties in Viz Configuration.
Note: When running a Video Wall with audio out, even though the video out channel is mapped, the SDI output will be black.