
Viz Engine
Version 3.10 | Published April 03, 2018 ©
Custom Resolution for 59.94 Hz Refresh Rate
Video-wall displays may not natively support a refresh rate of 59.94 Hz. Such displays will always require an EDID-file to be able to run at that frequency. Contact the display hardware vendor to obtain the correct EDID file for the monitors in use. Furthermore, a number of steps must be carried out before initiating the NVIDIA Mosaic Configuration for 1080i60M.
This section contains information on the following topics:
Caution: Loading unsupported or corrupted EDID settings for a display may render the source device unable to output any video signal to the display. Please refer to the information supplied by the display hardware vendor for information on the displays capabilities or limitations.
To Load an EDID File
-
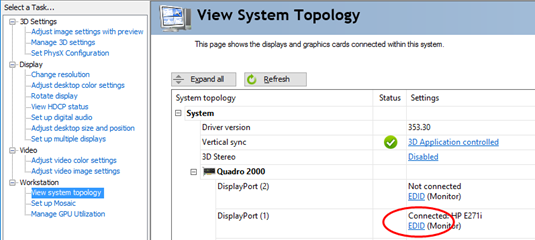
In the NVIDIA Control Panel, expand the Workstation section of the Select a Task... menu and click View system topology:
-
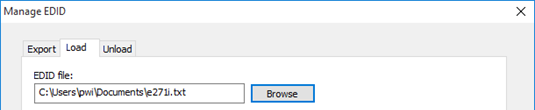
Click the EDID link on one monitor, and select the Load tab.
-
Click the Browse button and select the EDID file to be loaded. This file is usually included on the CD or DVD containing drivers, utilities and documentation for the display. If not, please contact the display manufacturer to obtain the required file.
-
In the Select Connector to force EDID panel, check all connected displays, then click Load EDID.
-
When the EDID file has been applied to all displays, check the properties of every display in the View System Topology section. They must all run on 59.94 Hz.
To Create a Custom 59.94 Hz Resolution
-
Enter the Change resolution section of the NVIDIA control panel.
-
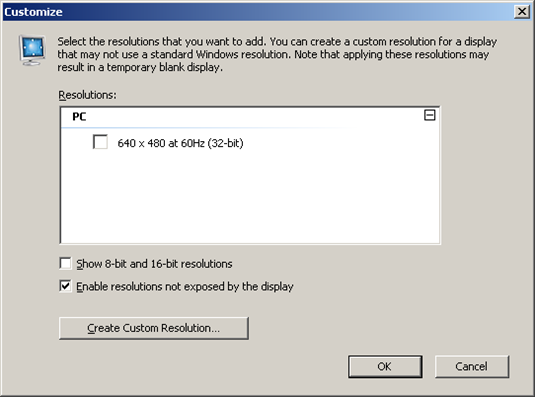
In the first section, Select the display you would like to change, select display number 1 and click the Customize... button:

-
In the upcoming dialog, tick the Enable resolutions not exposed by the display check box, and click Create Custom Resolution....
-
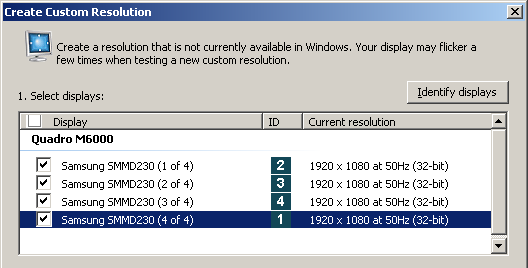
Select all displays in the upcoming dialog:
-
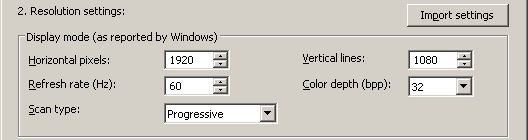
Enter a Refresh rate (Hz) of 60 Hz and leave all other settings to their default values:
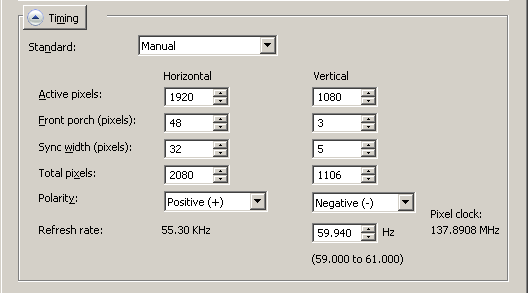
In the Timing panel, select Manual timing adjustment from the Standard drop-down list. Set the Refresh rate to 59.940 Hz, and leave all other settings to their respective default values:
-
Click the Test button. The connected monitors might go black for several seconds while adjusting to the new refresh rate. Do not press any key on the keyboard or buttons on the mouse while this goes on. When the screens returns to normal, acknowledge the new settings by pressing Yes in the upcoming dialog.
-
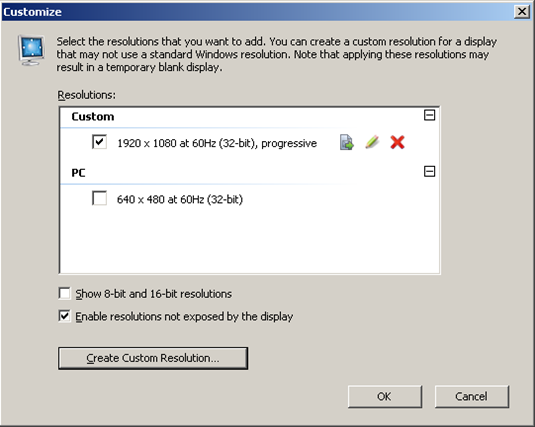
The newly created resolution will now show up as illustrated below and will have been applied to all displays.
IMPORTANT! Please note that for 59.94 Hz setups, the server refresh rate might report to be 60 Hz when the external house sync is 59.94 Hz. Even though the custom resolution states to be 60 Hz, the correct value under the hood is 59.94 Hz.
To Change from 59.94 Hz to 50 Hz Refresh Rate
If changing the frequency from 59.94 Hz back to 50 Hz, the EDID file must be unloaded for all connected displays, followed by rebooting the machine. Otherwise, Mosaic can not be applied.
-
In the NVIDIA Control Panel, expand the Workstation section of the Select a Task... menu and click View system topology:
-
Click the EDID link on one monitor, and select the Unload tab.
-
Select all connected displays and click the Unload button.
-
Repeat the step above for all monitors one at a time.
-
Restart the computer and proceed with the NVIDIA Mosaic Configuration for 1080i50.