Configure a Tracking System
To Add and Configure a Tracking System
-
Click
 .
. -
Type a Name for the configuration.
-
Select which protocol to use to receive data from the tracking system:
-
FreeD (see Description of the FreeD protocol)
-
RTHead
-
XML Tracking: A special feature, a self-definable protocol for special solutions
-
Motion Analysis
-
mo-sys
-
Trackman
-
Vicon
-
Libero
-
CanonLens (Zoom and Focus driver for canon lenses)
-
Spidercam
-
Flair
-
Thoma
-
Stype A5
-
Stype HF
Note: If changing the protocol of an already configured tracking system, the default configuration parameters for the new protocol will be read by the system.
-
-
Select a connection type. Depending on the tracking system select the connection type:
-
Serial: If serial is selected, also select a Comport (in the Comport box, all available comports are shown). If the default baud rate is not used, enter the correct one in the baudrate field
-
TCP/IP: Type in the Host IP to use (possible port as well)
-
UDP: Type in a Port number to use
-
-
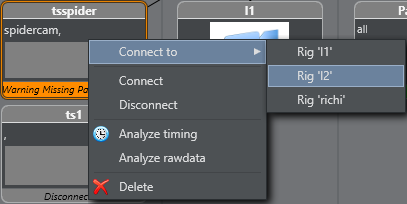
Right-click on the Tracking Systems box and select Connect (connect to the tracking system).
The Tracking Hub now connects to the selected Tracking System. Observe the colors on the bottom of the symbol:
-
Green: Connection is done and data receiving in time
-
Orange: If the color becomes orange, after a few seconds, connection is done and data receiving, but not in time
-
Red: If the color becomes red, possible connection failure or data is not received.
-
-
Go to Configure a Rig.