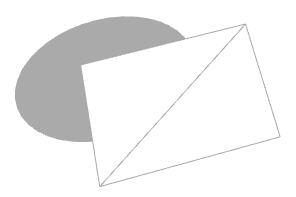
The Mask Source and Mark Target plug-ins allow one Container to act as a mask for other Containers.
The Mask Container is called the source and the Containers which are affected by the source mask are called targets.
A Container affected by a mask becomes transparent where the mask covers it.
Due to graphics hardware limitations, currently Viz Artist supports a maximum of eight different target and source layers for one object. This means that any target within a layer is affected by all masks for the same layer. For example, if a mask has the layers 1, 2 and 3 selected, it affects all targets that have 1, 2 or 3 selected.
Enable shadows in the Global Settings Panel.
Layers 7 and 8 may not be available because global shadow settings are enabled by default. Shadows use two layers of the mask plug-in, but can be set to Off in Global Settings Panel, to use all eight layers.
In the Global Settings Panel, define if a mask layer is to be drawn inverted. Normally the mask cuts a hole in the mask target where it covers it. If a layer is selected to be drawn inverted the opposite situation is the case. Only where the mask covers the mask target is target be visible.
Note: This plug-in is located in: Plugins -> Container plug-ins -> Global
Mask Source and Mask Target Properties
Layer: Sets the layer the mask should have an effect on. This allows the creation of more than one mask that has an effect on the target.
Inherited: (Mask Source Only) When enabled (
On), all Sub-Containers of the mask source mask the target. If disabled (Off) all Sub-Containers of the mask source does not mask the target as it no longer inherits the mask properties.Force Visible: (Mask Source Only) When enabled (
On), the geometry serving as mask source is rendered in the scene editor, even when not selected. When disabled (Off), the mask source geometry is only rendered when selected. This enables the designer to work more efficiently with multiple mask sources when designing the scene. The mask source geometry never gets rendered on the output.
To Add a Mask
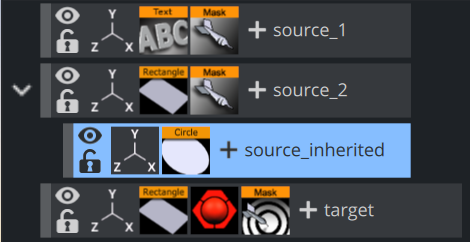
Add three Containers to the Scene Tree.
Name them
source_1,source_2andtarget.Add a Font and the Mask Source plug-in to the source_1 Container.
Add a Rectangle and the Mask Source plug-in to the source_2 group.
Add a Rectangle, material (for example, red) and the Mask Target plug-in to the target Container.
Open the source_1 Transformation Editor:
Set Axis Center X and Y to
C.Reset Position X and Y to
0.0.
Open the source_1 Text Editor: Enter some text (for example, Vizrt).
Open the source_1 Mask Source editor: Set Layer to
1.Open the source_2 Transformation Editor: Set Position X to
-120.0and Y to-70.0.Open the source_2 Rectangle editor: Set Width and Height to
50.0.Open the source_2 Mask Source editor: Set Layer to
2.Open the target Rectangle editor: Set Width to
300.0and Height to200.0.Open the target Mask Target editor. Enable Layer 1 and Layer 2.
Add a Container as a Sub-Container of source_2.
Name it
source_inherited.Add a Circle to the source_inherited Container.
Open the source_inherited Transformation Editor: Set Position X to
240.0.Open the source_inherited Circle editor: Set Radius to
25.0.Open the source_2 Mask Source editor.
Disable Inherited (
Off). This should make the Circle disappear as it no longer inherits the Mask Source properties.


